Every home has one: a perfectly fine mirror that reflects your face, your hallway, and your quiet suspicion that the room could look a little more interesting. The good news? You do not need a designer budget, a woodworking shop, or a secret inheritance from a very stylish aunt to transform it. With a bone inlay stencil technique, a plain mirror can become a dramatic, boutique-looking statement piece in a weekend.
Traditional bone inlay furniture is known for its delicate patterns, high-contrast color combinations, and handcrafted charm. It often appears on dressers, trays, consoles, and mirrors with intricate floral, geometric, or Indian-inspired motifs. Real bone inlay is beautiful, but it can also be expensive and difficult to source ethically. A painted stencil version gives you the look without the luxury price tag or the “please don’t touch that” stress level.
This guide explains how to create a faux bone inlay mirror using paint, stencils, careful prep, and a little patience. Think of it as giving your mirror a passport, a personality, and possibly a reason to stop hiding behind the laundry basket.
What Is a Bone Inlay Stencil Technique?
A bone inlay stencil technique is a decorative painting method that imitates the look of real bone inlay furniture. Instead of embedding pieces of bone, resin, or mother-of-pearl into wood, you paint a base color onto the mirror frame and use a stencil to apply a contrasting pattern on top.
The finished effect usually features a deep background color, such as navy, charcoal, black, teal, or emerald, paired with a light pattern that resembles ivory or warm white. The contrast is what creates that recognizable bone inlay look. When done well, the result feels layered, global, and custom-made rather than “I attacked this with leftover craft paint after midnight.”
Why Use a Stencil Instead of Freehand Painting?
Freehand painting is lovely if you have a steady hand, a calm spirit, and the confidence of a mural artist. Most of us, however, prefer a tool that keeps the pattern consistent. A stencil helps you repeat the same motif around the frame, align borders, and avoid the wobbly lines that happen when coffee and ambition team up against you.
Stencils also make the project beginner-friendly. You can choose a simple border stencil for a clean look or a full inlay-style stencil kit for a more dramatic transformation. The best part is that small imperfections actually add charm. Bone inlay designs are inspired by handcrafted pieces, so they should not look like they were printed by a robot with a ruler addiction.
Why This Mirror Makeover Works So Well
A mirror is one of the best surfaces for this technique because it already has visual power. Mirrors bounce light, make rooms feel larger, and naturally draw attention. When the frame becomes decorative, the whole piece shifts from functional to focal point.
This project works especially well for thrifted mirrors, old bathroom mirrors with removable frames, IKEA-style floor mirrors, plain wooden frames, or dated gold mirrors that have been waiting patiently for a second act. Instead of buying a new statement mirror, you can upgrade what you already own. Your wallet gets to breathe. Your room gets a glow-up. Everybody wins.
Materials You Will Need
Before you start, gather your supplies. A clean setup prevents that classic DIY moment where you are holding a wet brush and suddenly realize the painter’s tape is in another room, probably judging you.
- Mirror with a paintable frame
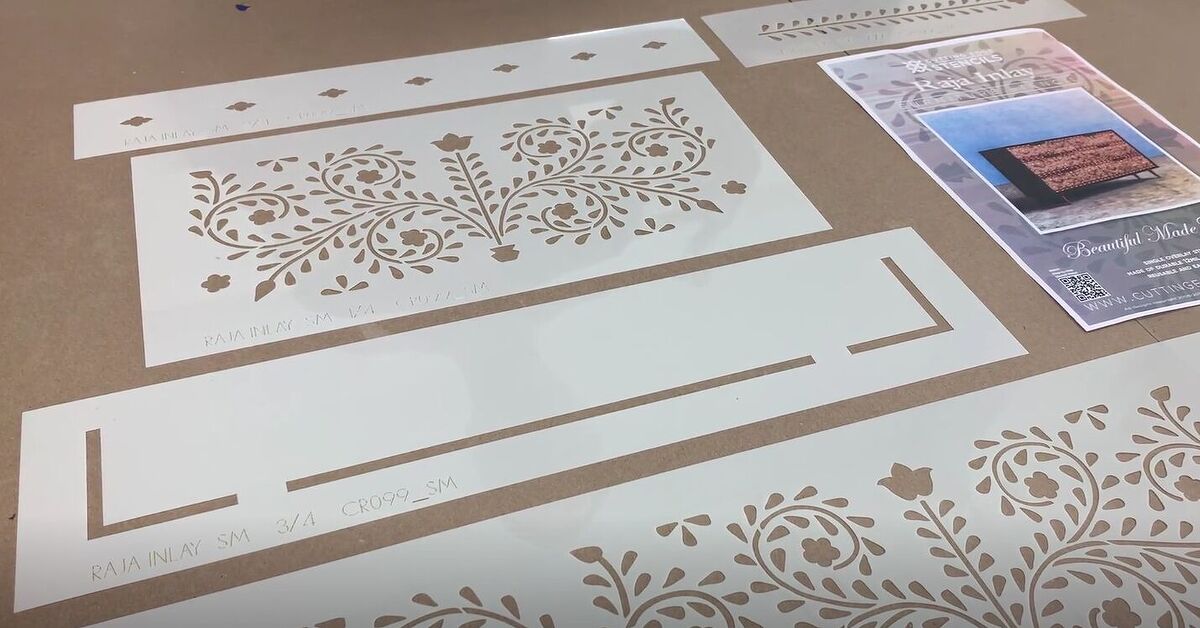
- Bone inlay or Indian inlay-style stencil
- Painter’s tape
- Drop cloth or old sheet
- Microfiber cloth
- Mild cleaner or degreaser
- Fine-grit sandpaper, around 220 grit
- Tack cloth or lint-free rag
- Primer suitable for the frame material
- Base paint color
- Stencil paint in ivory, cream, white, or another contrast color
- Stencil brush, foam pouncer, or small dense brush
- Small artist brush for touch-ups
- Clear topcoat, polycrylic, or furniture wax
- Utility knife or razor scraper for cleaning mirror edges
Choosing the Right Mirror
The ideal mirror has a flat or mostly flat frame. Highly carved frames can look beautiful when painted, but they are harder to stencil cleanly because the stencil cannot sit flush against the surface. A wide, simple frame gives you more room for pattern and makes the final design feel intentional.
Wood and MDF frames are easiest to paint. Plastic, metal, or glossy laminate frames can also work, but they usually need a stronger bonding primer. If the frame feels slick, do not skip primer. Paint needs something to grip, and glossy plastic is basically a tiny skating rink.
Step-by-Step: How to Create a Bone Inlay Stenciled Mirror
Step 1: Clean the Mirror Frame Thoroughly
Start by wiping the frame with a mild cleaner to remove dust, oils, fingerprints, furniture polish, and mysterious household film. Even if the frame looks clean, clean it anyway. Paint is fussy about dirt, and it will absolutely remember if you rushed this step.
After cleaning, let the frame dry completely. Moisture trapped under primer or paint can cause poor adhesion, uneven coverage, or peeling later.
Step 2: Protect the Mirror Glass
Use painter’s tape to protect the mirror surface where it meets the frame. Press the tape down firmly along the edges to prevent paint from sneaking underneath. For large mirrors, cover the center glass with paper, cardboard, or plastic sheeting.
If your frame has a tight edge, slide the tape slightly under the lip of the frame using a plastic card or putty knife. This creates a cleaner paint line. If paint still gets on the glass, do not panic. Once it dries, it can often be removed carefully with a razor scraper.
Step 3: Sand the Frame Lightly
Use fine-grit sandpaper to scuff the surface. You are not trying to remove the old finish completely. You simply want to dull the shine and create “tooth” so primer and paint can hold on. Sand gently, especially on MDF or veneer, because aggressive sanding can damage the surface.
After sanding, wipe away all dust with a tack cloth or lint-free rag. Dust left behind can create bumps in the paint. Nothing ruins a luxury-look mirror faster than a gritty finish that feels like it was painted during a sandstorm.
Step 4: Apply Primer
Primer helps the base coat adhere and keeps the final color looking even. Choose a primer that matches the frame material. For wood, a general-purpose primer usually works well. For plastic, metal, or glossy finishes, use a bonding primer.
Apply a thin, even coat and let it dry according to the product instructions. If the original frame color is very dark or very shiny, a second coat may help. Light sanding between primer coats can smooth out tiny bumps and give you a more polished result.
Step 5: Paint the Base Color
Now comes the fun part: color. Bone inlay-style mirrors often look best with a rich base color. Deep blue, black, forest green, slate gray, burgundy, and dark teal all pair beautifully with ivory stencil work. For a softer coastal look, try pale blue with white, beige with cream, or sage green with warm ivory.
Apply two thin coats rather than one thick coat. Thick paint can leave brush marks, pool in corners, and take longer to cure. Let each coat dry fully before adding the next. Patience here pays off later when your stencil lines stay crisp.
Step 6: Plan the Stencil Layout
Before dipping a brush into paint, decide where the pattern will go. Lay the stencil on the frame and test the placement. For a mirror, symmetry matters. Start at the center of each side or at a corner, depending on the stencil design. Use painter’s tape to mark guides so the pattern stays aligned as you move around the frame.
If your stencil has repeating motifs, check how the pattern will meet at the corners. Corners are where DIY confidence goes to be tested. You may need to overlap, rotate, or slightly adjust the stencil to make the design look balanced. A tiny mismatch is fine. A wildly crooked corner that looks like it got dizzy is worth correcting.
Step 7: Load the Stencil Brush Correctly
The secret to clean stenciling is using very little paint. Dip the tip of your stencil brush or foam pouncer into the paint, then blot most of it off on a paper towel. The brush should feel almost dry. This is called dry brushing, and it helps prevent paint from bleeding under the stencil.
Use an up-and-down dabbing motion instead of sweeping side to side. Sweeping pushes paint under the stencil edges. Dabbing builds the color gradually and gives you more control. If the first pass looks too light, that is good. Add another light layer rather than flooding the stencil.
Step 8: Stencil the Pattern in Sections
Tape the stencil firmly in place. Dab the paint over the cut areas, working from the outside edges toward the center. Hold the stencil flat with your fingers as you work, especially near narrow details. Lift the stencil carefully to reveal the design.
Let the section dry before repositioning the stencil. If you rush, wet paint can smear onto the back of the stencil and transfer where you do not want it. Wipe the stencil occasionally with a damp cloth, especially if paint begins building up along the edges.
Step 9: Touch Up the Details
Once the pattern is dry, inspect the frame. Use a small artist brush to clean up any fuzzy lines, fill gaps, or sharpen corners. This is where the piece starts looking custom. Do not obsess over every dot. The beauty of faux bone inlay is that it should feel handcrafted, not factory-stamped.
If you want a slightly aged effect, lightly sand a few edges after the paint dries. This gives the mirror a softer, collected-over-time feel. For a crisp modern look, skip distressing and keep the contrast bold.
Step 10: Seal the Frame
A clear topcoat protects the design from dusting, cleaning, and everyday handling. Use a water-based clear coat for most painted frames, especially over light stencil colors. Oil-based products can yellow over time, which may change the look of your ivory pattern.
Apply thin coats with a quality brush or foam applicator. Let each coat dry fully before adding another. For a mirror that will hang in a low-touch area, one or two coats may be enough. For a bathroom, hallway, or busy entryway, consider two to three light coats for better durability.
Design Ideas for a Bone Inlay Mirror
Classic Navy and Ivory
Navy and ivory is the little black dress of bone inlay design. It feels elegant, timeless, and surprisingly flexible. Use it in bedrooms, entryways, powder rooms, or dining rooms where you want a polished accent without shouting.
Black and White Drama
Black with white stenciling creates a bold graphic look. It works well in modern, eclectic, bohemian, and glam interiors. Pair it with brass lighting, natural wood, or a colorful rug to keep the room from feeling too formal.
Soft Blue and Cream
For coastal, cottage, or relaxed interiors, try a dusty blue base with cream stenciling. The effect is lighter and breezier than high-contrast black or navy. It still feels special, but it whispers instead of entering the room with a cape.
Emerald and Warm White
Emerald green gives the mirror a jewel-box quality. This color combination is stunning in small spaces, especially powder rooms or reading corners. Add plants nearby and suddenly your mirror looks like it belongs in a boutique hotel that serves excellent espresso.
Common Mistakes to Avoid
Using Too Much Paint
Paint bleed is the most common stencil problem. It usually happens because the brush is overloaded. Always blot the brush first. If you think you have too little paint, you are probably close to the right amount.
Skipping Surface Prep
Cleaning, sanding, and priming may not be glamorous, but they are the difference between a makeover that lasts and one that peels like a bad sunburn. Good prep gives the paint a strong foundation.
Ignoring the Corners
Plan corners before you begin. Test the stencil placement and decide how the pattern will turn. A little planning saves a lot of touch-up work later.
Sealing Too Soon
Paint may feel dry before it has fully cured. If you seal too soon, the finish can become streaky or tacky. Follow the drying recommendations on your paint and topcoat. When in doubt, wait longer. The mirror is not going anywhere unless it has developed legs, in which case you have a different home improvement issue.
Where to Use Your Finished Mirror
A bone inlay stenciled mirror can work in many rooms. In an entryway, it creates a memorable first impression. In a bedroom, it adds pattern without taking up floor space. In a bathroom, it can turn a basic vanity area into something much more polished. In a living room, it can hang above a console table, fireplace, or dresser used as storage.
The key is to let the mirror breathe. Because the pattern is decorative, avoid crowding it with too many busy objects. A simple lamp, a small vase, or a stack of books nearby is enough. Let the mirror be the star. It has earned the role.
Budget Benefits of a Faux Bone Inlay Mirror
Real bone inlay pieces can cost hundreds or even thousands of dollars depending on size, craftsmanship, and materials. A stencil makeover gives you a similar decorative effect at a fraction of the cost. If you already own the mirror, your main expenses are paint, stencil, primer, and topcoat.
This approach is also flexible. If your style changes later, you can repaint the frame. That is the magic of paint: it forgives trends, questionable color phases, and the year everyone thought everything should be gray.
Experience Notes: What This Project Feels Like in Real Life
The first thing you notice when doing a bone inlay stencil mirror project is that the prep takes longer than expected, and the painting goes faster than feared. Cleaning and taping the mirror can feel a little boring, but it is also the part that saves you from scraping paint off the glass with the emotional intensity of a detective in a crime drama. A careful tape line makes the whole project feel more professional before the decorative work even begins.
Choosing the stencil is surprisingly important. A large, open pattern feels modern and relaxed, while a small detailed pattern creates a more traditional bone inlay effect. If the frame is narrow, a complicated stencil can look crowded. For a wide floor mirror, however, a detailed border can be gorgeous. One practical trick is to print or sketch a rough pattern size on paper and place it on the frame before buying the stencil. This helps you see whether the scale makes sense.
The biggest learning curve is paint control. Most beginners want to load the brush because they want strong coverage immediately. Unfortunately, that is exactly how stencil bleed happens. The better method is to use a nearly dry brush and build the color slowly. At first, it feels wrong. You dab and dab and wonder whether anything is happening. Then you lift the stencil and realize the delicate pattern is forming cleanly. It is a tiny DIY miracle, minus the choir.
Another real-world lesson is that corners require kindness. Even with measuring, the design may not match perfectly where two sides meet. That does not mean the project failed. Real handcrafted inlay pieces often show slight variations, and those variations give them character. If a corner looks awkward, use a small artist brush to add a dot, leaf, petal, or line that visually connects the pattern. Nobody visiting your home will inspect the corner with a magnifying glass unless they are very rude or secretly a stencil judge.
Drying time also matters more than enthusiasm. It is tempting to keep moving the stencil quickly, especially when the first few sections look good. But if the stencil touches wet paint, it can smear the design. Let each area dry enough before overlapping or repositioning. Keep a damp cloth nearby to clean the stencil as you go. A clean stencil edge gives cleaner results.
The final sealing step changes the project from “pretty craft” to “finished home decor.” A matte or satin clear coat usually looks best because it protects the design without making the frame too shiny. Once sealed and hung, the mirror often looks far more expensive than it is. The transformation is satisfying because it keeps the original function of the mirror but adds personality, color, and pattern. It is proof that basic decor does not have to stay basic. Sometimes it just needs paint, patience, and a stencil with excellent manners.
Conclusion
Taking a mirror from basic to unique with a bone inlay stencil technique is one of the most rewarding DIY home decor projects you can try. It combines affordability, creativity, and high-end style in a way that feels approachable even for beginners. With proper cleaning, sanding, priming, careful stencil placement, and a protective topcoat, a plain mirror can become a custom statement piece that looks far more expensive than it really is.
The best part is that you control the entire design. You can go bold with navy and ivory, dramatic with black and white, soft with pale blue and cream, or rich with emerald and warm white. Whether your home leans boho, classic, modern, coastal, or eclectic, this technique can be adjusted to fit your space.
So before you donate that plain mirror or replace it with something pricey, give it a second look. Under that basic frame may be a future showpiece waiting for a little paint and pattern. Your mirror already reflects you. Now it can reflect your style, too.
Note: This article is written as original web-ready content based on real DIY painting, stenciling, furniture finishing, and mirror makeover practices. Always follow the instructions on your specific paint, primer, stencil, and sealer products for best results.