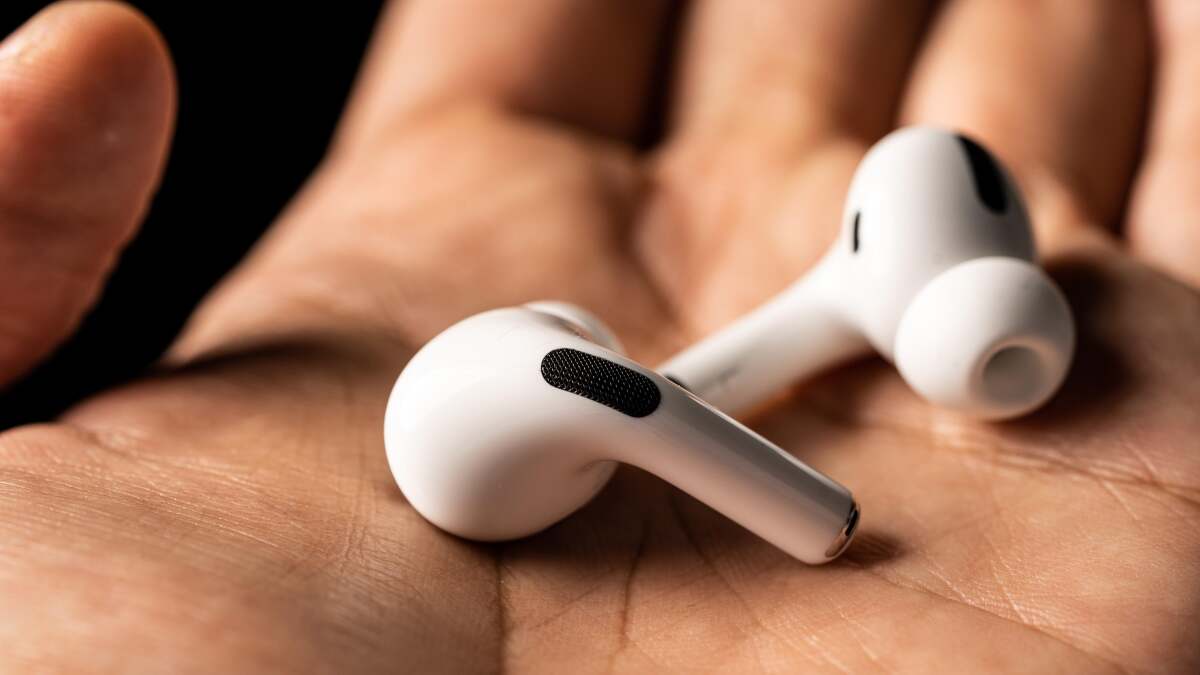
AirPods Pro are tiny enough to hide in the fifth pocket of your jeans, but the settings menu behind them is anything but tiny. Apple has packed these earbuds with noise control, spatial audio, hearing tools, call controls, accessibility options, Find My features, and enough personalization switches to make your old wired earbuds look like two noodles with commitment issues.
The good news: you do not need to become an audio engineer, a Bluetooth wizard, or the kind of person who says “soundstage” at dinner. With a few smart AirPods Pro settings, you can get better sound, stronger noise cancellation, clearer conversations, safer listening, and a smoother daily routine. Whether you own AirPods Pro 1, AirPods Pro 2, or AirPods Pro 3, the right setup makes them feel less like regular earbuds and more like a tiny personal audio assistant living politely in your ears.
This guide walks through the best AirPods Pro settings everyone should be using, with practical examples for commuting, working, exercising, traveling, taking calls, watching movies, and trying not to miss your coffee order because your music is too loud. Some features vary by AirPods model, iOS version, and region, but the core idea is simple: make your AirPods Pro fit your life instead of forcing your life to fit your earbuds.
Before You Start: Where to Find AirPods Pro Settings
First, connect your AirPods Pro to your iPhone or iPad and put them in your ears. Then open Settings and tap the name of your AirPods near the top of the screen. You can also go to Settings > Bluetooth, then tap the Info button next to your AirPods.
This is your control room. From here, you can adjust listening modes, microphone behavior, press-and-hold actions, spatial audio, accessibility options, charging features, and more. If you do not see certain settings, update your iPhone, iPad, or Mac, and make sure your AirPods firmware is current. Apple usually updates AirPods firmware automatically when the earbuds are charging and near a connected Apple device, so your job is mostly to keep everything close together and let the Apple ecosystem do its mysterious little dance.
1. Run the Ear Tip Fit Test or Acoustic Seal Test
The most underrated AirPods Pro setting is not really a setting at all. It is the fit test. If your ear tips do not seal properly, you lose bass, noise cancellation becomes weaker, Transparency mode sounds less natural, and your AirPods may slowly escape your ears like they are planning a tiny jailbreak.
For AirPods Pro 1 and AirPods Pro 2, use the Ear Tip Fit Test. For AirPods Pro 3, use the Acoustic Seal Test if available. Go to your AirPods settings, choose the fit test option, and follow the on-screen instructions. The test plays a short sound and checks whether your ear tips are creating a good acoustic seal.
Why this setting matters
A proper seal improves sound quality, bass response, and active noise cancellation. If the test suggests a different size, try it. Many people need different sizes for the left and right ear, because human ears are not manufactured by a quality-control robot. One ear may be a “medium,” while the other is living its best “small” life. That is normal.
Before you tweak equalizers, spatial audio, or noise settings, get the fit right. The best AirPods Pro settings cannot save a bad seal. It is like putting racing tires on a shopping cart.
2. Use Adaptive Audio as Your Everyday Mode
If your AirPods Pro support Adaptive Audio, this is one of the best settings to turn on for daily use. Adaptive Audio blends Active Noise Cancellation and Transparency mode depending on your surroundings. Instead of constantly switching modes like a DJ with anxiety, you let your AirPods decide how much outside sound should come through.
To turn it on, open Control Center while wearing your AirPods, press and hold the volume slider, tap Listening Mode, and choose Adaptive. You can also open your AirPods settings and adjust Adaptive Audio so it allows more or less environmental sound.
When Adaptive Audio works best
Adaptive Audio shines when your environment keeps changing. Walking through a city, commuting, shopping, working in a shared office, or moving between quiet and noisy places are perfect examples. It can reduce background noise while still letting important sounds reach you.
Use Active Noise Cancellation when you need maximum quiet, such as on a plane, train, or noisy bus. Use Transparency when you need to stay aware of your surroundings. Use Adaptive when you want the smartest all-purpose balance.
3. Turn On Conversation Awareness
Conversation Awareness is one of those AirPods Pro settings that sounds like a gimmick until you use it in real life. When you start speaking, your AirPods lower media volume and make voices in front of you easier to hear. When the conversation ends, your audio returns to normal.
To enable it, open Control Center, press and hold the volume slider while wearing your AirPods, and tap Conversation Awareness. You can also find it inside AirPods settings on supported models.
Best use cases
This setting is excellent for quick human interactions: ordering coffee, answering a coworker, talking to a cashier, asking for directions, or pretending you definitely heard your name the first time. It saves you from yanking out an earbud every time someone speaks.
However, if you sing along to music, talk to yourself, rehearse presentations, or mutter dramatically while reading emails, Conversation Awareness may activate more often than you want. In that case, turn it off during those moments. Your AirPods are smart, but they are not yet emotionally prepared for your private karaoke career.
4. Enable Personalized Volume
Personalized Volume adjusts your media volume based on your listening habits and environment. Over time, your AirPods learn whether you usually prefer louder audio in busy places or softer audio in quiet rooms. The goal is not to blast your ears into another dimension, but to keep your listening level comfortable without constant manual changes.
To turn it on, go to your AirPods settings and enable Personalized Volume. This setting is especially useful if you move between different environments throughout the day, such as home, office, gym, street, and public transit.
Why it improves the experience
Without Personalized Volume, many people keep tapping volume buttons every few minutes. A truck passes by, volume goes up. You enter a quiet room, volume goes down. A blender starts screaming in the kitchen, volume goes up again. Personalized Volume reduces that dance and makes your AirPods Pro feel more automatic.
Pair it with Adaptive Audio for a smoother daily setup. Adaptive Audio handles the world outside your ears, while Personalized Volume handles the sound inside them. Together, they are like a tiny audio butler with better battery life.
5. Customize Press-and-Hold Controls
AirPods Pro let you press and hold the stem to switch listening modes or activate Siri. By default, many models cycle between noise control options, but you can customize what the left and right AirPod do.
Open AirPods settings, find Press and Hold AirPods, then choose Left or Right. A smart setup is to make one AirPod switch between listening modes and the other activate Siri. For example, set the left AirPod to cycle through Noise Cancellation, Transparency, and Adaptive Audio, and set the right AirPod to Siri.
The best practical setup
If you rarely use Siri, assign both stems to noise controls. If you use voice commands often, split the controls. This gives you fast access without digging through settings while walking, cooking, driving as a passenger, or holding six grocery bags and questioning your life choices.
You can also choose which modes are included in the cycle. If you never use “Off,” remove it from the rotation. Fewer options mean faster switching and less accidental confusion.
6. Set Up Personalized Spatial Audio
Personalized Spatial Audio uses your iPhone to create a profile based on your head and ear shape. This helps supported music, movies, shows, and apps deliver a more customized surround-sound effect.
To set it up, wear your AirPods, open AirPods settings, tap Personalized Spatial Audio, and follow the instructions. You may need to move your iPhone around your head and ears, which will make you look briefly like you are trying to scan yourself for alien technology. Accept the awkwardness. The result can be worth it.
Fixed vs. Head Tracked Spatial Audio
When using Spatial Audio, you may see options such as Off, Fixed, and Head Tracked. For music, many people prefer Fixed because the sound stays consistent. For movies and shows, Head Tracked can feel more cinematic because the audio seems anchored to the screen.
The best setting depends on the content. Use Fixed for music, podcasts, and casual listening. Try Head Tracked for Apple TV, movies, and supported video apps. If head tracking feels distracting, turn it off. No setting is worth feeling like your soundtrack is following you around the room with a clipboard.
7. Use Headphone Accommodations for Clearer Sound
Headphone Accommodations is one of the best AirPods Pro settings for people who want clearer vocals, brighter detail, or a more customized sound profile. You can find it under Settings > Accessibility > Audio & Visual > Headphone Accommodations.
Turn it on, then use Custom Audio Setup or manually choose options such as Balanced Tone, Vocal Range, or Brightness. You can also adjust whether changes apply to phone calls, media, or both.
Who should use it?
This setting is useful if podcasts sound muffled, dialogue in videos seems too quiet, or music lacks the clarity you want. Try Vocal Range if you listen to podcasts, audiobooks, meetings, and phone calls. Try Brightness if your audio sounds dull. Start with mild settings, then increase gradually.
Think of Headphone Accommodations as seasoning. A little can make everything better. Too much and suddenly your audio tastes like it fell into a salt mine.
8. Customize Transparency Mode
Transparency mode lets outside sound in so you can hear your environment while still wearing AirPods Pro. But you can go deeper than simply turning it on. Through Accessibility settings, you can customize Transparency mode with options such as amplification, tone, ambient noise reduction, balance, and Conversation Boost on supported models.
Go to Settings > Accessibility > Audio & Visual > Headphone Accommodations > Transparency Mode. Turn on Custom Transparency Mode, then adjust the sliders slowly.
Best Transparency settings
If voices sound too quiet, increase amplification slightly. If the world sounds too sharp, adjust tone downward. If background noise is distracting, increase ambient noise reduction. If one ear hears more clearly than the other, adjust balance.
Do not max everything out immediately. Transparency mode should sound natural, not like you accidentally gained superhero hearing and can now hear a refrigerator thinking.
9. Turn On Noise Cancellation with One AirPod
By default, Active Noise Cancellation usually works when both AirPods are in your ears. But there is an accessibility option that allows noise cancellation with just one AirPod. This is helpful if you often use one earbud at work, while walking, or while keeping one ear open for family, pets, traffic, or suspiciously quiet toddlers.
Go to Settings > Accessibility > AirPods, choose your AirPods, and enable Noise Cancellation with One AirPod.
When to use it
This setting is great for one-ear listening during calls or podcasts. It can reduce background noise without fully disconnecting you from the room. Just remember: for the strongest noise cancellation and best sound quality, use both AirPods with a good seal.
10. Adjust Microphone Settings for Better Calls
AirPods Pro can automatically choose which microphone to use, but you can also force the microphone to stay on the left or right AirPod. For most people, Automatically Switch AirPods is the best option. It helps your AirPods pick the better microphone depending on battery, placement, and usage.
Open AirPods settings and look for Microphone. Keep it on automatic unless you have a specific reason to change it. For example, if one microphone sounds better during calls or one AirPod is used more often, you may choose left or right manually.
Call quality tip
For clearer calls, make sure the stems point downward, not sideways into the unknown. AirPods microphones are impressive, but they still perform better when they are not being smothered by a scarf, hoodie, hair, or a dramatic winter collar.
11. Use Announce Notifications Carefully
Announce Notifications can read messages and alerts through your AirPods Pro. This is useful when driving, walking, cooking, exercising, or doing anything where grabbing your phone is inconvenient. It is less useful when every shopping app, game, and delivery service decides your ears are now public property.
Go to Settings > Notifications > Announce Notifications. Turn it on, then choose which apps are allowed to speak through your AirPods.
The best setup
Allow important apps such as Messages, Phone, Calendar, Reminders, and navigation apps. Disable noisy apps that send low-priority alerts. Your AirPods should announce “Meeting in 10 minutes,” not “A blender you looked at once is 7% off.”
12. Protect Your Hearing with Safety Settings
AirPods Pro are fun, powerful, and convenient, but your ears are not replaceable accessories. Use Apple’s hearing safety tools to keep listening comfortable over time.
Open Settings > Sounds & Haptics > Headphone Safety. Turn on Reduce Loud Audio and choose a maximum decibel level that feels safe and reasonable. You can also review headphone audio levels in the Health app.
On supported AirPods Pro models, hearing health features may include a Hearing Test, Hearing Assistance, and Hearing Protection, depending on your region and device compatibility. These tools can help you understand your hearing profile and reduce exposure in loud environments.
Best hearing habit
If you keep raising the volume to overpower background noise, switch to Noise Cancellation or Adaptive Audio instead. Do not fight a loud world with louder music. That battle has no winners, only ringing ears.
13. Turn On Find My Features
AirPods Pro are small, smooth, and extremely talented at disappearing into couch cushions. Make sure Find My is enabled so you can locate them if they wander off into the sock dimension.
Open the Find My app and check that your AirPods appear in your device list. On supported models, you can play a sound, locate the case, use Precision Finding, and receive separation alerts.
Why it matters
This setting is not glamorous, but it can save you money and frustration. Turn on separation alerts if available, especially if you travel, work from coffee shops, or have a mysterious ability to leave expensive electronics in public places.
14. Use Optimized Battery Charging
Optimized Battery Charging helps reduce battery aging by learning your charging routine and delaying charging past 80% until you are likely to need your AirPods. If the option is available in your AirPods settings, keep it on.
This is one of the easiest AirPods Pro settings to recommend because it works quietly in the background. You do not have to manage it every day. Just use your AirPods normally and let the feature help protect long-term battery health.
15. Manage Automatic Switching Between Devices
Automatic switching can be magical when it works the way you want. Start music on your iPhone, open your Mac, answer a call on your iPad, and your AirPods follow along. Lovely. But sometimes they switch devices at the worst possible moment, like when your Mac steals audio from your iPhone while you are mid-podcast cliffhanger.
To adjust this, open Bluetooth settings on each device, tap your AirPods, and look for options such as Connect to This iPhone or Connect to This Mac. Choose automatic switching if you love seamless movement across devices. Choose “when last connected” if you prefer more control.
Best recommendation
Use automatic switching if you live fully inside the Apple ecosystem and jump between devices often. Use manual behavior if you work with multiple Apple devices at once and need predictable audio. Convenience is wonderful, but not when your earbuds behave like they are freelancing for every screen in the room.
Best AirPods Pro Settings for Different Situations
For commuting
Use Adaptive Audio for walking and public spaces, then switch to Noise Cancellation on trains, buses, or planes. Turn on Personalized Volume and Find My separation alerts. Keep Conversation Awareness on if you often interact with people along the way.
For work and study
Use Noise Cancellation when you need focus. Use Transparency or Adaptive Audio if coworkers may need to speak with you. Turn off Announce Notifications for distracting apps. Try Headphone Accommodations with Vocal Range for clearer meetings and lectures.
For workouts
Use Transparency or Adaptive Audio outdoors so you remain aware of traffic and people nearby. Use Noise Cancellation indoors if the gym playlist sounds like a robot fighting a drum set. Check ear tip fit before running or lifting.
For movies and shows
Set up Personalized Spatial Audio and try Head Tracked mode. It can make supported movies feel more immersive. If the effect distracts you, switch to Fixed Spatial Audio.
For calls
Keep microphone selection on automatic, use both AirPods when possible, and avoid covering the stems. If voices sound dull, try Headphone Accommodations with Vocal Range.
Experience Notes: How These Settings Feel in Everyday Use
The best AirPods Pro settings are not always the most advanced ones. They are the settings you stop noticing because they make daily listening feel effortless. In real-world use, the biggest improvement usually comes from three changes: fixing the ear tip seal, using Adaptive Audio, and turning on Personalized Volume. These do not sound dramatic on paper, but together they change the way AirPods Pro behave throughout the day.
Imagine leaving home in the morning. You start a podcast while walking outside. With Transparency mode, you hear too much traffic. With full Noise Cancellation, you may feel too sealed off from your surroundings. Adaptive Audio sits in the middle. It lowers distracting noise without making the world disappear. Then a neighbor says hello. Conversation Awareness lowers the podcast and brings their voice forward. You answer without removing an earbud, which is a small convenience that feels surprisingly luxurious. It is not life-changing in the dramatic movie-trailer sense, but it is the kind of tiny upgrade that makes technology feel civilized.
At work, the experience changes again. Noise Cancellation becomes the hero when the room is full of typing, chair squeaks, hallway chatter, and someone who apparently believes every snack bag must be opened with theatrical force. A good ear tip seal makes the difference here. If the seal is weak, you may keep raising the volume. If the seal is right, the background drops away and your music or white noise can stay at a comfortable level. That is better for focus and better for your ears.
During calls, Headphone Accommodations can make voices easier to understand, especially with podcasts, video meetings, or recorded lectures. The Vocal Range option is particularly useful when speech matters more than booming bass. It will not turn a bad microphone on someone else’s laptop into a studio broadcast, but it can make dialogue feel cleaner and less muddy.
Spatial Audio is more personal. Some people love Head Tracked audio for movies because it feels like the sound is attached to the screen. Others find it distracting when they move their head and the sound shifts. That is why the best practical advice is to use Fixed Spatial Audio for music and test Head Tracked for video. Do not force yourself to like a feature just because it sounds futuristic. The future should be comfortable.
For long-term use, hearing safety settings are easy to overlook but extremely important. Reduce Loud Audio, Headphone Safety, and hearing health tools can help prevent the common habit of slowly increasing volume in noisy places. The smarter move is to improve noise control, not to make everything louder. Your future self will appreciate that, even if your current self just wants the bass to slap like a motivational gym poster.
After a few days with these settings, AirPods Pro start to feel more personal. They switch less awkwardly, sound clearer, react better to your environment, and require fewer manual adjustments. That is the real goal. Not to turn on every feature, but to create a setup that matches your routine. The perfect AirPods Pro setup is not the one with the most toggles enabled. It is the one that lets you forget the toggles exist.
Conclusion
The best AirPods Pro settings everyone should be using start with the basics: get the right ear tip fit, choose the right listening mode, and customize the controls you actually touch every day. From there, Adaptive Audio, Conversation Awareness, Personalized Volume, Personalized Spatial Audio, Headphone Accommodations, Transparency customization, hearing safety tools, Find My, and optimized charging can make your AirPods Pro feel smarter, safer, and more comfortable.
You do not need to use every feature all the time. The best setup depends on your routine. Commuters may love Adaptive Audio. Office workers may rely on Noise Cancellation. Movie fans may enjoy Spatial Audio. Podcast listeners may benefit most from Vocal Range. Everyone, however, should check fit, protect hearing, and customize controls. Those three steps alone can make AirPods Pro feel noticeably better.
Note: Feature names and availability can vary by AirPods Pro model, iOS or iPadOS version, macOS version, country, and region. For the best experience, keep your Apple devices updated and check your AirPods settings after major software updates.