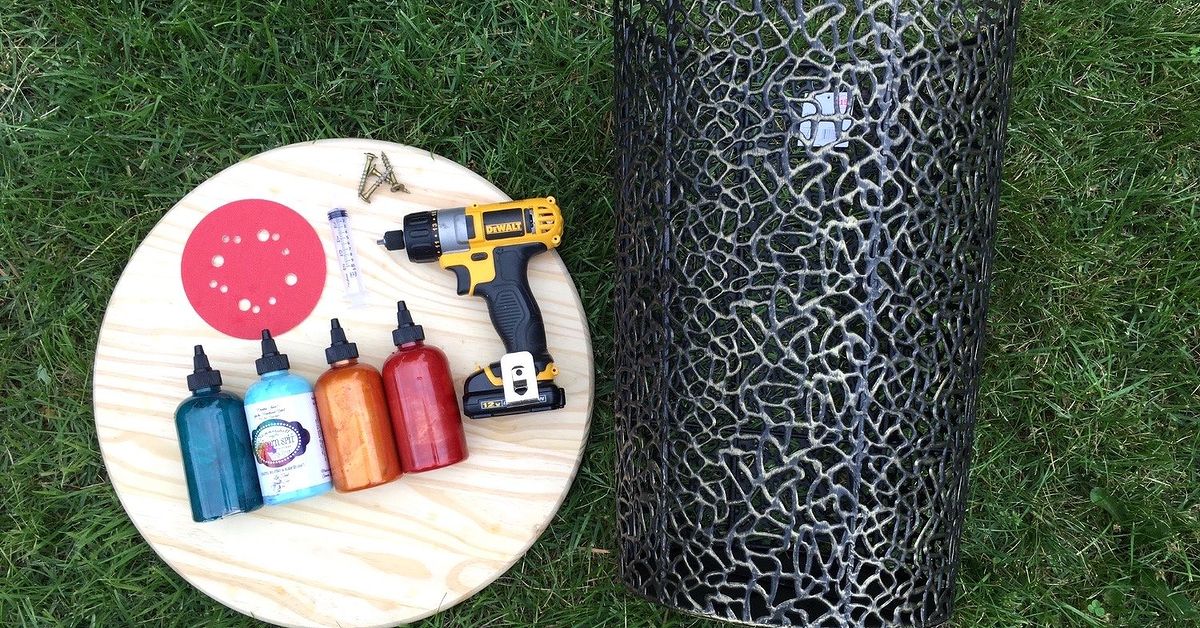
A wire basket may currently be holding blankets, toys, potatoes, or a mysterious collection of charging cables nobody wants to identify. With a wooden round, a little paint, and a secure attachment system, however, that humble basket can become a stylish DIY side table that looks far more expensive than it is.
This wire basket table project is beginner-friendly, apartment-friendly, and wonderfully customizable. It can serve as an end table beside a sofa, a nightstand in a guest room, a plant stand in a sunny corner, or a compact storage table on a covered porch. Best of all, the project does not require complicated joinery or a garage full of tools that make the neighbors nervous.
Why a Wire Basket Makes Such a Good Table Base
A sturdy wire basket already has several qualities that furniture builders normally have to create from scratch. It is lightweight, open, visually interesting, and shaped like a ready-made table base. Turn it upside down, add a tabletop, and most of the structural work is already finished.
The open grid also keeps a small room from feeling crowded. A solid cabinet-style end table can look bulky beside a chair, while a wire base allows light and flooring to remain visible. When the basket is positioned upright instead, the table can provide accessible storage for blankets, magazines, toys, or extra pillows.
Designers frequently use baskets beneath tables because they combine texture with practical storage. Wire versions create a more industrial or modern appearance, while a natural wood top introduces warmth and keeps the piece from looking like it escaped from the produce aisle.
Choose the Right Wire Basket
Look for a Wide, Stable Shape
The best basket has a broad opening or base, straight or gently tapered sides, and a strong upper rim. A narrow basket with a wide tabletop may look dramatic, but it can also tip when someone places a heavy book near the edge. For a dependable DIY end table, the tabletop should extend only a few inches beyond the basket on each side.
A basket approximately 16 to 20 inches in diameter often works well for a compact side table. The finished height should usually fall near the arm of the sofa or chair beside it. Measure your intended location before shopping instead of relying on the classic DIY measuring system known as “that looks about right.”
Inspect Every Weld and Joint
Press down gently on the basket and check whether it rocks, flexes, or twists. Examine the welded intersections and the top ring for cracks, broken wires, sharp edges, or heavy rust. Small cosmetic imperfections can be repaired, but a weak frame should not be trusted to support drinks, lamps, or anything else that would create an exciting insurance claim.
Decide Whether You Want Storage
An inverted basket creates the simplest base and usually provides the greatest stability. An upright basket offers storage, but the tabletop must be removable or hinged. For a first project, an inverted basket is easier. For a multifunctional table, use an upright basket and secure the top with hidden wooden cleats so it stays centered but can still be lifted off.
Materials and Tools
- One sturdy metal wire basket
- One round wood panel, edge-glued board, plywood circle, or reclaimed tabletop
- 120-, 180-, and 220-grit sandpaper
- Metal cleaner or mild dish soap
- Wire brush or abrasive pad for loose rust
- Metal primer, if needed
- Spray paint formulated for metal
- Wood stain, paint, or clear finish
- Polyurethane or another durable tabletop topcoat
- Short screws that will not penetrate the tabletop
- Metal pipe straps, cable clamps, or small mounting brackets
- Drill and drill bits
- Measuring tape and pencil
- Protective gloves, eye protection, and an appropriate mask or respirator
- Drop cloth, cardboard, or plastic sheeting
- Optional felt pads, rubber feet, decorative handles, or basket liner
A precut wooden round is the easiest tabletop choice. Edge-glued pine rounds are affordable and easy to stain, although pine may absorb stain unevenly. Birch plywood provides a cleaner modern look, while reclaimed wood creates a rustic surface with more character. Just make sure reclaimed material is dry, flat, free of insects, and thoroughly checked for nails or staples.
How to Turn a Wire Basket Into a DIY Table
Step 1: Plan the Proportions
Place the basket where the table will be used and set a cardboard circle on top to test the size. Cardboard is much easier to trim than wood and considerably less judgmental when your first attempt resembles an egg.
A tabletop overhang of roughly 1 to 3 inches around the basket usually looks balanced. A wider overhang can work, but the base must be heavy and broad enough to prevent tipping. Check that the finished table will not interfere with nearby doors, walkways, recliners, or enthusiastic pets.
Step 2: Clean and Prepare the Basket
Wash the basket with warm water and a small amount of dish soap. Remove dust, grease, labels, and any adhesive residue. Rinse it and allow it to dry completely.
If the basket has rust, scrub away every loose or flaking area with a wire brush or abrasive pad. Paint cannot stabilize metal that is actively shedding rust beneath it. Clean metal also helps primer and paint adhere more consistently. Professional metal-painting guidance emphasizes removing contamination, eliminating loose rust, using suitable primer, and wearing proper eye and respiratory protection.
Step 3: Prime and Paint the Metal
Move outdoors or into a properly ventilated workspace. Protect the surrounding area from overspray, including floors, walls, cars, bicycles, and the neighbor’s suspiciously pristine grill.
Apply a metal primer if the basket has bare steel, repaired rust, or a slick finish that may resist paint. Follow the primer manufacturer’s drying and recoating instructions.
Shake the spray paint thoroughly and apply several light coats rather than one heavy coat. Keep the can moving in smooth passes, beginning each pass before the spray reaches the basket and releasing it after moving beyond the edge. Change your angle frequently so paint reaches the inner grid, underside, welds, and rim.
Light coats reduce drips and create a more even finish. Home-improvement and paint manufacturers commonly recommend multiple thin passes, proper surface preparation, and paint specifically intended for metal.
Let the basket dry and cure for the full period stated on the product label. Paint that feels dry to the touch may still be soft underneath, especially around overlapping wires.
Step 4: Prepare the Wooden Top
Inspect the wooden round for dents, glue marks, raised grain, and sharp edges. Sand the top, bottom, and edge in the direction of the grain. Start around 120 grit for rough material, continue with 180 grit, and use 220 grit for a smoother final surface when appropriate for your chosen finish.
Do not jump directly from rough paper to very fine paper. Progressive sanding removes the scratches left by the previous grit. Vacuum the dust and wipe the wood with a clean, lint-free cloth before applying stain or finish. Established woodworking guidance similarly recommends sanding with the grain, progressing through finer abrasives, and removing dust between stages.
Lightly soften the top and bottom edges with sandpaper. A subtle rounded edge feels better in the hand and is less likely to chip than a razor-sharp factory edge.
Step 5: Stain, Paint, or Seal the Top
Test your finish on the underside first. Wood species, sanding technique, and stain color can produce very different results from the cheerful little sample printed on the can.
For a natural look, use a clear satin finish. For farmhouse style, choose a warm brown stain and a matte black basket. For a modern table, try pale wood with a white, charcoal, or brass-colored base. A painted tabletop can also work, although a durable topcoat is still helpful on surfaces exposed to cups, lamps, keys, and everyday scratches.
When staining, apply the product according to its label and wipe away excess before it becomes sticky. After the stain has dried completely, protect the top with several thin coats of polyurethane or another furniture-grade clear finish. Brush or wipe with the grain, allow proper drying time, and lightly sand between coats when the manufacturer recommends it.
Thin coats level more effectively than thick coats, which can sag, wrinkle, or remain soft. Furniture-finishing guides from Lowe’s, This Old House, and WOOD Magazine recommend careful preparation, thin applications, and fine sanding between compatible topcoats for a smoother, more durable surface.
Step 6: Attach the Top Securely
Turn the tabletop upside down on a padded work surface. Center the basket on it and trace or mark several attachment points around the upper wire ring.
The most dependable method is mechanical fastening. Position small metal pipe straps, cable clamps, or brackets over the basket’s top ring and screw them into the underside of the wood. Use at least three evenly spaced attachment points; four are better for a larger table.
Choose screws shorter than the tabletop thickness. Measure twice before drilling because a screw tip emerging through the finished surface has a unique ability to ruin both the table and your afternoon.
Predrill small pilot holes to reduce the chance of splitting. Tighten the screws until the hardware holds the wire firmly, but do not crush the basket or strip the wood.
Construction adhesive designed to bond wood and metal may be used as a supplement, provided the product specifically lists both surfaces. Do not rely on a random craft glue for structural attachment. Mixed-material construction adhesives generally require clean surfaces, firm contact, and the manufacturer’s specified clamping and curing period.
Step 7: Add Floor Protection and Test Stability
Attach felt pads or rubber bumpers wherever the basket contacts the floor. These protect hard flooring, reduce sliding, and compensate for tiny irregularities in the metal rim.
Set the table upright and press gently near the center, then near each edge. Confirm that the top does not rotate, slide, or lift. Place a light object on it first and gradually add ordinary tabletop items. If the table rocks, adjust the pads or recheck the basket for distortion.
This project is an accent table, not a stool. Do not sit, stand, climb, or allow children to use it as playground equipment. A wire basket designed to hold laundry was not secretly engineered for a 180-pound adult with confidence issues.
Stylish Ways to Customize Your Wire Basket Table
Modern Minimalist
Paint the basket matte black and seal a pale maple, birch, or natural pine top with a clear satin finish. Keep the tabletop thin and avoid decorative hardware.
Warm Farmhouse
Use an antique bronze or black base with a medium walnut-stained top. Lightly distress painted areas only after the finish has cured, concentrating on places where natural wear would occur.
Playful and Colorful
Paint the base coral, teal, mustard, or cobalt blue. Pair it with a natural wood top so the color feels intentional rather than overwhelming. This version works especially well in a craft room, child’s bedroom, or eclectic living room.
Upright Storage Table
Keep the basket upright and make the top removable. Attach two short wooden cleats to the underside so they fit just inside the basket rim. The cleats prevent sideways movement while allowing access to blankets or magazines.
Covered-Porch Version
Use exterior-rated metal paint and a weather-resistant wood finish. Seal every face and edge of the tabletop, including the underside. Even then, place the table in a covered location rather than leaving it exposed to standing water, harsh sun, or snow.
Glass-Top Variation
A glass top can create an airy appearance, but it should be professionally cut from appropriate safety glass with finished edges. Add clear rubber bumpers between the glass and metal. Do not balance an ordinary piece of window glass on the basket and hope everyone develops unusually graceful habits.
Common Mistakes to Avoid
- Choosing a flimsy basket: Decorative wire that bends easily will not make a dependable table base.
- Using an oversized top: Excessive overhang increases leverage and makes tipping more likely.
- Skipping metal preparation: Paint applied over grease, loose rust, or peeling coating may fail quickly.
- Spraying one thick coat: Heavy paint collects around wire intersections and produces drips.
- Finishing only the visible wood: Sealing the underside and edge helps the tabletop respond more evenly to moisture changes.
- Attaching the top with hot glue: Hot glue is useful for crafts, but this table deserves a more serious relationship.
- Using screws that are too long: Always compare screw length with the actual thickness of the tabletop.
- Ignoring cure time: Paint and clear finishes need time to harden before assembly and regular use.
- Treating the table like seating: A basket table should hold normal decor and everyday objects, not people.
How to Style the Finished Table
Because the base already provides plenty of texture, keep the tabletop arrangement simple. A small lamp, a coaster, and one decorative object may be enough. In a bedroom, add a compact reading lamp and a shallow tray for glasses or jewelry. Beside a sofa, use the table for a drink, remote control, and one or two books.
If the basket remains accessible for storage, avoid filling it with dozens of tiny objects. Larger items such as rolled blankets, magazines, or a single fabric bin look more intentional through an open wire grid. A removable washable liner can soften the appearance and prevent small objects from slipping through.
Project Experience: Lessons You Notice After Building and Using the Table
The most surprising part of this project is how much the final result depends on proportions rather than expensive materials. A basic basket and an inexpensive wood round can look polished when their diameters feel balanced. Conversely, premium stain cannot rescue a tabletop that appears comically large compared with its base. Making a cardboard template before buying or cutting wood is one of the simplest ways to avoid that problem.
Another practical lesson is that wire baskets are rarely perfectly round. A basket may look symmetrical on a store shelf but reveal a slight wobble once placed upside down on a flat floor. Rotating it, gently correcting minor bends, and adding individual felt pads can make a remarkable difference. Trying to force all four contact points to behave identically usually creates more frustration than simply adjusting the pads.
Painting the metal also takes more patience than the small size suggests. The open grid creates dozens of inner corners, overlaps, and hidden surfaces. From one angle, the basket may look completely painted; from another, an entire stripe of the original color suddenly appears as if it has been waiting to embarrass you. Rotating the basket between light coats produces better coverage than attempting to flood every recess at once.
The wooden top is where the project begins to feel like real furniture. Sanding the edge carefully changes the experience of the table every time it is touched. A rough or sharp edge makes the piece feel unfinished, even when the stain color is beautiful. A smooth edge, by contrast, makes an inexpensive panel feel deliberate and substantial.
Stain selection is another area where expectations and reality occasionally have a polite disagreement. Pine can absorb dark stain unevenly, especially around knots and end grain. Testing the underside first may reveal that a lighter stain, clear finish, or pre-stain conditioner creates a more attractive result. This hidden test area also lets you compare satin and gloss finishes without turning the visible top into a permanent sample board.
During assembly, mechanical fasteners provide an immediate sense of security. Adhesive may be useful, but brackets or straps make it possible to see and verify how the top is held. They also allow the piece to be disassembled later for repainting, repairs, or moving. That flexibility matters more than expected when the table eventually migrates from a living room to a bedroom, office, or covered patio.
Daily use quickly reveals whether the design is stable. A coffee mug placed near the edge is a better test than admiring the table from across the room. If the base shifts, the answer is not to warn every guest to behave carefully forever. Reduce the overhang, improve the attachment points, add nonslip feet, or choose a broader basket.
Finally, the project demonstrates why upcycled furniture can feel more personal than a store-bought piece. The table may begin as a utility basket, but the chosen paint, wood tone, hardware, and small imperfections give it a specific identity. It becomes a useful object with a storyand, unlike many dramatic furniture makeovers, it can usually be completed without demolishing a wall or discovering ancient plumbing.
Final Thoughts
Turning a wire basket into a DIY table is a small project with an impressive payoff. The basket supplies an airy, sculptural base, while the wooden top adds warmth, function, and countless opportunities for customization. Careful measuring, patient surface preparation, thin finish coats, and secure mechanical attachment are what separate a charming table from a wobbly craft experiment.
Choose a strong basket, keep the proportions sensible, and give every coating enough time to cure. The finished piece can bring storage and style to a living room, bedroom, office, or covered outdoor areawhile quietly enjoying the fact that it once spent its life holding laundry.