A patio umbrella can turn a sun-baked outdoor space into a comfortable place for lunch, reading, or quietly avoiding indoor chores. Unfortunately, many standard umbrella bases are either too light, too expensive, or designed with all the visual charm of gym equipment.
A DIY patio umbrella stand solves that problem by combining three useful elements: a heavy concrete anchor, a properly sized sleeve for the umbrella pole, and a decorative planter that disguises the engineering. The result is sturdy, attractive, customizable, and surprisingly beginner-friendly.
This guide focuses on a center-pole market umbrella rather than a cantilever or offset model. Cantilever umbrellas create much greater leverage and usually need a manufacturer-approved base or permanent anchoring system. For a standard patio umbrella, however, a planter-style homemade umbrella base can be an excellent weekend project.
Why Build a DIY Patio Umbrella Stand?
Store-bought umbrella stands certainly work, but building your own gives you more control over weight, appearance, dimensions, and placement. You can coordinate the planter with your patio furniture, use flowers or herbs to soften the design, and add wheels if you need movable shade.
A planter stand is especially useful when you want to position an umbrella beside a lounge chair, outdoor sofa, or small bistro set without relying on a table to support the pole. Similar projects from major home-improvement and DIY publishers commonly use a decorative container, an internal bucket, quick-setting concrete, and a PVC or ABS sleeve.
The Basic Design
The project works like a weighted core hidden inside a planter. A short PVC pipe stands vertically in a bucket filled with concrete. That bucket is placed inside a larger decorative planter, and the surrounding space is finished with potting mix, plants, decorative gravel, or a removable planter insert.
The PVC sleeve keeps the umbrella pole centered and makes it possible to remove the umbrella for storage. Concrete supplies the weight. The outer planter supplies the style. Everybody contributes something, which is more teamwork than most patio furniture can claim.
Materials and Tools
Materials
- One large outdoor planter, approximately 18 to 24 inches wide
- One sturdy 2- to 5-gallon plastic bucket that fits inside the planter
- One 24- to 30-inch length of PVC or ABS pipe
- One 50- or 60-pound bag of fast-setting concrete mix
- Outdoor-rated silicone sealant
- Duct tape or heavy painter’s tape
- Scrap wood for temporary braces
- Potting mix suitable for containers
- Plants, mulch, or decorative gravel
- Optional plastic bottles or rigid foam filler
- Optional load-rated plant caddy with locking wheels
- Optional exterior spray paint or masonry paint
Tools
- Tape measure
- Marker
- Drill and appropriate drill bits
- Level
- Mixing tub, wheelbarrow, or heavy-duty bucket
- Mixing hoe, shovel, or sturdy paddle
- Utility knife or PVC cutter
- Rubber gloves
- Safety glasses
- Dust mask or suitable particulate respirator
Choose the Right Planter and Pipe
Select a Wide, Weather-Resistant Planter
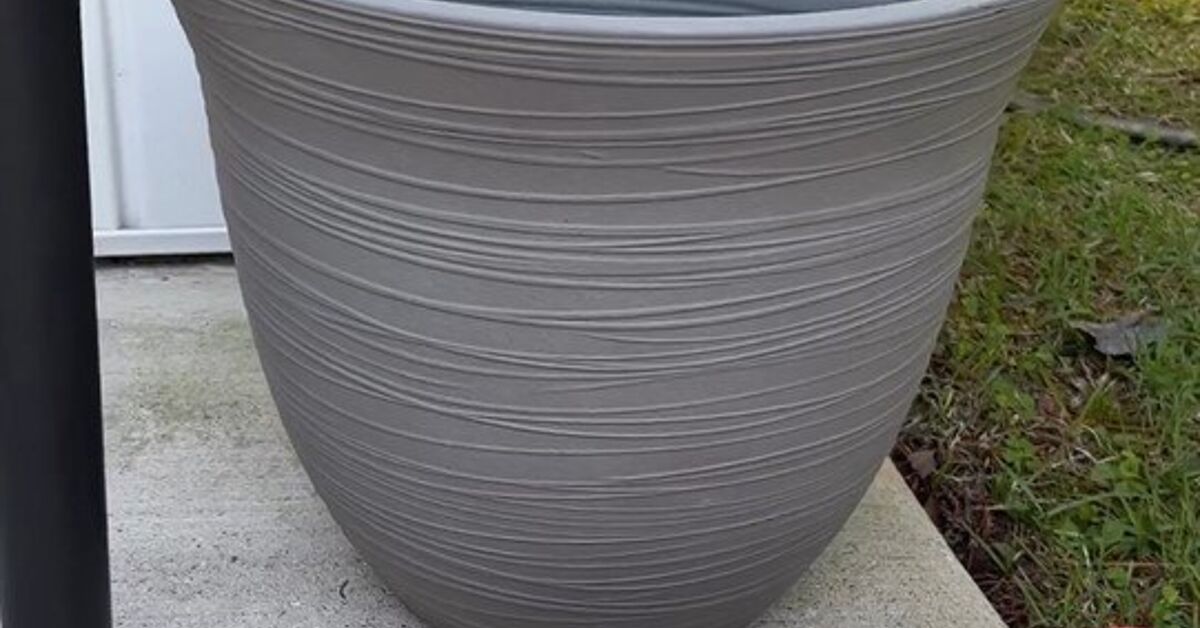
Choose a planter with a broad footprint rather than a tall, narrow shape. A wider base distributes the load more effectively and is less likely to tip when the umbrella canopy catches a breeze. Resin, fiberglass, galvanized metal, heavy plastic, concrete, and thick ceramic can all work.
Lightweight resin planters are easy to move before construction, but they need a substantial concrete core. Ceramic looks elegant but may crack if dropped or exposed to repeated freeze-thaw cycles. Metal is durable, although dark metal can become hot in direct summer sun. If you use metal, consider placing plants in a separate inner liner rather than directly against the container walls.
Make sure the planter is in good condition. Concrete is not known for respecting containers with hairline cracks.
Measure the Umbrella Pole
Measure the outside diameter of your umbrella pole before buying the PVC sleeve. The inside diameter of the pipe should be slightly larger than the pole so it slides in easily without wobbling excessively.
Many market umbrella poles are around 1.5 inches in diameter, but sizes vary. A 1.5- or 2-inch PVC or ABS pipe is common for DIY umbrella stands. Do not rely solely on the size printed on the pipe because nominal pipe sizes do not always equal the exact inside diameter. Bring your measurement to the hardware store and check the actual fit.
Leave enough sleeve above the concrete to support the pole, but do not make it unnecessarily tall. Approximately 20 to 24 inches of usable sleeve is practical for many projects.
How Heavy Should the Stand Be?
There is no universal base weight that is safe for every umbrella. Canopy diameter, pole height, wind exposure, whether the umbrella passes through a table, and the manufacturer’s specifications all matter.
A 50-pound concrete core plus the weight of the planter, soil, and plants may create a finished stand weighing 70 pounds or more. That can be suitable for many modest center-pole umbrellas in sheltered locations, but it is not permission to leave an open umbrella outside during strong wind. Commercial base guidance also emphasizes choosing weight according to umbrella size and wind exposure.
Always close and secure the canopy when it is unattended or when wind develops. A heavy base reduces tipping risk; it does not turn an umbrella into a permanent roof.
Step-by-Step: Build the Umbrella Stand
Step 1: Plan the Final Location
Choose where the stand will normally sit before mixing concrete. The completed project may be inconveniently heavy, which is exactly what you want from an umbrella base and exactly what your lower back does not want from a surprise.
Place the stand on a flat, solid surface. Sloped decking, uneven pavers, and loose gravel can reduce stability. Check overhead clearance and make sure the open canopy will not strike a wall, grill, tree branch, roof edge, or power line.
Step 2: Prepare Drainage
If the decorative planter will contain live plants, drill several drainage holes in areas that will not be blocked by the concrete bucket. The best arrangement is usually to keep the concrete core separate and allow water to drain around it.
Proper holes matter more than a thick layer of rocks. Horticultural guidance consistently recommends containers with unobstructed drainage because waterlogged potting mix limits oxygen around roots and can encourage root rot. A small piece of screen or a coffee filter can keep soil from escaping without sealing the opening.
If the planter sits directly on a solid patio, elevate it slightly with pot feet or use a caddy designed to permit drainage.
Step 3: Prepare the PVC Sleeve
Cut the pipe to the desired length and smooth any sharp edges. Seal the bottom with a removable cap or several layers of strong tape so wet concrete cannot enter the pipe.
Drill a small drainage hole through the side of the sleeve just above the future concrete surface. This allows rainwater that enters the open tube to escape instead of creating a miniature mosquito resort.
You can paint the exposed portion of the sleeve to match the umbrella pole. Use a coating labeled for plastic and outdoor exposure, and allow it to dry fully before setting the pipe in concrete.
Step 4: Center and Brace the Sleeve
Place the PVC pipe in the center of the smaller bucket. Use two pieces of scrap wood across the top of the bucket to create a simple brace. Tape or clamp the pipe between them.
Check the pipe with a level from at least two directions. It needs to be plumb, not merely “pretty straight from where I’m standing.” A crooked sleeve will make the entire umbrella lean, and the error becomes much harder to correct after the concrete sets.
Step 5: Mix the Concrete Safely
Work outdoors or in a well-ventilated location. Wear waterproof gloves and safety glasses, avoid creating clouds of dry powder, and keep wet concrete away from bare skin. Cement dust can irritate the respiratory system, eyes, and skin, while prolonged contact with wet cement can cause chemical burns.
Follow the water measurement printed on the concrete bag. Begin with the specified amount rather than improvising a concrete smoothie. Too much water can weaken the finished material and increase shrinkage or cracking.
Mix until all dry pockets disappear and the consistency is workable but not soupy. Concrete manufacturers commonly recommend adding measured water carefully and mixing only as much fast-setting material as you can place within its working time.
Step 6: Pour Around the Pipe
Hold the braced pipe steady while adding concrete to the internal bucket. Work in small lifts, pressing the mix around the sleeve with a scrap stick or trowel.
Tap the sides of the bucket with a rubber mallet to release trapped air. Do not hammer it as though the bucket owes you money; gentle vibration is enough.
Fill the bucket to within an inch or two of the rim. Recheck the pipe with the level before the mix begins to stiffen. Wipe concrete splashes from the exposed pipe and surrounding surfaces immediately.
Step 7: Allow the Concrete to Set and Cure
Leave the bracing in place until the concrete is firm. Fast-setting mixes may become hard relatively quickly, but initial hardness is not the same as full strength. Follow the curing and load-time instructions on the specific product you purchased.
Protect the concrete core from heavy rain, extreme heat, freezing temperatures, and unnecessary movement during the early curing period. Concrete-project guidance often recommends retaining moisture with plastic and waiting several days before removing forms or placing significant loads on decorative cast pieces.
Step 8: Install the Core in the Decorative Planter
Once the concrete has cured sufficiently, place the bucket in the center of the decorative planter. Confirm that the planter is level and that the bucket cannot shift from side to side.
For a permanent setup, use rigid foam blocks around the bucket to hold it in place. For a garden version, surround the core with lightweight filler and potting mix. Empty capped plastic bottles can reduce the amount of soil required, but keep them away from drainage openings.
Do not fill a huge planter entirely with garden soil. Regular ground soil can become dense, drain poorly, and add far more weight than expected. Use a quality container mix that remains loose enough to hold moisture while still allowing excess water to escape.
Step 9: Add Plants or a Decorative Finish
The umbrella canopy changes the light conditions around the planter, so choose plants according to the amount of sun the container actually receives. Shade-tolerant options can include begonias, caladiums, coral bells, ferns, coleus, and impatiens. In sunnier positions, consider geraniums, lantana, petunias, herbs, or drought-tolerant succulents.
Group plants with similar moisture and light requirements. A thirsty begonia and a desert-loving succulent may look charming together for approximately nine minutes, after which watering becomes a diplomatic crisis. Container-gardening guidance also recommends accounting for the actual patio light, using well-drained potting mix, and selecting plants that share compatible care needs.
For a low-maintenance stand, skip live plants and cover the interior with decorative river stones, recycled glass, bark nuggets, or artificial greenery. Keep the surface finish removable so you can inspect the core and drainage holes later.
Step 10: Insert and Secure the Umbrella
Slide the umbrella pole into the PVC sleeve. If the fit is slightly loose, use a removable plastic bushing, rubber shim, or purpose-made adapter. Do not wedge in random pieces of wood that can swell, rot, and trap the pole.
For additional control, drill a horizontal hole through the upper PVC sleeve and install a stainless-steel hand knob or thumb screw. The screw should press against the umbrella pole rather than pierce it. Add a rubber tip to prevent scratching.
Open the canopy slowly and observe the stand. If it rocks, leans, or lifts along one edge, close the umbrella immediately and revise the base rather than adding more flowers and hoping the problem becomes decorative.
Optional Upgrade: Make It Mobile
A rolling umbrella planter lets you move shade as the sun crosses the patio. However, attaching tiny furniture casters directly to a heavy planter can create a top-heavy object that rolls beautifully until it meets a joint between pavers.
The simpler approach is to place the finished stand on a heavy-duty plant caddy rated well above the total weight. Select a broad model with locking wheels. Test it with the umbrella closed, and always lock every caster before opening the canopy.
If you permanently attach casters, reinforce the bottom of the planter and use corrosion-resistant hardware. Drainage holes must remain open, and the wheel arrangement should be wide enough to resist tipping. HGTV’s rolling design, for example, uses evenly spaced casters, a galvanized container, a separate concrete-filled bucket, and drainage holes between the wheels.
Style Ideas for a Custom Umbrella Base
Modern Minimalist
Choose a square charcoal, white, or sand-colored planter. Paint the exposed pipe to match the umbrella pole, then finish the surface with dark river stones and one sculptural plant.
Classic Garden
Use a large urn-style resin planter with trailing flowers around the edge. Ivy, sweet potato vine, lobelia, and bacopa can soften the container without interfering with the umbrella pole.
Farmhouse Patio
Try a galvanized tub, cedar planter box, or faux whiskey barrel. Add herbs such as thyme, parsley, mint, or basil, keeping in mind that mint is ambitious enough to deserve its own removable pot.
Coastal Look
Paint the planter soft white or blue and top the soil with pale stones. Select salt- and heat-tolerant plants appropriate for your local conditions.
Small-Space Side Table
Add a removable circular tabletop around the PVC sleeve. Exterior plywood, composite decking, or sealed hardwood can create a convenient surface for drinks and books. Leave room for drainage, pole removal, and access to the planter interior.
Common Mistakes to Avoid
- Using a narrow planter: Height does not compensate for a small footprint.
- Guessing the pipe size: Measure the umbrella pole before buying the sleeve.
- Adding too much water to concrete: Follow the package ratio.
- Failing to brace the pipe: Even a small lean becomes obvious with a tall umbrella.
- Blocking drainage: Keep concrete, filler, and soil away from the holes.
- Using garden soil: It may compact and drain poorly in a container.
- Opening the umbrella before curing: Give the concrete time to gain strength.
- Assuming “heavy” means windproof: Close the canopy when wind develops.
- Moving the stand with the umbrella open: Close it first, even when using wheels.
- Using this design for a cantilever umbrella: Offset models generally require much more substantial support.
Care and Seasonal Maintenance
Inspect the PVC sleeve, concrete core, planter, drainage holes, and wheel locks at the beginning of each outdoor season. Tighten loose hardware and replace damaged shims or adapters.
Keep soil and debris out of the sleeve when the umbrella is removed. A simple PVC cap can protect the opening during storage. If water collects inside despite the drainage hole, clear the blockage with a narrow wire.
In freezing climates, remove the umbrella and move crack-prone ceramic planters to a protected location. Emptying wet potting mix may also reduce freeze damage. Resin and fiberglass containers are often easier to overwinter, but their care requirements still vary by manufacturer.
Refresh the potting mix and plants as necessary. Because container plants cannot extend their roots into surrounding ground, they require regular watering and occasional feeding. Check moisture rather than following a rigid calendar, since heat, wind, plant size, and container material all affect how quickly the mix dries.
Practical Build Experience: What DIYers Usually Learn
The most important lesson from this project is that preparation takes longer than pouring the concrete. The actual pour may last only a few minutes. Measuring the pole, choosing compatible pipe, drilling drainage holes, protecting the work area, and inventing a brace that does not resemble modern sculpture are the steps that determine whether the finished stand looks professional.
A common first-time surprise is the speed of fast-setting concrete. Everything feels calm while the powder is still in the bag. Once water is added, the project suddenly develops a schedule. The best approach is to have the PVC sleeve centered, braced, leveled, and taped before mixing anything. Keep the level and cleanup water within reach. Concrete does not pause while someone searches the garage for a missing tool.
DIYers also tend to underestimate how visible a small alignment error becomes. A pipe that is only slightly off-center in the bucket may appear acceptable at ground level. After a seven- or eight-foot umbrella is inserted, that small error can make the canopy look noticeably tilted. Checking the sleeve from multiple directions is worth the extra minute. It also helps to step back several feet and look at the pipe against a vertical reference such as a doorframe or fence post.
Another lesson concerns portability. Before adding concrete, a large planter feels perfectly manageable. After adding a 50-pound core, soil, plants, water, and an umbrella, it becomes a piece of patio real estate. Builders who expect to move the stand frequently are usually happier when they plan for a load-rated caddy from the beginning. Trying to slide the finished planter across textured concrete can scratch both the planter and the patio.
Drainage is another detail that is easy to treat as an afterthought. A planter may look beautiful immediately after planting, even when the holes are blocked. The consequences appear later as yellow leaves, soggy soil, unpleasant odors, or a puddle trapped around the concrete bucket. Separating the concrete core from the planting area makes maintenance easier. A removable nursery pot or liner is especially useful because plants can be lifted out without dismantling the umbrella base.
Plant selection is usually more successful after observing the finished location for a day. An area that seems sunny in the morning may become deeply shaded once the canopy opens. Conversely, plants near the edge of the container may receive several hours of intense afternoon sun. Foliage plants often handle these mixed conditions better than sun-demanding flowers. Using one upright plant, several compact fillers, and a trailing plant produces a polished arrangement without crowding the pole.
The finished project also teaches a useful distinction between stability and invincibility. A properly weighted stand may feel extremely solid during normal use, but an open umbrella creates a large sail. Wind can change direction quickly around buildings, fences, and patio walls. Experienced owners develop the habit of closing the umbrella before leaving home, going to bed, or watching a storm approach. That simple routine protects the stand, umbrella, furniture, windows, and whichever neighbor would otherwise receive an unexpected patio accessory.
Finally, the most satisfying part of the build is how little it resembles a basic concrete weight when completed. Matching the sleeve color to the pole, centering the plants carefully, and hiding the internal bucket transform inexpensive materials into a feature that looks intentional. Guests usually notice the flowers or the shade first. The concrete quietly performs the important work underneath, which is probably the highest compliment a block of concrete can receive.
Conclusion
A simple DIY patio umbrella stand does not require advanced carpentry, specialized equipment, or a heroic relationship with concrete. A wide planter, correctly sized pipe, carefully mixed concrete, proper drainage, and a few thoughtful finishing details are enough to create a sturdy and stylish base.
Measure before shopping, brace the sleeve before mixing, allow the concrete to cure, and choose plants that suit the light beneath the canopy. Most importantly, respect windy weather and close the umbrella when it is not actively being used.
The finished stand can provide movable shade, greenery, and personality while eliminating the need for an unattractive commercial base. It is practical outdoor engineering wearing a very convincing flowerpot costume.
Note: This design is intended for standard center-pole market umbrellas in suitable conditions. It is not a substitute for the manufacturer-required base for a cantilever umbrella, oversized canopy, rooftop installation, or highly exposed location. Always follow the umbrella manufacturer’s weight, installation, and wind-safety instructions.