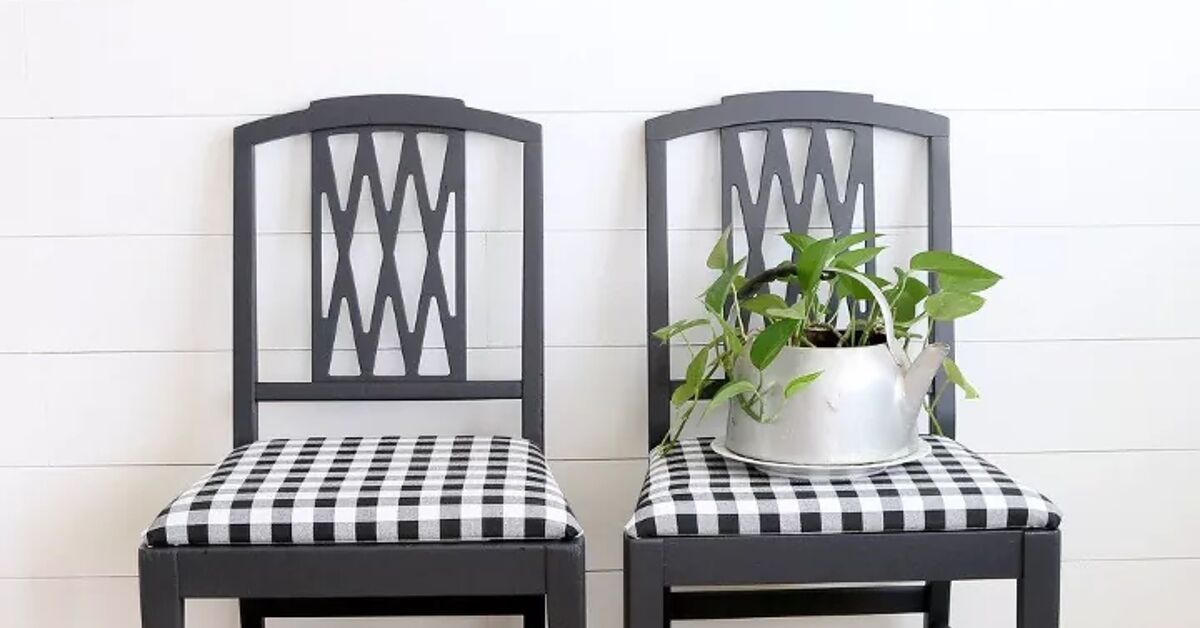
If your dining chair looks like it survived a spaghetti incident, a science fair, and one overly confident cat, do not banish it to the garage just yet. Learning how to reupholster a dining chair is one of those home projects that sounds fancy, looks impressive, and is surprisingly doable. In many cases, you can transform a tired chair in an afternoon with a few basic tools, the right fabric, and the willingness to pull out a suspicious number of old staples.
The best part is that reupholstering a dining chair can make your furniture look custom, not just “better than before.” You can freshen a formal dining set, modernize thrifted chairs, or rescue a family favorite without buying a whole new set. Whether you are dealing with faded fabric, flattened foam, or a chair seat that looks like it has been through three holidays too many, this guide will walk you through the process step by step.
Below, you will learn how to remove the old seat, choose the best upholstery fabric, replace padding if needed, staple the new material neatly, and finish the underside so the chair looks polished. By the time you are done, your dining chair should look less “yard sale mystery” and more “Where did you buy that?”
Why Reupholster a Dining Chair Instead of Replacing It?
There are good reasons to reupholster instead of replace. First, it is usually more affordable, especially if the chair frame is still sturdy. Second, it lets you keep solid wood furniture that might be built better than many new budget options. Third, it is a quick style upgrade. A new fabric can turn traditional chairs modern, make a bland dining set feel designer, or help mismatched thrift-store finds look intentionally coordinated.
It is also one of the easiest upholstery projects for beginners because many dining chairs have removable seat pads. That means you do not need industrial sewing skills, advanced carpentry knowledge, or a dramatic movie montage. You mostly need patience, decent scissors, and a staple gun that is ready to work harder than you planned.
What You Need to Reupholster a Dining Chair
- Dining chair with a removable seat
- Upholstery fabric
- Staple gun and matching staples
- Flathead screwdriver or butter knife for prying
- Needle-nose pliers or staple remover
- Scissors or rotary cutter
- Marker or fabric pencil
- Measuring tape
- Batting, if the seat needs extra softness
- Replacement foam, if the original foam is flat or crumbling
- Dust cover fabric or black cambric for the underside, optional but recommended
If you are doing a full set of chairs, an electric or pneumatic stapler can save time and hand strength. For one or two chairs, a good manual staple gun usually gets the job done just fine.
How to Choose the Best Fabric for Dining Chair Upholstery
Before you start tearing into the chair, pick the right fabric. This is not the moment to use flimsy fabric that wrinkles when someone merely looks at it. Dining chairs get daily wear, friction, crumbs, spills, elbows, pets, and the occasional guest who drops into the seat like they are auditioning for a wrestling event.
Look for upholstery-weight fabric that is tightly woven and made for furniture use. Performance fabrics are especially smart for dining rooms because they are built for everyday wear and are easier to clean. If your household includes kids, pets, red wine, or all three, durability matters just as much as color.
Texture matters too. A heavily textured weave can look beautiful, but it may trap crumbs. Velvet can feel rich, but it may show marks. Faux leather and vinyl are easy to wipe down, though they create a sleeker, more tailored look than soft woven fabric. Microfiber is often a practical choice because it tends to resist pulling, tearing, and everyday mess.
Also check the cleaning code before you buy. Upholstery fabrics often use codes like W, S, WS, or X. In plain English, that tells you whether the fabric can be cleaned with water-based products, solvent-based cleaners, either option, or vacuuming only. That tiny label can save you from future regret.
Measure Before You Cut
Remove the seat from the chair and flip it over. Most dining chairs have screws underneath that hold the seat in place. Unscrew them carefully and keep all hardware in a small bowl or labeled bag. This is a simple step, but losing one tiny screw can turn your DIY project into a scavenger hunt you did not ask for.
Once the seat is off, examine the existing fabric. If it is still intact, use it as your template. This is the easiest way to get the right size and shape. If you are measuring from scratch, lay the seat upside down on the new fabric and leave at least 3 inches of extra fabric around all sides so you have enough to wrap and staple securely.
If you are replacing batting, cut it several inches larger than the padded area so it wraps smoothly over the foam and edges. The goal is not just to cover the seat, but to create soft, rounded contours instead of a stiff, boxy look.
Step-by-Step: How to Reupholster a Dining Chair
1. Remove the Seat From the Chair Frame
Turn the chair upside down and locate the screws holding the seat in place. Use the correct screwdriver so you do not strip them. Lift the seat out and set the wood frame aside somewhere safe. This is the calm before the staple storm.
2. Remove the Old Fabric and Staples
Flip the seat over and start removing the staples from the old fabric. Use a staple remover, flathead screwdriver, or pliers. This part is often the most annoying step of the whole project, so if you suddenly start bargaining with the chair, that is normal.
Work slowly to avoid gouging the wood seat base. Once all the staples are out, peel off the old fabric. Save it. Even if it is ugly, stained, or looks like it has seen things, it is still useful as a pattern.
3. Inspect the Foam and Batting
If the foam still feels supportive and springy, you may be able to reuse it. If it is crumbling, uneven, or sad enough to inspire a speech, replace it. Use the old foam as a guide and cut new foam to match the seat shape. An electric carving knife, foam cutter, or sharp utility knife can help you get a cleaner cut.
If the seat just needs a softer finish, add a fresh layer of batting over the existing foam. Batting smooths out bumps, rounds the edges, and makes the finished chair look fuller and more professional.
4. Place the New Fabric
Lay the new fabric face down on a clean surface. If the fabric has a pattern, stripes, or obvious direction, take your time centering it. A floral print that drifts sideways on one chair will stare at you forever during dinner.
Place the batting and seat upside down on top of the fabric. Double-check the alignment before stapling. This is the last easy moment to fix it without drama.
5. Staple the Fabric From the Center Out
Start in the center of one side and place one staple. Move to the opposite side, pull the fabric snug, and place a second staple. Then repeat on the remaining two sides. This keeps tension even and prevents bunching.
Continue stapling outward from the center on each side, alternating sides as you go. Pull firmly, but do not yank like you are trying to start a lawn mower. You want the fabric smooth and tight, not stretched so hard that the pattern distorts or the foam compresses oddly.
As you work, keep checking the top side of the seat to make sure the fabric looks smooth. Little adjustments now save you from having to rip out staples later while whispering threats at the chair.
6. Fold the Corners Neatly
Corners are where a beginner project can suddenly look either polished or homemade in the wrong way. Treat the corner like wrapping a present. Pull the point of the fabric toward the center of the seat, flatten the excess into neat pleats, and staple as you go.
Try to keep the folds symmetrical from chair to chair, especially if you are working on a matching set. They do not have to be mathematically perfect, but they should look intentional.
7. Trim Excess Fabric
Once everything is stapled down, trim the extra fabric on the underside. Leave enough around the staples so nothing pulls loose, but remove bulky excess that could interfere with the seat fitting back into the chair frame.
Be careful not to cover or staple over the screw holes. That is a classic DIY mistake and a deeply irritating one.
8. Add a Dust Cover for a Finished Look
If you want the chair to look truly refreshed, add a dust cover to the underside. Cut a piece of black cambric or other breathable fabric using the old dust cover as a guide, or trim a new piece to fit neatly over the underside. Staple it around the edges so it hides raw fabric edges, batting, and staples.
This step is technically optional, but visually it makes a big difference. It is the equivalent of lining a jacket: most people may never comment on it, but it makes the whole piece look better made.
9. Reattach the Seat
Place the finished seat back into the chair frame and reinstall the screws. Tighten them securely, but do not overtighten to the point that you damage the wood. Then flip the chair upright and admire your work from several angles like the proud furniture magician you now are.
Common Mistakes to Avoid
- Using the wrong fabric: Lightweight fabric may wear out quickly or wrinkle badly.
- Skipping pattern alignment: Plaids, stripes, and florals need careful placement.
- Pulling unevenly: Uneven tension creates ripples and puckers.
- Ignoring the foam: New fabric cannot hide completely dead padding.
- Stapling over screw holes: This makes reassembly harder than it needs to be.
- Messy corners: Bulky folds can make the seat look amateurish.
- Rushing the staple removal stage: Leaving old staples behind can create lumps and snags.
How to Make Your Dining Chair Look Even More New
If you really want the makeover effect, do not stop at the seat. Clean the chair frame thoroughly. Touch up wood scratches with a furniture marker. Tighten loose joints. Polish the frame if it is wood, or repaint it if the style calls for it. New upholstery on a dusty, wobbly frame is like wearing a tuxedo with untied sneakers. The contrast is memorable, but not in the way you want.
You can also elevate the look by choosing thoughtful details. A contrast welt or piping creates a more tailored finish. A textured solid fabric can add depth without overwhelming the room. A bold print can turn a plain dining set into a statement piece. And if you are doing multiple chairs, repeating the same fabric on all seats instantly makes the room feel more pulled together.
How Long Does It Take?
For a simple removable seat, one chair can often be reupholstered in about an hour once you know the process. Your first chair may take longer because you are learning, measuring twice, and discovering that removing staples is somehow both tedious and weirdly personal. After that, the process speeds up. By chair number three, you will probably develop opinions about staple placement and start saying things like, “This corner fold is cleaner than the last one.” That is how it begins.
Experience and Real-World Lessons From Reupholstering Dining Chairs
One of the most common experiences people have when reupholstering a dining chair is underestimating how much the little details matter. From across the room, a chair seat looks simple. It is just fabric over padding, right? Then you start the project and realize that every tiny choice affects the final result. The direction of the pattern matters. The amount of pull matters. The way you fold the corners matters. Even the exact spot where you place the first staple can change how professional the seat looks when you are done.
Another very real experience is that the old chair usually tells you what it needs. Once the fabric comes off, you may discover foam that has flattened on one side, batting that has shifted, or a seat board that is still solid after years of use. That moment helps you decide whether this is a quick recover project or a more complete refresh. Many people start thinking they only need new fabric, then realize the foam is the real culprit behind that tired, lumpy look. Replacing or smoothing the padding can make the chair feel dramatically newer, not just look newer.
There is also a learning curve with tension. First-timers often either pull too loosely and end up with wrinkles, or pull too tightly and distort the shape of the seat. The sweet spot comes from alternating sides and checking the top often. That habit is what separates a rushed DIY result from a polished one. The good news is that dining chairs are forgiving. If a section looks off, you can remove a few staples and adjust it without redoing the entire seat.
Patterned fabric brings its own lessons. A striped or geometric fabric can look incredible, but only if it is lined up carefully before you staple. People often learn this the hard way after finishing a chair and noticing the stripes run slightly crooked. Once you see it, you cannot unsee it. Solid fabric is usually easier for beginners, but a patterned upholstery fabric can be worth the effort if you want a custom, designer-style finish.
Many DIYers also discover that doing one chair is a project, but doing a full dining set is a system. It helps to batch the process: remove all seats, strip all old fabric, cut all new fabric, then staple one by one. That assembly-line approach saves time and keeps the chairs looking more consistent. It also reduces the odds that one chair ends up overstuffed, another under-pulled, and a third somehow wrapped tighter than a burrito.
The most satisfying experience, though, is the before-and-after moment. A dated chair can become modern with a clean neutral fabric. A plain chair can become high-end with rich texture. A stained seat can become guest-ready again in one afternoon. Reupholstering gives you that rare home project win where the transformation is immediate, useful, and visible every day. You do not need a workshop, advanced tools, or a design degree. You just need patience, practical fabric, and the confidence to believe that the sad chair in front of you has potential.
Conclusion
Once you know how to reupholster a dining chair, it becomes one of the most rewarding small furniture upgrades you can do at home. It is affordable, beginner-friendly, and capable of making an old chair look stylish again without replacing the whole piece. The key is choosing durable upholstery fabric, working carefully from the center outward, folding corners neatly, and not ignoring the condition of the foam underneath.
In other words, the magic is not just in the new fabric. It is in the details. Take your time, keep the tension even, finish the underside cleanly, and your chair can go from worn-out to wow-worthy. And the next time someone compliments your dining room, you can casually say, “Oh, those? I reupholstered them.” Then enjoy the moment.