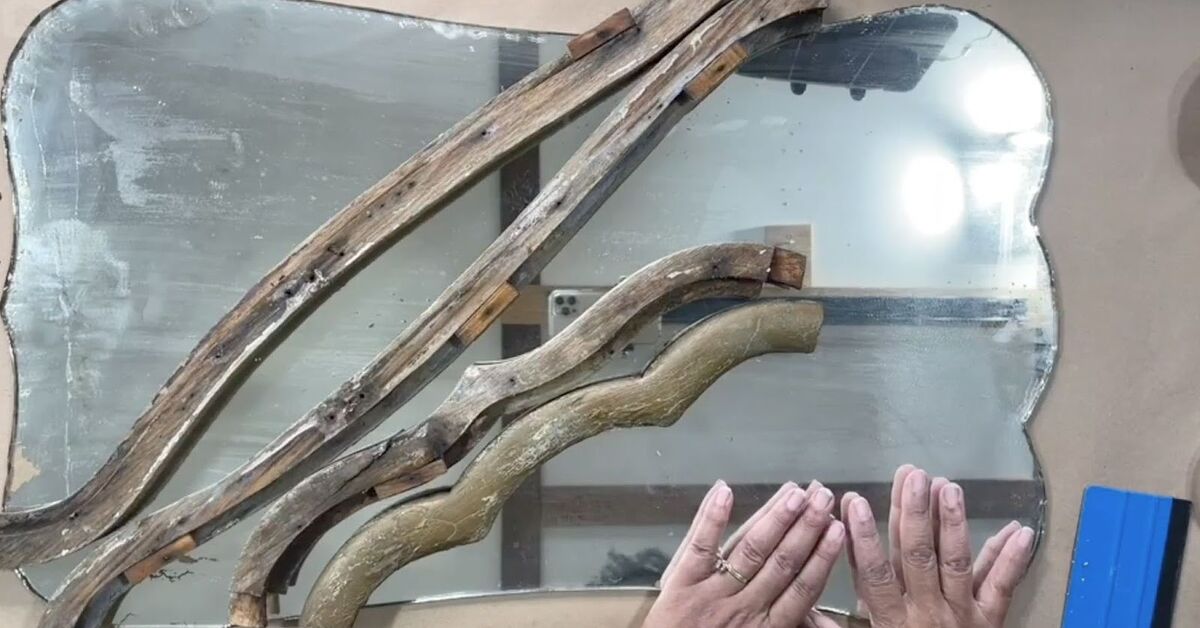
Some old mirrors have the emotional range of a Victorian novel: chipped corners, cloudy glass, a frame that once looked elegant but now looks like it survived three garage sales and a minor haunting. The good news? You do not need a full renovation budget, a carpentry degree, or a dramatic home-makeover montage to bring one back to life. With a vintage frame, a few smart materials, and a little patience, an old mirror can become the kind of statement piece people assume came from a boutique decor shop with candles that cost more than dinner.
Reviving an old mirror with a vintage frame is one of the most satisfying DIY home decor projects because it combines restoration, upcycling, and design in one manageable weekend project. It can brighten a hallway, make a small room feel larger, add character to a bathroom, or become the centerpiece above a mantel, dresser, or entryway table. Best of all, the process is flexible. You can preserve the aged charm, go bold with paint, add gilding wax, distress the frame, replace the glass, or turn a thrift-store find into a custom mirror that actually fits your style.
Why an Old Mirror Is Worth Saving
Before you haul that dusty mirror to the donation pile, take a second look. Vintage mirror frames often have details that are expensive to reproduce today: carved wood, layered molding, ornate corners, curved silhouettes, beveled edges, or metalwork with real personality. A new mass-produced mirror can look nice, but an old mirror has history. It has texture. It has possibly witnessed questionable wallpaper choices and survived.
Upcycling old mirrors is also budget-friendly and environmentally sensible. Instead of buying something new, you reuse existing materials and reduce waste. A vintage frame can be refinished many ways, from soft antique gold to matte black, warm wood stain, chalky white, or a weathered European look. The result feels custom because it is custom. Nobody else will have the exact same mirror unless your frame has a twin living in a mysterious attic somewhere.
Start with a Quick Mirror Assessment
The secret to an effortless mirror makeover is knowing what you are working with before you start. Lay the mirror on a padded surface and inspect the frame, glass, backing, and hanging hardware. Look for loose joints, missing decorative pieces, peeling paint, water damage, rusty nails, or cracked glass. A little wear is charming. A frame that crumbles when you touch it is less “vintage treasure” and more “future splinter incident.”
Check the Frame Structure
Gently wiggle the corners. If the frame shifts, reinforce it with wood glue, corner brackets, or small finishing nails. If decorative trim is loose, secure it before painting or staining. Small chips can be filled with wood filler, epoxy putty, or even moldable repair compound, depending on the frame material. For missing ornate details, silicone molds and resin appliques can recreate the look without requiring you to become a 19th-century woodcarver.
Inspect the Mirror Glass
Old mirror glass may have black spots, cloudy areas, scratches, or silvering loss around the edges. Some aging can look beautiful, especially if you want an antique effect. But if the glass is badly cracked or unsafe, replace it. Many local glass shops can cut mirror glass to fit an existing vintage frame. Bring accurate measurements or the frame itself if possible. The glass should sit securely without being forced.
Think About Safety First
If the frame is genuinely old and has peeling paint, be careful. Items painted before modern lead regulations may contain lead-based paint. Avoid sanding unknown old paint aggressively, especially indoors. If you suspect lead paint, use a lead test kit, seal the surface instead of disturbing it, or consult a professional. DIY is fun; inhaling mystery dust is not a personality trait.
Gather Your Supplies
You do not need a workshop full of tools to refresh a vintage mirror frame. Most projects require simple supplies that are easy to find at hardware stores, craft stores, or online.
Basic Tools and Materials
- Microfiber cloths
- Mild soap or wood-safe cleaner
- Painter’s tape
- Drop cloth or cardboard
- Fine-grit sandpaper or sanding sponge
- Tack cloth
- Wood filler or repair putty
- Primer
- Paint, stain, gilding wax, or metallic finish
- Small brush for detailed areas
- Spray paint if you want a smooth finish
- Clear protective topcoat
- New hanging hardware if needed
For ornate frames, keep a small artist brush nearby. It helps reach carved grooves and tiny corners where paint likes to hide like it owes rent. For a smoother modern finish, spray paint can work beautifully, but prep and light coats matter. Heavy spray paint coats create drips, and drips are basically paint’s way of saying, “You rushed me.”
Step 1: Clean the Frame and Glass
Start with cleaning. Dust, wax, old polish, and grime can prevent paint or stain from bonding properly. Use a dry microfiber cloth first, then wipe the frame with a slightly damp cloth and mild soap if needed. Avoid soaking wood or plaster frames. For ornate details, use a soft toothbrush to remove dust from grooves.
Clean the mirror glass separately with glass cleaner sprayed onto a cloth, not directly onto the mirror. Spraying liquid directly at the edges can seep behind the glass and damage the silvering. This is one of those tiny details that feels fussy until you avoid ruining the mirror. Then it feels genius.
Step 2: Protect the Mirror Surface
If you are keeping the glass in the frame while refinishing, protect it carefully. Apply painter’s tape along the inside edge of the frame. Cover the rest of the mirror with newspaper, kraft paper, or plastic. Press the tape down firmly so paint does not sneak underneath. Paint is sneaky. It sees a tiny gap and treats it like an invitation.
If the mirror can be removed safely, take it out before painting. This gives you cleaner edges and makes refinishing easier. However, many vintage mirrors have fragile backing or old fasteners, so do not force anything. If removal feels risky, leave the glass in place and mask it well.
Step 3: Repair Chips, Gaps, and Loose Details
Now fix the frame. Fill small dents, nail holes, cracks, or missing spots with wood filler or repair putty. For carved frames, shape the filler with a toothpick, craft stick, or small sculpting tool while it is still workable. Let repairs dry completely, then sand lightly until smooth.
If you want to preserve an aged look, do not over-repair. A tiny nick here and there adds authenticity. The goal is not to make the frame look factory-new unless that is your style. Vintage charm lives in the little imperfections. Think “collected over time,” not “attacked with a belt sander.”
Step 4: Lightly Sand for Better Adhesion
Light sanding helps primer and paint stick. Use fine-grit sandpaper or a sanding sponge and gently scuff the surface. You are not trying to remove every bit of the old finish. You are just giving the new finish something to grip. After sanding, wipe the frame with a tack cloth or slightly damp microfiber cloth to remove dust.
For glossy frames, sanding is especially important. Paint does not enjoy sticking to slick surfaces. It will pretend to cooperate and then chip later, usually right before guests arrive.
Step 5: Choose Your Vintage Frame Finish
This is where the mirror makeover becomes fun. The finish determines whether your old mirror feels romantic, rustic, dramatic, coastal, farmhouse, modern vintage, or full-on “I inherited this from a mysterious countess.” Here are several timeless options.
Antique Gold
Gold is classic for ornate vintage mirror frames. Use metallic paint, gold leaf, or gilding wax. For a softer antique look, apply dark glaze or brown wax into the crevices and wipe the high points clean. This creates depth and makes details pop without looking too shiny.
Matte Black
Matte black turns an old frame into a bold, modern statement. It works especially well in entryways, bathrooms, dining rooms, and gallery walls. Black also hides minor imperfections while highlighting the silhouette of the frame.
Warm Wood Stain
If the frame is real wood and the grain is attractive, consider stripping or lightly sanding the old finish and applying stain. Walnut, oak, and chestnut tones give a vintage mirror a warm, expensive look. Finish with clear wax or polyurethane for durability.
Chalky White or Soft Cream
A white or cream finish creates a relaxed cottage, French country, coastal, or shabby-chic style. Light distressing on raised edges can make the frame look naturally aged. Just do not distress every inch evenly; real age is random, not a zebra costume.
Two-Tone Patina
For extra depth, layer colors. Paint the base dark brown or black, then dry-brush gold, bronze, ivory, or sage green over the raised details. This technique works beautifully on carved frames because it emphasizes texture.
Step 6: Prime the Frame
Primer is the quiet hero of a lasting mirror makeover. It helps cover old colors, blocks stains, and improves adhesion. Choose a primer based on your frame material: wood, metal, plastic, plaster, or resin. Apply thin, even coats and let the primer dry according to the manufacturer’s instructions.
If your frame has lots of carved detail, use a small brush and avoid letting primer pool in the grooves. Thick primer can soften crisp details. The frame should look coated, not frosted like a cupcake.
Step 7: Paint or Finish in Thin Layers
Whether you brush, spray, wax, or stain, thin layers are the key. Two or three light coats usually look better than one heavy coat. Brush painting offers control and works well for detailed frames. Spray painting creates a smooth finish but requires excellent masking, ventilation, and patience.
When using spray paint, hold the can at a consistent distance and move in steady passes. Begin spraying slightly before the frame and continue past the edge to avoid blotches. Let each coat dry before adding another. Your future self will thank you for not touching tacky paint “just to check.” That fingerprint will haunt you.
Step 8: Add Age, Depth, and Character
A vintage frame makeover often looks best when the finish has dimension. After the paint dries, add antiquing glaze, dark wax, metallic wax, or dry-brushing. Focus on corners, carved recesses, and edges where natural wear would occur.
How to Distress the Frame Naturally
Use fine sandpaper to lightly rub raised areas, corners, and edges. Distress slowly and step back often. The best distressed finishes look accidental, not like the frame lost a fight with sandpaper. If you go too far, touch up with paint and try again.
How to Add Gilded Highlights
Dip a fingertip or small cloth into gilding wax and gently skim the raised details. Gold, antique brass, champagne, and copper finishes all work well. This method is easy, forgiving, and wildly satisfying. Suddenly, carved flowers and scrollwork appear like they just got proper lighting and a better agent.
Step 9: Seal the Finish
Once you love the look, protect it. Use a clear wax, water-based polyurethane, spray sealer, or another compatible topcoat. Bathrooms and humid spaces need extra durability, so choose a moisture-resistant finish. Matte sealers preserve a soft vintage look, while satin adds a subtle glow.
Let the frame cure fully before hanging. Dry-to-the-touch does not always mean fully cured. If you hang it too soon, hardware can mark the finish or the frame can stick to the wall. Patience is not glamorous, but neither is peeling paint.
Step 10: Upgrade the Backing and Hanging Hardware
An old mirror is only as safe as its hardware. Check the backing board, clips, wire, D-rings, screws, and wall anchors. Replace rusty or weak hardware. Heavy mirrors should be hung with hardware rated for their weight, and whenever possible, anchored into wall studs. For masonry, use appropriate anchors and drilling methods.
If the old backing is damaged, replace it with sturdy hardboard or thin plywood cut to size. Secure the mirror glass carefully with mirror clips, points, or suitable adhesive depending on the frame design. Avoid general construction adhesives directly on mirror backing unless they are labeled mirror-safe, because some adhesives can damage reflective coating.
Where to Use a Vintage Framed Mirror
A refreshed vintage mirror can work almost anywhere. In an entryway, it offers a last outfit check before you leave the house and pretend you are not running late. In a living room, it reflects light and creates a focal point. In a bedroom, it adds softness and character above a dresser. In a bathroom, it can replace a plain builder-grade mirror and instantly make the space feel more finished.
Above a Console Table
Pair the mirror with a narrow console, a lamp, and a small bowl for keys. This setup makes an entry feel intentional instead of “shoes live here now.”
Over a Fireplace
A vintage mirror over a mantel adds height, elegance, and light. Choose a mirror wide enough to feel balanced but not so large that it overwhelms the fireplace. Before hanging, check what the mirror reflects. A mirror reflecting a window, art, or chandelier is wonderful. A mirror reflecting the ceiling fan’s dusty top side is less magical.
In a Bathroom
A vintage frame can warm up tile, stone, and modern fixtures. If the room has moisture, seal the frame well and make sure the backing is protected. Wood frames can work in bathrooms if properly finished and ventilated.
Common Mistakes to Avoid
The biggest mistake is skipping prep. Paint over dust, wax, or gloss, and the finish may chip. Another mistake is choosing hardware that is too weak for the mirror’s weight. Mirrors are heavier than they look, and gravity is famously unforgiving.
Also avoid overdoing the theme. A vintage mirror does not require the whole room to look like a period drama. Mix it with modern furniture, clean lines, natural textures, or contemporary lighting. Contrast makes vintage pieces feel fresh instead of fussy.
Budget-Friendly Upgrade Ideas
If you want a high-end look without spending much, try these simple upgrades:
- Add gold or bronze wax to raised details.
- Paint the frame the same color as the wall for a built-in effect.
- Use black paint for instant drama.
- Replace damaged mirror glass with beveled glass.
- Add felt pads to the back so the frame sits evenly.
- Use a picture light above the mirror to make it feel gallery-worthy.
- Group smaller vintage mirrors together for a collected wall display.
Experience Notes: What Actually Makes This Project Feel Effortless
After working through old mirror makeovers, one thing becomes clear: the project feels effortless only when you stop trying to make the mirror perfect. Vintage frames are not meant to look like they came off a conveyor belt yesterday morning. Their charm is in the uneven edges, the softened corners, the carved details with tiny shadows, and the little dents that make you wonder where the mirror lived before it landed in your hands. The best makeovers respect that history while giving the piece enough polish to feel intentional.
One practical lesson is to decide the final style before opening a paint can. It sounds obvious, but many DIY disasters begin with “I’ll figure it out as I go.” That sentence has caused more creative chaos than glitter. Put the mirror in the room where it will hang, even temporarily, and look at the surrounding colors, metals, wood tones, and lighting. A gold frame might look elegant in a warm room but too flashy in a very cool-toned space. Matte black might look refined in a modern hallway but heavy in a small powder room unless balanced with lighter walls. A cream finish might look soft and romantic, but if the wall is already beige, the mirror may disappear like a polite ghost.
Another helpful experience is to test finishes on the back of the frame or an inconspicuous spot. Paint and wax can look completely different once they dry. Metallic finishes are especially dramatic. Some gold paints look antique and soft; others look like a marching band instrument. Testing first prevents regret, and regret is difficult to sand out of carved scrollwork.
For ornate frames, dry-brushing is often the easiest technique with the biggest reward. Load a brush with a tiny amount of paint, wipe most of it off, then skim the raised details. This creates instant depth without requiring artistic talent. It is the DIY equivalent of good lighting: suddenly everything looks better. Dark wax or glaze can also transform a flat paint job into something rich and aged. The trick is to apply it sparingly and wipe it back quickly. Too much dark wax can make a frame look dirty instead of antique.
Hardware is another area where experience matters. Many old mirrors come with tired wire, tiny hooks, or mysterious nails installed by someone with brave intentions and questionable math. Replace them. Weigh the mirror if possible, then choose proper D-rings, heavy-duty wire, French cleats, or wall anchors. A beautifully refinished mirror is not a success if it makes a dramatic midnight exit from the wall.
Finally, give the finished mirror a little styling support. A vintage framed mirror looks best when it has a conversation with the room. Add a lamp nearby so it reflects warm light. Place greenery, books, a ceramic bowl, or framed art below it. Keep the surrounding decor edited so the mirror can shine. The goal is not to make the mirror scream for attention; it should simply stand there looking effortlessly charming, as if it has always belonged there and definitely did not spend last weekend covered in painter’s tape on your kitchen table.
Conclusion
Giving new life to an old mirror with a vintage frame is one of the easiest ways to add character, light, and personality to your home. The process is simple: clean, repair, sand, prime, finish, seal, and hang safely. Yet the result can feel completely custom. Whether you choose antique gold, matte black, warm wood, distressed white, or a layered patina, the makeover turns a forgotten piece into decor with presence.
The best part is that vintage mirror makeovers do not demand perfection. In fact, they are better when they keep a little age and mystery. A nick here, a darkened groove there, a softly worn edgethese details tell a story. With the right finish and secure hardware, your old mirror can become the kind of piece that makes a room feel brighter, more thoughtful, and more collected. Not bad for something that may have started the week in a basement wearing dust like a cardigan.
Note: This article is original, web-ready content based on widely accepted DIY restoration, painting, mirror installation, upcycling, and home decor best practices from reputable U.S. home improvement, design, safety, and paint resources.