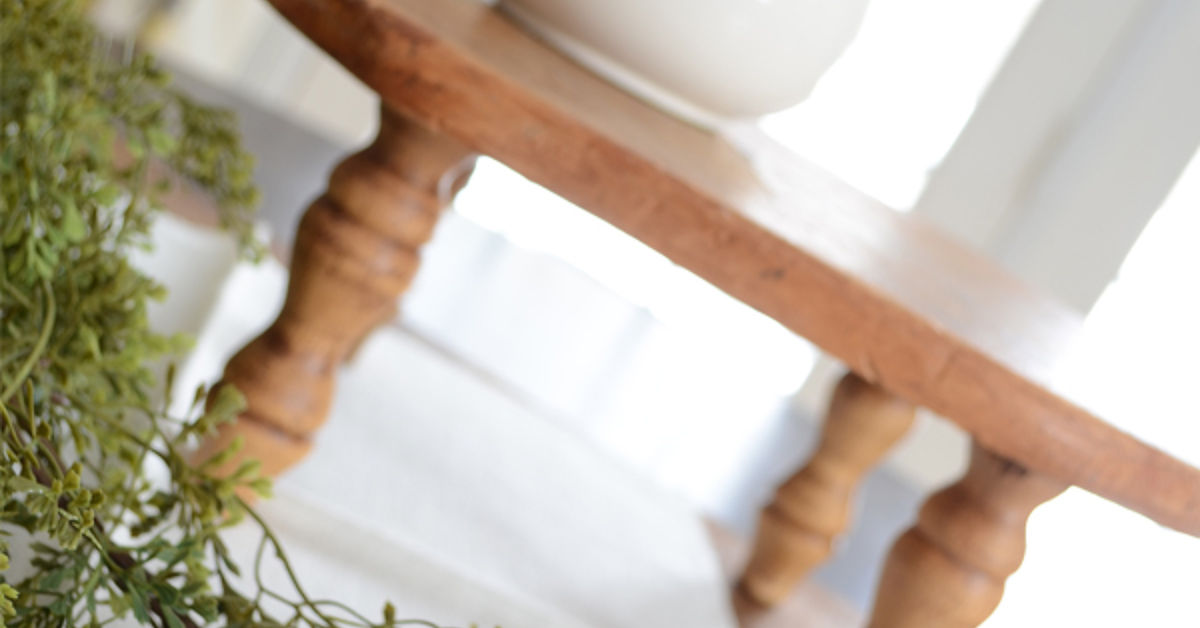
A vintage cutting board has a way of whispering, “I have stories.” Maybe it once held Sunday roasts, holiday pie crusts, or enough chopped onions to make an entire family cry for reasons unrelated to drama. Instead of hiding that old board in a cabinet, you can turn it into a beautiful Pottery Barn inspired pedestal that looks collected, rustic, useful, and just fancy enough to make store-bought muffins feel emotionally supported.
This project is all about creating elevated decor from something humble. Pottery Barn style often leans into warm wood, reclaimed textures, simple silhouettes, and serveware that adds height to a table or counter. A vintage cutting board already has most of that character built in. Add a sturdy base, clean it properly, refresh the finish, and suddenly you have a pedestal tray that works for candles, greenery, coffee bar styling, a bathroom vignette, wrapped treats, or a small seasonal centerpiece.
The best part? You do not need to be a master woodworker. You need patience, a little sanding, the right adhesive or screws, and a willingness to accept that rustic charm means “perfectly imperfect,” not “I measured this with NASA equipment.”
Why a Vintage Cutting Board Makes the Perfect Pedestal Top
A vintage cutting board is usually made from solid wood, and that makes it an excellent candidate for a DIY pedestal. Unlike thin decorative trays, a real board has weight, grain, patina, and visual depth. Scratches, darkened edges, small knife marks, and softened corners all contribute to the aged, collected look associated with high-end farmhouse and European-inspired home decor.
For this project, the board becomes the “top” of the pedestal. The base can come from a chunky wooden candleholder, a small turned furniture foot, a thrifted wooden bowl turned upside down, a salvage-store bun foot, or even a short section of table leg. The goal is to create a raised surface that feels substantial without looking bulky.
Best Cutting Board Shapes to Use
Round cutting boards make beautiful cake-stand-style pedestals. Rectangular boards look more like raised serving trays and are excellent for kitchen counters, islands, and coffee bars. Paddle boards with handles are especially charming because the handle adds instant character. If the board has a hanging hole, leave it visible for authenticity or thread a leather cord through it for a decorative detail.
A board with stains, grooves, or uneven color can still work beautifully as decor. However, if it has deep cracks, active mold, loose pieces, or a strong sour smell, do not use it for food service. It may still be repurposed for candles or decorative objects, but food safety comes first. No pedestal tray is worth a suspicious cheese situation.
Supplies You Will Need
Gather your materials before you start so the project feels creative instead of chaotic. A calm workspace is important, especially when glue, clamps, and sanding dust decide to audition for a slapstick comedy.
- One vintage wooden cutting board
- One wooden base, candleholder, bun foot, small bowl, or short pedestal piece
- Food-safe wood glue or strong wood adhesive suitable for the project
- Optional screws for extra support
- Clamps or heavy books for pressure while drying
- 120-grit and 220-grit sandpaper
- Soft cloths or paper towels
- Mild dish soap
- White vinegar or hydrogen peroxide for light sanitizing
- Food-grade mineral oil
- Beeswax board cream or wood wax, optional
- Pencil and measuring tape
- Drill, if using screws
- Eye protection and a dust mask for sanding
If you are younger or new to tools, ask an adult for help with drilling, cutting, or power sanding. This project can be simple, but spinning tools do not care how cute your pedestal idea is.
Step 1: Choose the Right Vintage Cutting Board
The right board should be solid, dry, and mostly flat. Place it on a counter and press gently on the corners. If it rocks slightly, that is not a deal-breaker, but heavy warping can make the finished pedestal unstable. Check both sides for cracks, loose joints, or soft spots.
Look for visual character. Old maple, walnut, acacia, olive wood, and other hardwood boards can age beautifully. A few knife marks are welcome. Uneven color is welcome. A slightly darker edge is very welcome. These details help the finished piece look like something discovered at a charming antique market rather than assembled during a five-minute panic before guests arrive.
When to Skip a Board
Skip any cutting board that smells musty even after cleaning, has black mold-like staining deep in the grain, is splitting apart, or has cracks that cannot be cleaned. If you love the shape but it is not food-safe, use it strictly as decorative display. Add a small card under the pedestal that says “decor only” if there is any chance someone might put snacks directly on it.
Step 2: Clean the Board Thoroughly
Before sanding or gluing, clean the board. Scrape away crumbs, wax, or old residue with a plastic scraper. Wash with mild dish soap and warm water, then rinse quickly. Do not soak the board. Wood absorbs water, and soaking can lead to swelling, cracking, or warping.
For odor or surface stains, sprinkle coarse salt over the board and rub it with half a lemon. You can also use a baking soda paste for stubborn spots. After cleaning, rinse lightly and dry the board immediately with a towel. Stand it upright so both sides can air-dry completely.
If you want to lightly sanitize the surface, use diluted white vinegar or 3 percent hydrogen peroxide, then rinse and dry. Keep the process gentle. The goal is to refresh the board, not punish it for having a past.
Step 3: Sand Without Erasing the Character
Sanding is where many DIY projects either level up or become suspiciously shiny. Start with 120-grit sandpaper if the board has rough patches, old finish, or raised grain. Sand with the wood grain, not against it. After the surface feels smoother, switch to 220-grit sandpaper for a softer finish.
Do not sand so aggressively that you remove every mark. A Pottery Barn inspired pedestal should feel warm and lived-in. Think “carefully restored,” not “brand-new cutting board wearing a vintage costume.” Keep darker edges, old knife marks, and natural variations if they add beauty.
Wipe away dust with a dry cloth. Avoid soaking the board after sanding. If you use a damp cloth, let the board dry fully before moving to glue or finish.
Step 4: Pick a Pedestal Base That Fits the Board
The base determines the personality of the finished piece. A turned wooden candleholder creates a classic cake-stand look. A chunky bun foot feels farmhouse and sturdy. A small inverted wood bowl creates a softer, rounded silhouette. A short table-leg section gives the pedestal a more architectural style.
How to Size the Base
As a general rule, the base should be wide enough to support the board without wobbling. For a small round board, one centered pedestal base may be enough. For a long rectangular board, consider two small bases or a longer rectangular support underneath. If the top is heavy, keep the pedestal low. Tall, narrow bases can look elegant, but they can also turn a wooden tray into a tiny diving board for candles.
Before attaching anything, place the board on the base and test the balance. Press gently on different edges. If it tips easily, choose a wider base or add support. A pedestal should feel confident, not dramatic.
Step 5: Mark the Center and Dry-Fit Everything
Flip the cutting board over and find the center. For a round board, measure across the diameter in two directions and mark the crossing point. For a rectangular board, measure length and width, then mark where the center lines meet.
Place the base on the mark and trace lightly around it with a pencil. This gives you a guide when applying glue. Dry-fit the pieces again and view them from the side. Make sure the base looks centered and proportional. This is the moment to adjust, not after the glue has started setting and your pedestal develops a mysterious lean.
Step 6: Attach the Base
Apply wood glue evenly to the top of the pedestal base or to the marked area on the underside of the cutting board. Press the pieces together firmly. Wipe away squeeze-out before it dries. Use clamps if possible. If clamps do not fit, place the pedestal upside down and add weight carefully with heavy books or another flat object.
Let the glue cure according to the manufacturer’s instructions. Many wood glues need several hours to set and longer to reach full strength. Do not rush this step. The pedestal may look finished, but glue needs time to build its bond. This is a great opportunity to clean up your workspace, admire your sanding dust collection, and pretend you always work this neatly.
Should You Add Screws?
If the pedestal will hold heavier decor, add screws from the underside of the base into the board, making sure they are short enough not to poke through the top. Pre-drill pilot holes to reduce splitting. If the pedestal may ever touch food, avoid exposed hardware on the top surface and keep all fasteners safely hidden underneath.
Step 7: Finish the Wood Beautifully
Once the base is attached and cured, apply food-grade mineral oil to the cutting board surface. Use a clean cloth and work the oil into the grain. Let it soak in for several hours or overnight, then wipe away any excess. This step deepens the color, highlights the grain, and helps prevent the wood from drying out.
If you want a slightly richer finish, add a beeswax board cream after the mineral oil has absorbed. Buff it gently until the surface feels smooth rather than greasy. Avoid olive oil, vegetable oil, or other cooking oils on cutting boards because they can turn rancid over time.
Food-Safe or Decorative?
If you plan to place food directly on the pedestal, use only food-safe finishes on the top surface and make sure the board itself is clean, stable, and free from deep cracks. For maximum safety, use parchment paper, a small plate, or a napkin under food. If you use stain, paint, polyurethane, or non-food-safe finishes, treat the piece as decorative only.
Pottery Barn Inspired Styling Ideas
A pedestal is not just a raised board. It is a tiny stage. What you place on it determines whether it whispers “designer kitchen” or shouts “random objects gathered during a power outage.” Keep the styling simple, layered, and seasonal.
Kitchen Counter Styling
Place the pedestal beside your stove or coffee maker. Add a small crock of wooden spoons, a salt cellar, a mini plant, and a folded linen towel. The raised height keeps everyday items looking intentional instead of cluttered.
Coffee Bar Display
Use the pedestal for mugs, sugar, cinnamon sticks, honey, or a small jar of biscotti. Add a tiny vase with greenery for softness. This is especially useful in small kitchens because vertical styling creates impact without taking up too much counter space.
Seasonal Centerpiece
For fall, style the pedestal with mini pumpkins, taper candles, and dried eucalyptus. For winter, use pine sprigs, bells, ornaments, and a white candle. For spring, add moss, small potted herbs, or pastel eggs. For summer, try lemons, a small bowl of berries, and fresh basil.
Bathroom Vanity Tray
If the board is no longer food-safe, move it to the bathroom. Use it for a candle, rolled washcloths, a glass jar of cotton rounds, and a small soap dish. The warmth of wood balances tile, stone, and metal finishes beautifully.
Common Mistakes to Avoid
The first mistake is choosing a base that is too small. A pedestal should not wobble every time someone walks past it. The second mistake is over-sanding. Removing all patina can make a vintage board look flat and generic. The third mistake is using the wrong oil. Cooking oils belong in salad dressing, not in long-term cutting board care.
Another common issue is using the pedestal for wet foods or heavy items when it was built mainly for decor. Unless you built it with strong joinery, proper adhesive, and a stable base, keep it for lighter displays. A few cookies are fine. A giant watermelon is a personality test your pedestal did not sign up for.
Maintenance Tips for Long-Lasting Beauty
Dust the pedestal regularly with a dry or slightly damp cloth. If it is used for dry food presentation, wipe it clean shortly after use and dry it immediately. Do not put it in the dishwasher. Do not soak it in the sink. Reapply food-grade mineral oil whenever the wood looks dry or dull.
Store the pedestal in a dry area away from direct heat and strong sunlight. Wood naturally expands and contracts with moisture and temperature changes, so gentle care helps preserve the finish and shape.
Experience Notes: What This Project Teaches You
Creating a Pottery Barn inspired pedestal from a vintage cutting board is one of those DIY projects that feels small at first, then quietly changes how you look at old objects. The first lesson is that character matters. A new board from a store may be flawless, but a vintage board has personality built into every mark. The dents and scratches are not flaws to hide; they are the reason the finished pedestal feels warm and authentic.
The second lesson is that proportion is everything. During the first dry-fit, a base that looks cute by itself may suddenly look too skinny under the board. Another base may seem oversized until you place it under a chunky rectangular board and realize it gives the piece the right visual weight. The best approach is to test several options before gluing. Walk around the piece. Look at it from counter height. Place a candle or bowl on top. If it feels balanced before glue, it will probably feel balanced after.
The third lesson is patience. Sanding takes longer than expected, especially if the board has an old finish. Glue takes longer than your excitement wants it to. Mineral oil needs time to soak in. The project rewards waiting. When you rush, you get smears, wobble, or a finish that feels tacky. When you slow down, the board begins to glow, the grain comes forward, and the whole piece starts looking like something from a boutique home store.
The fourth lesson is that styling makes the project come alive. A finished pedestal sitting empty may look nice, but once you add a linen napkin, a candle, a small plant, or a cluster of seasonal objects, it suddenly becomes decor. It creates height on a flat surface, and height is one of the easiest tricks for making a table, shelf, or counter look professionally arranged.
The final lesson is that DIY does not need to look homemade in the wrong way. It can look personal, collected, and elevated. A vintage cutting board pedestal is affordable, sustainable, and flexible. It can move from kitchen to dining table to bathroom shelf to holiday buffet without complaining. It is proof that good design is not always about buying more. Sometimes it is about seeing more potential in what already exists.
Conclusion
A Pottery Barn inspired pedestal made from a vintage cutting board is the kind of DIY project that delivers style without demanding a full weekend, a giant budget, or a garage full of professional tools. With the right board, a stable base, careful cleaning, light sanding, proper attachment, and a food-safe finish when needed, you can create a piece that feels rustic, elegant, and genuinely useful.
Use it for candles, plants, coffee bar essentials, seasonal decor, or dry food presentation with a protective layer. Let the old wood keep its stories. Let the pedestal add height and charm. And most importantly, enjoy the small thrill of saying, “I made that,” when someone asks where you bought it.