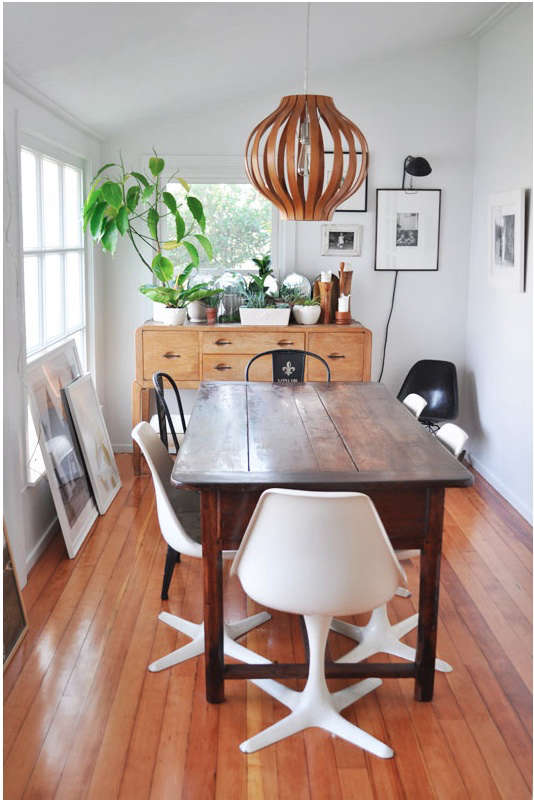
There is a special kind of design magic that happens when an ordinary object gets promoted. A humble clip light, usually found clamped to a dorm desk, studio shelf, or late-night reading nook, suddenly becomes a chic picture light. It leans over a framed print, sends a focused glow across a canvas, and whispers, “Yes, I studied lighting design in Milan,” even if it came from the hardware aisle.
The idea behind Design Sleuth: Clip Light as Picture Illumination is beautifully simple: use a clamp-on lamp to highlight wall art, photographs, posters, small paintings, gallery shelves, or framed collections without installing a hardwired picture light. It is renter-friendly, budget-conscious, flexible, and surprisingly stylish when done with intention. Instead of treating lighting as an afterthought, this approach turns it into part of the composition.
Traditional picture lights have long been used to give artwork a gallery-like presence. They add depth, drama, and a warm focal point to a room. But not every home needs a brass wall-mounted fixture, an electrician, or a commitment level normally reserved for kitchen renovations. A clip light offers a lighter, looser, more improvisational solution. Think of it as the design equivalent of rolling up your sleeves: practical, clever, and just polished enough to look intentional.
What Is Clip Light Picture Illumination?
Clip light picture illumination is the use of a clamp, clip-on, or adjustable task lamp to shine light onto framed artwork or decorative wall displays. Rather than being permanently mounted to the wall, the lamp attaches to a nearby shelf, picture rail, bookcase, frame edge, easel, pegboard, or other stable surface. The head of the light is then angled toward the art to create a soft highlight.
This approach borrows from three worlds at once: gallery lighting, studio task lighting, and casual modern decorating. From gallery lighting, it takes the idea of drawing attention to an object. From task lighting, it borrows adjustability and function. From modern decorating, it takes the confidence to say, “Why yes, the clamp is supposed to show.”
The best versions look relaxed but not random. A black metal clip lamp over a black-and-white photograph can feel industrial and graphic. A white clamp light against a white wall can almost disappear. A brass or bronze clip light can soften the effect and nod toward classic picture lighting. A colorful lamp can make the whole arrangement playful, especially in a child’s room, studio, or creative workspace.
Why a Clip Light Works So Well as a Picture Light
It Creates a Focal Point
Good interiors need visual hierarchy. Without it, a room can feel like everything is politely waiting for someone else to speak first. Lighting gives the eye a place to land. When a clip light illuminates a framed piece, that artwork becomes a focal point, even if it is a modest print, a family photograph, or a flea-market painting with mysterious emotional power.
Accent lighting is designed to highlight details: artwork, bookshelves, architectural features, textured walls, ceramics, plants, or sculptural objects. A clip light can perform this role in a smaller, more flexible way. It does not flood the entire room. It simply says, “Look here.”
It Adds Depth to Flat Walls
A flat wall with framed art can be attractive, but once you add angled light, the wall gains dimension. Shadows appear around the frame. Paper texture becomes visible. Brushstrokes, matting, and frame profiles stand out. Even inexpensive art can look more considered because the lighting suggests care.
This is the same reason restaurants, hotels, and galleries spend so much energy on lighting. Illumination does not just help us see objects; it changes how we value them. A poster under bad overhead lighting is a poster. A poster under a focused warm glow becomes a mood.
It Is Ideal for Renters
Hardwired picture lights are beautiful, but they require planning, tools, and sometimes professional installation. Renters may not be able to drill, cut into walls, or add electrical boxes. A clip light avoids the drama. Clamp it to a shelf, run the cord neatly along the edge, plug it in, and enjoy the glow. No landlord panic. No drywall confession. No “I thought I knew where the stud was” tragedy.
It Is Flexible When Your Art Changes
People who love art rarely leave their walls unchanged forever. New print? Rotate the gallery wall. Found photograph? Add it to the mix. Seasonal textile? Hang it up. A clip light can move with the display. Unlike a fixed picture light, which is married to one location, a clip light is more like a friendly design nomad.
How to Choose the Right Clip Light
Look for an Adjustable Head
The lamp head should tilt, pivot, or bend so you can control the beam direction. A gooseneck clip lamp is especially useful because it lets you fine-tune the angle. An architect-style clip lamp with a jointed arm can also work beautifully, especially for larger artwork or a more studio-inspired look.
Avoid clip lights that shine only straight down unless your mounting point is perfectly placed above the artwork. The goal is control. If the lamp refuses to aim properly, it will behave less like a picture light and more like a tiny interrogation lamp.
Choose LED Bulbs for Low Heat
LED bulbs are generally the smartest choice for illuminating art at home because they produce less heat than incandescent bulbs and are widely available in warm, dimmable options. Heat matters because artwork, paper, photographs, textiles, and pigments can be sensitive to environmental stress over time. A clip light should make your art look better, not slowly toast it like a decorative sandwich.
For valuable, antique, fragile, or original artwork, be extra cautious. Avoid direct sunlight, strong UV exposure, and hot bulbs. If the piece has museum-level importance, consult a professional conservator or use a purpose-built art lighting system with appropriate controls.
Pay Attention to Color Temperature
For most residential interiors, a warm white bulb between 2700K and 3000K gives artwork a flattering, comfortable glow. Around 2700K feels cozy and candle-adjacent, while 3000K can feel slightly cleaner and crisper. Very cool bulbs, such as 5000K or higher, can make a living room feel like a dental office that discovered abstract art.
Warm light is especially flattering for wood frames, vintage prints, oil paintings, sepia photographs, and rooms with soft textiles. If the art relies on very bright whites, blues, or contemporary color fields, a neutral warm tone around 3000K may preserve clarity without making the space feel cold.
Choose High CRI When Possible
CRI, or Color Rendering Index, describes how accurately a light source reveals color compared with natural light. For art lighting, look for bulbs or integrated LED lamps with a CRI of 90 or higher when possible. A high-CRI bulb helps reds, blues, greens, skin tones, and subtle neutrals appear more faithful. Low-quality bulbs can flatten colors or make everything look slightly off, which is not ideal when the whole point is to admire the art.
Use Dimmers or Smart Plugs
A dimmable clip light is far more useful than a single-brightness lamp. Artwork rarely needs to be blasted with light. A soft wash is usually enough to create atmosphere. If the lamp itself is not dimmable, a compatible smart plug or dimmable bulb may help, depending on the fixture and bulb type.
Dimming also improves the mood of the room. During the day, the light can stay off. In the evening, it can glow gently above a painting, turning a blank corner into a tiny private gallery. This is the kind of domestic luxury that feels fancy but does not require refinancing the sofa.
Where to Place a Clip Light for Picture Illumination
Above the Artwork
The most classic placement is above the frame, with the light angled downward. If there is a shelf, ledge, molding, or picture rail above the artwork, this can work beautifully. The beam should fall across the surface without creating harsh glare. If the artwork is behind glass, adjust the angle until reflections are minimized.
On a Nearby Shelf
A shelf-mounted clip light is one of the easiest solutions. Place the artwork below or beside the shelf, then angle the lamp toward it. This works especially well for casual gallery walls, leaning frames, and mixed vignettes with books, ceramics, and plants.
The shelf also helps hide the clamp and cord. Run the cord behind books or along the wall with discreet clips. The result looks relaxed, but not messy. There is a fine line between “artist’s studio chic” and “extension cord wilderness.” Try to stay on the chic side.
On a Bookcase or Cabinet
If your art hangs near a bookcase, clamp the light to the vertical side or top edge of the unit. This can create a layered lighting effect, especially in living rooms, bedrooms, and home offices. The lamp becomes part of the furniture arrangement rather than a separate wall fixture.
On a Frame or Easel
For sturdy frames or display easels, a small lightweight clip lamp can attach directly to the frame or support. This is best for casual pieces, not delicate frames or valuable artwork. Always check that the clamp does not scratch, dent, or stress the frame. Add felt pads if needed.
How to Avoid Glare, Shadows, and Awkward Lighting
Glare is the great villain of art lighting. It can turn a beautiful framed photograph into a mirror that reflects your ceiling fan. To reduce glare, angle the light so it washes across the art rather than bouncing directly into your eyes. If the art is behind glass, move the lamp slightly off center or adjust the tilt until the reflection disappears.
Shadows can be charming when they add depth, but distracting when they cut across the art. A very narrow beam may create a spotlight effect with a bright center and dark edges. For larger pieces, use a wider beam or place the lamp farther away. For small pieces, a narrow beam can work well, especially if you want drama.
Also watch for uneven color. Mixing a very cool clip light with warm lamps elsewhere in the room can make the artwork look disconnected. A consistent warm color temperature throughout the space usually feels more elegant.
Best Rooms for Clip Light Picture Illumination
Living Room
In a living room, a clip light can highlight art above a console, beside a sofa, or within a bookshelf wall. It adds a cozy evening layer without relying on the overhead light. This is especially helpful in rooms where the ceiling fixture is too bright, too central, or frankly too committed to ruining the vibe.
Bedroom
A clip light above a small framed print can double as soft bedside illumination. Clamp it to a headboard, shelf, or wall-mounted ledge. Choose a warm bulb and dim it low. The effect is intimate and calm, ideal for bedrooms where you want layered light instead of one harsh source.
Home Office
Home offices often need personality. A clip light can illuminate a favorite print, pinboard, framed certificate, or inspiration wall. It creates a more finished background for video calls and adds visual warmth to a space that might otherwise be dominated by screens and paperwork.
Dining Room
A small clip light focused on artwork near a dining table can make dinners feel more atmospheric. It adds a restaurant-like glow and gives guests something to admire between bites. Just make sure the light is not shining directly into anyone’s eyes. Nobody wants to discuss salad while being visually cross-examined.
Style Ideas: From Industrial to Soft Minimalist
Industrial Black Clip Light
A matte black clip light is the easiest way to create a graphic, modern look. Pair it with black frames, white walls, metal shelving, or vintage furniture. This style works well in lofts, studios, and minimalist spaces because it celebrates the functional look of the clamp.
Brass or Bronze Clip Light
A brass-toned clip lamp feels warmer and more decorative. It can mimic the richness of a traditional picture light without requiring permanent installation. Use it with wood frames, antique prints, oil paintings, or moody wall colors.
White Clip Light
A white clip light can disappear against a white wall or shelf, allowing the artwork to remain the star. This is a great choice for Scandinavian interiors, small apartments, children’s rooms, or any space where visual clutter needs to be reduced.
Colorful Clip Light
A red, yellow, blue, or green clip lamp can make the lighting part of the art arrangement. This works best when the color appears elsewhere in the room, such as in a pillow, rug, book spine, or artwork detail. Repetition makes the choice look deliberate rather than accidental.
Safety and Conservation Considerations
Clip lights are charming, but they still need to be used responsibly. Make sure the clamp is secure and the lamp cannot fall onto the artwork. Keep cords tidy and away from foot traffic. Use bulbs within the wattage rating of the fixture. If the lamp gets hot, switch to a lower-heat LED option or choose another fixture.
For original works on paper, textiles, photographs, watercolors, and delicate vintage pieces, limit light exposure. Even visible light can contribute to fading over time. Turn the lamp off when it is not needed, use lower brightness, and avoid placing sensitive art in direct sun. For everyday posters and replaceable prints, the risk is lower, but good habits still matter.
If you own valuable artwork, a clip light may be better used nearby rather than directly on the piece. In those cases, consider professional picture lighting, UV-filtering glazing, conservation framing, and controlled room conditions.
Practical Setup: A Simple Step-by-Step Approach
Step 1: Select the Artwork
Start with one piece you want to emphasize. A medium-size print, small painting, or framed photograph is ideal. Clip lights are best for targeted moments rather than large museum-scale canvases.
Step 2: Find a Secure Mounting Point
Look for a shelf, ledge, bookcase, headboard, picture rail, or sturdy frame edge. The clamp should grip firmly without damaging the surface. Add a felt pad if the clamp is rough.
Step 3: Test the Angle
Turn on the lamp and move the head slowly until the beam falls evenly across the art. Step back and view it from normal seating and standing positions. Check for glare, hot spots, and awkward shadows.
Step 4: Tidy the Cord
A beautiful lighting idea can be ruined by a cord wandering down the wall like it got lost. Use cord clips, cable channels, furniture placement, or decorative objects to keep the cord discreet.
Step 5: Adjust the Brightness
Lower brightness usually looks more sophisticated than maximum brightness. The goal is glow, not interrogation. If the art looks dramatic but the room still feels comfortable, you have found the sweet spot.
Common Mistakes to Avoid
Using a bulb that is too bright: More light is not always better. Strong light can create glare and flatten the room’s atmosphere.
Ignoring bulb color: Cool white bulbs can make warm interiors feel harsh. Choose 2700K to 3000K for most homes.
Clamping onto delicate frames: Heavy clamps can damage fragile frames. Use a nearby shelf or support instead.
Leaving sensitive art lit all day: Light exposure adds up. Turn the lamp off when you are not enjoying the display.
Forgetting the cord: A visible cord is not automatically bad, especially in industrial interiors, but it should look managed. Intentional is stylish. Tangled is just tangled.
Why This Small Design Trick Feels So Modern
The clip light as picture illumination feels modern because it values adaptability. Today’s homes often need to work harder than ever: living room, office, studio, dining area, guest room, and occasional storage facility for things we swear we are donating soon. Flexible lighting fits that reality.
It also reflects a broader shift in design culture. People want interiors that feel personal rather than showroom-perfect. A clip light has character. It suggests experimentation. It says the homeowner notices details and is willing to solve problems creatively.
Most importantly, it makes art feel present. A lit picture changes the emotional temperature of a room. It invites people to pause. It gives the wall a quiet glow. It turns a corner into a vignette. And it does all of that without requiring a major purchase or permanent installation.
Experience Notes: Living With a Clip Light as Picture Illumination
The first time you try using a clip light as picture illumination, the result may feel almost suspiciously easy. You clamp the lamp, angle the head, turn it on, and suddenly the wall looks more finished. It is the kind of upgrade that makes you walk out of the room and back in again just to admire your own cleverness. This is normal. Enjoy it. Design joy should not be rationed.
In real homes, this trick works best when you treat it as part of a larger lighting plan. A clip light over art should not be the only light in the room. It should be one layer among several: a floor lamp near a chair, a table lamp on a console, maybe a pendant or ceiling light used only when practical brightness is needed. When the room has multiple points of light, the clip lamp feels intentional and atmospheric rather than lonely.
One useful experience is to test the lamp at night, not just during the day. Daylight can hide lighting problems. At night, glare becomes obvious, shadows sharpen, and color temperature matters more. Sit where you normally sit. Walk past the artwork. Look at it from the doorway. If the bulb reflects in the glass or shines into your eyes, adjust the angle. A few inches can make a huge difference.
Another lesson: the clamp matters. Some clip lights have strong springs that grip securely but can leave marks on painted wood or delicate surfaces. Adding a small piece of felt, cork, or rubber between the clamp and the mounting surface can protect furniture and improve grip. If the lamp is heavy, do not rely on a thin frame or unstable shelf. Gravity is not a design partner you want to negotiate with.
Cord management also becomes more important than expected. At first, you may think, “It’s just a cord.” Then you take one step back and realize the cord has become the most noticeable line in the composition. The easiest fix is to run it along an edge: behind a shelf, down the side of a bookcase, or behind a console. Cord covers can help, but even simple adhesive clips can make the setup look much cleaner.
For renters, the clip light is especially satisfying because it gives the feeling of custom lighting without the commitment. You can use it above a framed poster in the living room, then move it to the bedroom next month, then clamp it to a kitchen shelf for a small still-life moment with cookbooks and ceramics. It supports the way people actually decorate: slowly, experimentally, and occasionally after seeing one inspiring photo and rearranging the entire apartment at 11:30 p.m.
The best part is how personal the effect becomes. A clip light does not need to illuminate expensive art. It can highlight a child’s drawing, a travel photo, a vintage map, a fabric sample, or a thrift-store painting that makes no logical sense but somehow belongs in your life. By shining light on it, you give it importance. That is the real design lesson here: lighting is not just about visibility. It is about attention.
After living with this setup for a while, many people discover that they look at their art more often. The glow catches the eye in the evening. The frame feels more dimensional. The wall feels more alive. And because the solution is so easy to change, there is no pressure to get it perfect forever. You can adjust, swap, move, and refine. That freedom is exactly what makes the clip light such a smart design sleuth discovery.
Conclusion
Design Sleuth: Clip Light as Picture Illumination proves that great decorating does not always require expensive fixtures or complicated installation. Sometimes, the smartest idea is already sitting on a desk, waiting for a promotion. With the right bulb, angle, clamp, and cord management, a simple clip light can become a stylish picture light that highlights artwork, adds depth, and makes a room feel warmer and more intentional.
This idea is especially useful for renters, small-space dwellers, art lovers, and anyone who enjoys flexible design. Choose warm LED light, aim for high color quality, keep brightness gentle, and protect delicate artwork from unnecessary exposure. The result is practical, attractive, and full of personality. In other words, it is exactly the kind of design trick that makes a home feel collected rather than decorated by committee.
Note: This article is original, written in standard American English, and synthesized from real interior design, art lighting, LED lighting, and conservation principles for web publishing.