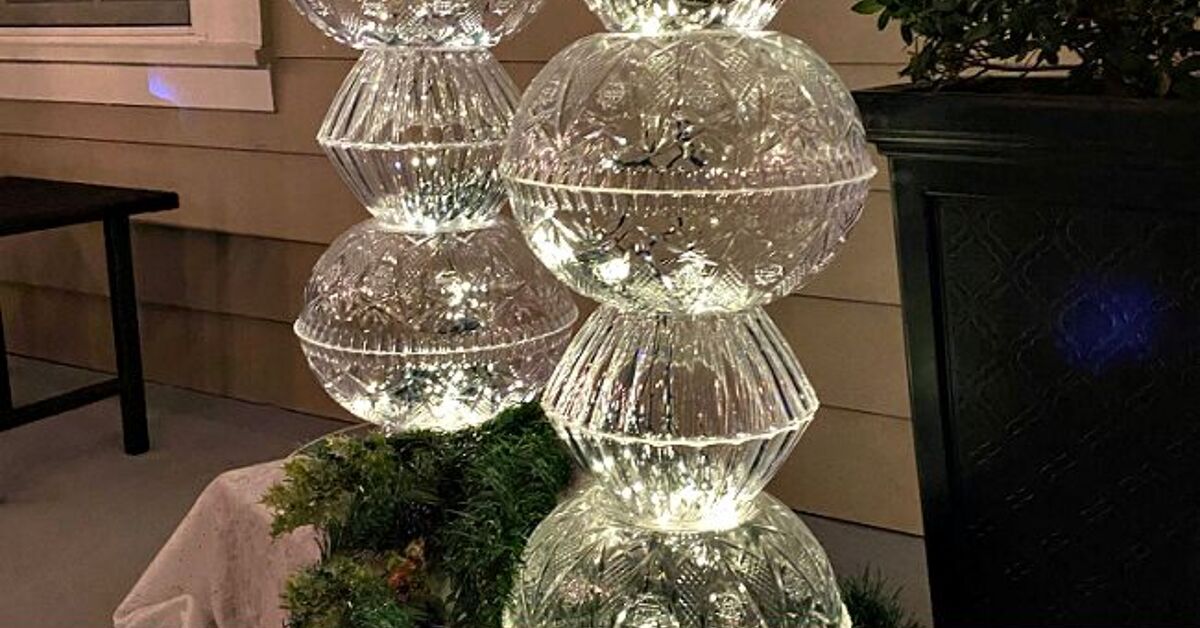
Want a front door that says “Merry Christmas” without also whispering “I emptied my bank account at the home decor store”? Good news: an easy dollar store Christmas topiary for front door decorating can look surprisingly high-end, cheerful, and polished with a handful of budget supplies, a little patience, and just enough hot glue to make you feel powerful.
Christmas topiaries are perfect for creating instant curb appeal. They add height, symmetry, color, sparkle, and that “someone here owns matching storage bins” energy. The best part? You do not need designer planters, expensive faux greenery, or a holiday decorating degree from the North Pole. With dollar store mini trees, ornaments, garland, floral foam, ribbon, zip ties, and a sturdy base, you can build a festive topiary that frames your entryway beautifully.
This guide walks through the supplies, design ideas, step-by-step instructions, styling tips, safety notes, and real-life experience behind making a budget-friendly Christmas topiary that looks charming from the sidewalk and fabulous in photos. Santa may still check his list twice, but your neighbors will only need one glance.
What Is a Christmas Topiary?
A Christmas topiary is a decorative arrangement shaped into a neat vertical form, often placed in a planter near the front door. It may look like a small cone tree, a stacked ornament display, a spiral evergreen, or a festive ball-shaped arrangement. Traditional topiaries are made from trimmed greenery, but holiday versions often use faux pine, shatterproof ornaments, ribbon, berries, lights, picks, and decorative stems.
For a front door, the goal is simple: create height and holiday style without blocking the walkway. A pair of topiaries on both sides of the door gives the most classic look, while one statement topiary can work beautifully for smaller porches, apartment entries, or narrow stoops.
Why Use Dollar Store Supplies?
Dollar store Christmas decorations are ideal for this project because topiaries need volume. One ornament is cute. Thirty ornaments, grouped together with greenery and ribbon, suddenly look like a boutique display that costs much more than it does.
Budget supplies also give you freedom to experiment. If you decide halfway through that your red-and-gold theme wants to become “peppermint candy cottage with a mild glitter problem,” you can adjust without guilt. Dollar store crafting works best when you layer inexpensive pieces until the final design looks full, intentional, and festive.
Best Dollar Store Items for a Christmas Topiary
Look for mini Christmas trees, plastic planters, floral foam blocks, faux pine stems, ornament packs, berry picks, wired ribbon, garland ties, battery-operated lights, decorative bows, faux snow, bells, candy cane picks, and zip ties. Shatterproof ornaments are especially helpful for outdoor decorating because they are lightweight and safer than glass.
Not every dollar store item needs to be used exactly as sold. Mini trees can be stacked, garland can fill gaps, ornaments can hide foam, and gift bows can become tree toppers. The secret is to see each item not as “cheap decor,” but as raw material. That sounds dramatic, but so is a porch with two glittering topiaries. We are leaning in.
Supplies You Will Need
For one easy dollar store Christmas topiary for front door display, gather the following:
- 1 medium plastic planter, bucket, or decorative pot
- 1 to 2 floral foam blocks or a foam cone
- 1 wooden dowel, broom handle, tomato stake, or sturdy stick
- 2 to 3 mini faux Christmas trees or several faux greenery stems
- Shatterproof ornaments in your chosen color palette
- Wired ribbon or a pre-made bow
- Holiday picks such as berries, pinecones, bells, or candy canes
- Zip ties, floral wire, and hot glue
- Small rocks, sand, bricks, or gravel to weigh down the planter
- Battery-operated outdoor-safe lights, optional
- Faux snow, moss, or extra garland to cover the base
If the topiary will sit outdoors, choose materials that can handle wind, moisture, and temperature changes. Battery lights should be rated for outdoor or covered outdoor use. If you use plug-in lights, check that both the lights and extension cords are labeled for outdoor use, and avoid overloading outlets or cords. A beautiful porch is wonderful; a safe porch is better.
Step-by-Step: How to Make an Easy Dollar Store Christmas Topiary
Step 1: Choose Your Color Theme
Before buying supplies, pick a simple color palette. Red and gold gives a classic Christmas look. Silver and white feels snowy and elegant. Red, white, and green looks playful. Black, white, and buffalo check creates a farmhouse style. Champagne, bronze, and evergreen feels more upscale.
Try to stay within three main colors. Dollar store aisles are wonderful but dangerous; one minute you are buying ribbon, the next minute you are holding glitter reindeer, blue snowflakes, and a sign that says “Sleigh All Day.” Stay strong. A focused palette makes inexpensive decorations look coordinated.
Step 2: Prepare the Planter
Place rocks, gravel, sand, or a brick inside the bottom of the planter. This step matters because front door topiaries are tall and can become wobbly. A weighted base helps prevent the topiary from tipping over when wind visits with attitude.
Next, wedge floral foam into the planter. If the foam is loose, secure it with hot glue or tuck extra cardboard around the sides. Insert the dowel or stake into the center of the foam. Push it down firmly so it stands straight. This stake becomes the backbone of the topiary.
Step 3: Build the Greenery Shape
If you are using mini faux trees, remove or adjust their stands and attach the trees to the stake with zip ties or floral wire. Stack two small trees vertically for extra height, placing the fuller tree at the bottom and the smaller one above it. Fluff the branches carefully. Dollar store trees often arrive looking like they just survived a long winter nap inside a cardboard box, so give them a little spa treatment.
If you are using loose greenery stems, insert them into the foam and wire them around the stake to create a cone shape. Fill empty spaces with garland ties or pieces of faux pine. Step back often to check the shape. A topiary does not have to be mathematically perfect, but it should look balanced from the front.
Step 4: Add Ornaments
Attach shatterproof ornaments with floral wire, ornament hooks, or hot glue. Start with larger ornaments first, placing them evenly around the topiary. Then use smaller ornaments to fill gaps. This creates depth and keeps the arrangement from looking flat.
For a designer look, cluster ornaments in groups of three. Mix matte, shiny, and glitter finishes. The different textures catch light beautifully and make the project look more expensive. If your ornaments have obvious seams, turn those toward the back. Crafting is partly creativity and partly hiding the evidence.
Step 5: Add Ribbon and Picks
Wired ribbon can be wrapped around the topiary like garland or tucked in as loops. Keep the ribbon loose and dimensional rather than pulling it tight. A few ribbon loops near the top, middle, and bottom can make the entire piece look fuller.
Then add berry picks, pinecones, bells, candy cane stems, or faux poinsettias. Use these accents sparingly. They should look like festive details, not like the topiary lost a fight with the craft aisle.
Step 6: Cover the Base
Hide the floral foam with faux snow, moss, extra garland, pinecones, or ornaments. This finishing step makes the topiary feel complete. You can also tie a large bow around the planter or wrap the pot in burlap, ribbon, plaid fabric, or a dollar store holiday scarf.
Step 7: Add Lights
Lights are optional, but they create a magical glow at night. Battery-operated LED fairy lights are the easiest choice for a covered porch because they avoid visible cords. Wrap the lights loosely around the greenery and tuck the battery pack into the back of the planter where it is easy to reach.
If you use plug-in lights, make sure they are outdoor-rated and connected safely. Avoid running cords across walkways where guests could trip. A Christmas topiary should impress visitors, not test their balance before they reach the doorbell.
Front Door Styling Ideas
Create a Matching Pair
Two matching topiaries placed on either side of the front door create instant symmetry. This is one of the easiest ways to make a porch look polished. Even if the rest of the porch is simple, matching topiaries give the entry a finished holiday frame.
Pair with a Wreath
A wreath above or between the topiaries ties the whole look together. Use the same ribbon or ornament colors from your topiary in the wreath. Repeating colors makes the display feel planned, even if your planning process involved coffee, coupons, and a cart with one squeaky wheel.
Add a Doormat Layer
Layer a patterned outdoor rug under a Christmas doormat for a cozy front door setup. Buffalo check, red plaid, black-and-white stripes, and natural coir mats all work well with holiday topiaries. This simple layer adds warmth and makes the topiaries feel like part of a complete scene.
Use Lanterns for Extra Glow
Outdoor lanterns with battery candles look beautiful beside topiaries. They add light without competing with the greenery. Place lanterns slightly forward and lower than the topiary to create a layered effect.
Design Variations to Try
Classic Evergreen Topiary
Use faux pine, red ornaments, gold ribbon, berries, and warm white lights. This style works with nearly any front door color and feels timeless.
Peppermint Candy Topiary
Use red and white ornaments, candy cane picks, striped ribbon, and white faux snow at the base. This style is cheerful, kid-friendly, and perfect for a playful porch.
Farmhouse Christmas Topiary
Use flocked greenery, burlap ribbon, buffalo check bows, pinecones, bells, and neutral ornaments. It looks cozy and handmade without being overly glittery.
Elegant Gold and White Topiary
Use white ornaments, champagne gold ribbon, pearl picks, and soft lights. This version looks more expensive than it is, which is basically the official mission statement of dollar store decorating.
How to Make It Look Expensive
The difference between “budget craft” and “boutique porch decor” usually comes down to fullness, balance, and editing. Use enough greenery to hide the structure. Repeat colors throughout the piece. Choose one statement ribbon instead of five unrelated ribbons. Use larger ornaments near the bottom and smaller ornaments near the top. Keep the front view clean and full, but do not forget the sides if people will see the topiary from the walkway.
Another trick is to upgrade the planter. A simple plastic pot can be placed inside a larger basket, metal bucket, ceramic planter, or thrifted urn. You can also spray-paint a dollar store container in matte black, white, bronze, or deep green for a more custom look. Let painted pieces dry fully before decorating.
Outdoor Durability Tips
Front door decor has to deal with real life: wind, rain, delivery boxes, curious pets, and the occasional relative who bumps into things while carrying pie. To help your Christmas topiary last through the season, secure ornaments with wire instead of relying only on glue. Use zip ties for heavy pieces. Place the topiary on a covered porch when possible. Bring it inside during severe weather.
For lights, choose outdoor-safe options and check manufacturer instructions. LED lights are a smart choice because they stay cooler and use less energy than older incandescent strands. If your display uses cords, keep connections off wet ground and avoid pinching cords under doors or rugs.
Common Mistakes to Avoid
Using a Base That Is Too Light
A tall topiary needs weight at the bottom. Without it, the whole thing may lean, wobble, or tip. Add rocks, sand, gravel, or a brick inside the planter before arranging the topiary.
Forgetting to Fluff the Greenery
Mini faux trees and garland often look thin straight out of the package. Take time to bend, spread, and shape every branch. This one step can make a dollar store tree look much fuller.
Using Too Many Colors
A limited palette looks more intentional. Choose two or three main colors, then repeat them throughout the topiary, wreath, doormat, and porch accents.
Ignoring Weather
Indoor ornaments, paper accents, and delicate glitter pieces may not survive outdoor conditions. For a front door display, choose plastic, wire, faux greenery, weather-tolerant ribbon, and covered outdoor placement whenever possible.
Budget Breakdown
The exact cost depends on your local store and what you already own, but many DIY Christmas topiaries can be made affordably by mixing dollar store finds with reused supplies. You may already have an old planter, leftover ornaments, ribbon scraps, or a strand of lights from previous years. Reusing materials keeps costs low and gives the project a more personal feel.
For one topiary, the main expenses are usually the planter, foam, greenery, ornaments, ribbon, and lights. Making two matching topiaries may cost more upfront, but you can often stretch supplies across both. One roll of ribbon, one pack of ornaments, and one garland can decorate two smaller topiaries if you plan carefully.
How to Store Your Christmas Topiary
At the end of the season, remove batteries from lights before storing. Dust off any faux snow or debris. If the topiary is sturdy and you have space, store it upright in a large bag or storage bin. If space is limited, remove the ornaments and ribbon, then save the greenery and planter separately.
Label the storage container clearly. Future you will appreciate not opening six mystery bins next December while muttering, “Where did I put the good ribbon?” Holiday decorating should begin with joy, not a storage-room treasure hunt.
Experiences and Practical Lessons from Making a Dollar Store Christmas Topiary
The first thing you learn when making an easy dollar store Christmas topiary for front door decor is that the project looks questionable before it looks beautiful. At the halfway point, it may resemble a tiny artificial tree wearing too many accessories and standing in a bucket of secrets. Keep going. Most DIY holiday decorations come together in the final 20 percent, when the ribbon, filler, and base covering suddenly make everything look intentional.
One helpful experience is to shop with your front door in mind. A topiary that looks bold inside the store may disappear outside if your porch is large or your door color is dark. For example, red ornaments pop beautifully against a black, navy, green, or white door. Gold and champagne tones look elegant near warm wood doors. Silver and white decorations can feel icy and bright, especially when paired with warm lights. Taking a quick photo of your front entrance before shopping helps you choose supplies that actually match your home.
Another real-world lesson: buy more greenery than you think you need. Sparse greenery is the number one reason a budget topiary looks unfinished. Dollar store mini trees and garlands can be thin, but that is easy to fix. Layer two trees together, wrap garland around the center, or add loose pine stems into blank spots. Once ornaments and ribbon are added, the fullness improves dramatically.
Stability is also more important than most beginners expect. A front door topiary is exposed to wind every time the weather changes or the door opens. A lightweight plastic planter may look fine, but it needs weight inside. A brick, rocks, sand, or gravel can save the project from becoming a festive tumbleweed. If you are making a pair, test both topiaries by gently nudging them before placing them outside. If they wobble indoors, they will definitely wobble outdoors.
Hot glue is useful, but it is not always enough for outdoor decor. Temperature changes and moisture can weaken glue over time. Floral wire and zip ties are less glamorous, but they hold better. The best approach is to wire important pieces first, then use glue to position smaller decorations. Think of glue as the assistant manager, not the boss.
Lighting is another area where experience helps. Battery-operated fairy lights are convenient, especially for renters or apartments where outdoor outlets are limited. However, the battery pack should be easy to reach. Do not bury it under five layers of ribbon and faux snow unless you enjoy tiny seasonal engineering challenges. If the topiary is under a covered porch, tuck the battery pack behind the greenery or inside a small plastic bag for extra protection.
Finally, the most satisfying part of this project is how customizable it becomes. You can make it elegant, playful, rustic, candy-themed, traditional, or totally over-the-top. You can match your wreath, coordinate with your doormat, or use leftover ornaments from your tree. The project is forgiving, affordable, and surprisingly fun. And when guests ask where you bought your festive front door topiary, you get the pleasure of saying, “I made it,” while casually pretending you did not spend ten minutes deciding where one tiny pinecone should go.
Conclusion
An easy dollar store Christmas topiary for front door decorating is one of the smartest holiday DIY projects because it delivers big visual impact on a small budget. With a sturdy planter, weighted base, faux greenery, shatterproof ornaments, ribbon, and a few festive accents, you can create a front entry display that feels cheerful, welcoming, and custom-made for your home.
The key is to build in layers: secure the structure, fluff the greenery, repeat your color palette, add ornaments in balanced clusters, finish with ribbon, and cover the base. Keep safety in mind when using lights outdoors, and choose weather-friendly materials whenever possible. Whether you make one topiary or a matching pair, this project proves that beautiful Christmas curb appeal does not have to come with a luxury price tag. Sometimes it starts with a dollar store cart, a glue gun, and a confident little voice saying, “Yes, I absolutely need more ribbon.”
Note: This article is written for web publishing in standard American English and synthesizes practical guidance from real U.S. DIY, craft, home-improvement, and holiday decorating best practices.