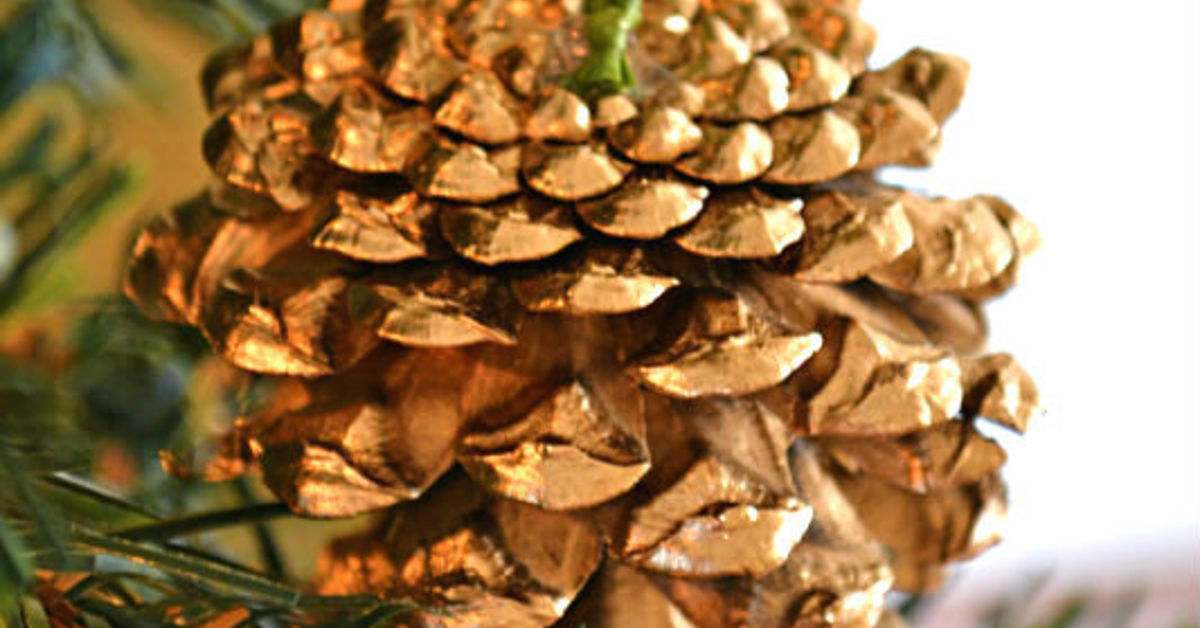
If you love holiday decor that feels equal parts cozy cabin and chic city apartment, the gilded pine cone ornament is basically your seasonal soulmate. It has everything going for it: natural texture, a little shimmer, and that “I casually have excellent taste” energy. And the best part? You do not need a designer budget, a secret trade account, or a West Elm shopping cart hanging over your head like an elegant little threat.
This West Elm-inspired knockoff takes one of winter’s most humble freebiesa pine coneand gives it a glow-up worthy of a mantel moment. It’s simple, affordable, and weirdly satisfying to make. One minute you’re holding something that looks like it fell off a damp hiking trail, and the next minute it looks ready to star in a holiday catalog next to linen stockings and a candle that smells like cedar, smoke, and excellent life choices.
Whether you want to dress up your Christmas tree, style a wreath, add a little sparkle to gift wrap, or create a handful of ornaments that look far more expensive than they are, this project hits the sweet spot. It’s approachable enough for a beginner, flexible enough for a seasoned crafter, and pretty enough that nobody needs to know it started with something squirrels probably ignored.
Why This Ornament Works So Well
The magic of a gilded pine cone ornament is all about contrast. Pine cones are rugged, earthy, and a little imperfect. Gold, on the other hand, is glamorous, polished, and never shy about being festive. Put those two together and you get the kind of holiday decor people love because it feels layered rather than loud. It reads rustic, but not dusty. Elegant, but not uptight. Fancy, but still willing to sit next to a mug of cocoa.
That balance is exactly why this style feels so West Elm-adjacent. Modern holiday decor often leans into clean shapes, natural materials, and a restrained metallic palette. Pine cones fit beautifully into that formula because they already bring shape and texture to the table. Add a soft gold finish, and suddenly they become sculptural ornaments instead of backyard clutter.
There’s also the practical side: pine cones are inexpensive, easy to source, and naturally lightweight enough for most branches, garlands, and hooks. You can make one for a styled shelf, ten for a tree, or twenty if you’ve decided this is the year every gift gets a pine cone topper and no one is leaving your house without admiring your wrapping skills.
What Makes a West Elm-Inspired Knockoff Feel Right
1. A restrained gold finish
The trick is not turning the pine cone into a disco ball unless that is your personal ministry. A good West Elm-style knockoff usually looks softly luminous rather than aggressively glittered. Think brushed gold, antique gold, champagne gold, or a warm metallic with a little depth. The cone’s texture should still show through.
2. Natural shape over perfect symmetry
Do not overthink every flap and petal. Pine cones are supposed to look organic. The slight irregularities are part of the charm. In fact, the best ornaments often have a little attitudeone side fuller than the other, a slightly tilted silhouette, that sort of thing. Holiday perfection is overrated anyway.
3. Minimal embellishment
Ribbon, twine, or a simple hanging loop is usually enough. You can add beads, bells, or faux snow, but if your goal is a modern designer look, less is more. This is not the moment for three bows, four berries, and a partridge in a craft-store aisle.
4. Thoughtful styling
Even a simple ornament looks high-end when it’s styled well. Pair it with velvet ribbon, matte ornaments, dried orange slices, wood beads, greenery, or neutral wrapping paper. Suddenly your DIY project stops looking like a Saturday craft and starts looking editorial.
How to Make a Gilded Pine Cone Ornament
Supplies
- Medium or large pine cones, foraged or store-bought
- Gold spray paint or metallic craft paint
- Hot glue gun and glue sticks
- Ribbon, twine, jute cord, or thin velvet trim for hanging
- Newspaper, kraft paper, or a drop cloth to protect your workspace
- Optional: fine glitter, craft wire, clear sealer, small beads, or mini bells
Step 1: Prep the pine cones
If you gathered your pine cones outdoors, give them a good shake to remove dirt and debris. Let them dry thoroughly before painting. You want clean, dry cones so the paint adheres well and the finish looks crisp instead of muddy. If one looks suspiciously like it came with woodland roommates, maybe let that one sit this round out.
Step 2: Choose your finish
For the quickest, smoothest result, spray paint is hard to beat. It gets into all the nooks and layers without requiring the patience of a saint. If you want more control, use a small brush and metallic acrylic paint. Brushing lets you highlight the tips only, creating a softer gilded effect that looks collected and custom rather than fully coated.
Step 3: Paint with intention
There are three good ways to approach the finish:
- Full gold coverage: bold, festive, and great for trees that need shine.
- Gold-tipped scales: more natural and a bit more sophisticated.
- Ombre gold: heavier at the base or tips for a modern, styled look.
Let the first coat dry fully before deciding whether it needs another pass. Pine cones have a lot of texture, which is wonderful for style and mildly annoying for impatience.
Step 4: Add the hanging loop
Cut a piece of ribbon, twine, or cord, then tie it into a loop. Hot glue the knotted end to the top or back of the pine cone where it will be least visible. For extra security, wrap a small piece of floral wire around the top scales first, then tie or glue the loop to that anchor point. If you plan to use the ornament on a fuller tree, a slightly longer loop helps it hang more gracefully instead of disappearing into the branches like a shy celebrity.
Step 5: Upgrade it, but don’t overdo it
If you want more sparkle, dust the still-tacky paint with a whisper of fine glitter. If you want it more elevated than sparkly, skip glitter entirely and add a velvet ribbon loop in cream, olive, rust, or black. A tiny wood bead or brass bell can also add charm without sending the ornament into “craft fair at the mall” territory.
Step 6: Seal and style
A clear finishing spray can help protect the paint, especially if the ornament will be handled, stored, or reused for years. Once dry, hang it on the tree, tuck it into a wreath, attach it to a napkin ring, or tie it to a wrapped gift. Congratulations: you now own a holiday accent with boutique energy on a budget-store timeline.
Tips for Making It Look Expensive
Pick the right gold
Not all gold is created equal. Bright yellow gold can veer flashy fast, while antique or champagne tones tend to feel softer and more refined. If your holiday decor leans modern, try a muted metallic. If your style is more traditional, a richer gold can work beautifully.
Use better ribbon
If you change nothing else, upgrade the hanging loop. Velvet ribbon, cotton twill tape, silk-like ribbon, or waxed linen cord instantly makes the ornament feel intentional. Cheap shiny ribbon can undo a very pretty paint job in about two seconds.
Mix finishes on the tree
A gilded pine cone ornament looks best when it has company. Pair it with matte ceramic ornaments, glass baubles, wood beads, brass bells, paper stars, or cream-colored decorations. The mix of finishes keeps the tree from looking flat and gives it that collected-over-time effect.
Embrace asymmetry
Designer styling rarely looks too perfect. Group ornaments in odd numbers, let ribbon tails fall naturally, and mix sizes. A cluster of three gilded pine cones on a wreath often looks better than one lonely cone trying to carry the entire season on its back.
Ways to Use a Gilded Pine Cone Ornament Beyond the Tree
This ornament is a multitasker, and frankly, we love that for it.
- Gift topper: Tie one onto brown kraft paper and suddenly your package looks curated.
- Wreath accent: Tuck a few into greenery for a modern woodland look.
- Place setting detail: Set one on each napkin with a name tag for instant holiday charm.
- Mantel styling: Scatter several in a bowl or along garland for subtle sparkle.
- Winter decor: Use them after Christmas too. Pine cones and gold still work beautifully through the rest of winter.
Common Mistakes to Avoid
Using wet or dirty pine cones: Paint and glue do not love mystery moisture.
Choosing a gold that’s too shiny: Unless you’re aiming for glam glam, a softer metallic usually looks more expensive.
Adding too many extras: Pine cones already have detail. Let the texture do some of the talking.
Weak hanging loops: Nothing ruins the mood like your ornament dropping off the tree and taking a lower branch with it.
Skipping a style test: Before making ten, finish one completely and hang it where you plan to use it. That one little test can save you from mass-producing something that looked better in your head.
Why This Knockoff Is Actually Better Than Buying the Original
Yes, the store version is lovely. But making your own has a few real advantages. First, you control the finish. Want a brushed antique look? Done. Want a softer champagne tone? Easy. Want black velvet ribbon instead of metallic string? You are the boss of this pine cone now.
Second, DIY lets you scale the project to your space. Maybe you want oversized pine cones for a dramatic wreath, smaller ones for gift wrap, and medium ones for the tree. Retail ornaments rarely give you that kind of freedom unless your wallet enjoys cardio.
Third, there’s a pleasure in making decor that feels personal. It may be inspired by a designer look, but once you tweak the color, the ribbon, and the styling, it becomes yours. And that is often what makes a home feel memorable during the holidaysnot the price tag, but the little details that feel specific to the people living there.
Experience: What It’s Really Like to Make a Gilded Pine Cone Ornament
There is a particular kind of satisfaction that comes from making something beautiful out of an object that was, five minutes earlier, basically yard debris. That’s the emotional arc of the gilded pine cone ornament. It starts with low expectations and ends with you holding it at arm’s length, turning it in the light like you’ve just discovered your hidden talent as a holiday stylist.
The first experience most people have is surprise. Pine cones are far more sculptural than we give them credit for. Once you actually sit down with a few different sizes, you start noticing how elegant they are. Some are squat and chunky, some are long and tapered, and some look like they were designed by a very dramatic woodland architect. When the gold goes on, all that texture comes forward. The scales catch the light, the shape feels more intentional, and what looked ordinary starts looking oddly luxurious.
Then there’s the painting part, which is equal parts fun and tiny act of faith. At first, a half-painted pine cone can look like a bad salon appointment. Patchy. Awkward. Slightly regrettable. But once the finish evens out and dries, it all comes together. That is the moment this project wins people over. It doesn’t demand expert skill. It just rewards a little patience and a willingness to trust the process, even when your ornament briefly resembles a metallic artichoke.
Adding the ribbon is where personality sneaks in. Gold cord gives it sparkle. Velvet ribbon makes it feel rich and soft. Jute twine leans rustic and laid-back. The choice changes the whole mood, which is part of the fun. You can make the same basic ornament feel glam, farmhouse, modern, organic, or somewhere in between. It’s a small project, but it has room for style.
And once it’s finished, the experience shifts again. Now it’s about placement. You hang it on the tree and suddenly the tree looks better. You tie one onto a package and the package looks expensive. You set three in a bowl with greenery and now your coffee table looks like it got its life together before you did. That versatility is probably the biggest delight of all. A single DIY ornament starts behaving like a whole decorating strategy.
There’s also a nostalgia factor baked into the experience. Pine cones are one of those materials that instantly feel seasonal without screaming. They remind people of winter walks, front porches, cold air, evergreen branches, and old-school holiday decorating before everything became battery-operated and suspiciously pre-fluffed. Gilding them doesn’t erase that warmth; it just gives it a more polished jacket.
Best of all, the project is forgiving. If one pine cone turns out weird, congratulations, it now has character. If the gold is uneven, it can look antique. If the ribbon is slightly crooked, call it organic. This is not a craft that punishes you for being human. It actually gets better when it feels a little handmade. That’s the charm. That’s the point. And that’s why so many people end up making one, then three, then a whole little collection because apparently the holiday decorating goblin in all of us loves a stylish pine cone with a gold finish.
Final Thoughts
A gilded pine cone ornament is proof that holiday decor does not need to be complicated to be beautiful. With one natural element, one metallic finish, and one simple hanging loop, you can create something that feels warm, elevated, and expensive in all the right ways. It captures that West Elm-inspired balance of modern and organic without requiring a designer checkout page.
So if your holiday decor needs a little sparkle, but your budget would prefer a calm and quiet winter, this DIY is a very smart place to start. It’s stylish, affordable, endlessly adaptable, and charmingly impossible to mess up. In other words, it’s the kind of project that deserves a spot on your tree, your gifts, your wreath, and possibly your annual list of “things I accidentally became smug about because they turned out so good.”