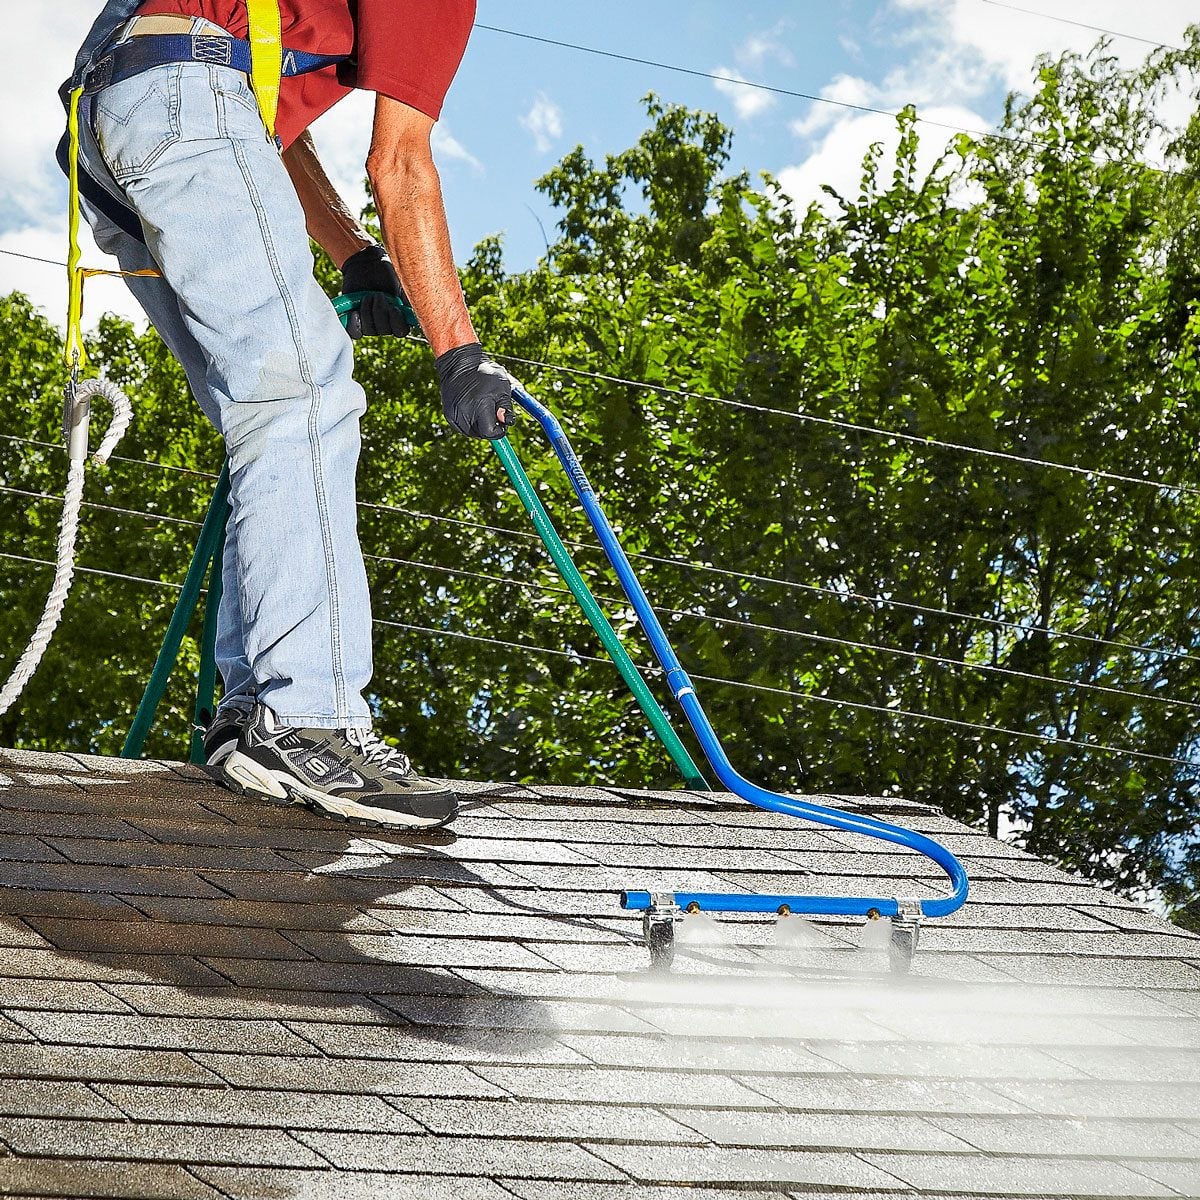
Roof stains are like uninvited guests at a backyard barbecue: they show up quietly, spread across the place, and suddenly everyone notices them. Those black streaks, green patches, and fuzzy moss colonies can make a perfectly healthy roof look like it has been through a swamp-themed makeover. The good news? Many roof stains can be cleaned safely with a DIY approach, as long as you use the right method, protect your landscaping, and resist the dramatic urge to blast everything with a pressure washer.
This guide explains how to clean roof stains on asphalt shingles, what causes those ugly marks, which cleaners work best, what tools you need, and when it is smarter to call a professional. The goal is simple: restore curb appeal without shortening the life of your roof. Because saving money is great, but accidentally sanding your shingles bald with high-pressure water is not exactly a homeowner victory lap.
What Causes Roof Stains?
Most dark roof stains are not dirt. They are usually caused by blue-green algae, commonly known as Gloeocapsa magma. This algae travels through the air, lands on shingles, and thrives in damp, shaded areas. If your roof has black streaks running downward, especially on the north-facing side or under overhanging trees, algae is probably the culprit.
Green patches may be moss, mildew, or a mixture of organic growth. Moss is more serious than simple staining because it can hold moisture against the roof surface. Over time, that moisture may encourage shingles to curl, lift, or deteriorate. Lichen, which often looks like crusty gray-green spots, can attach stubbornly to shingles and should be handled gently. The key word here is gently. Your roof is not a driveway, and it should not be treated like one.
Before You Start: Is DIY Roof Cleaning Safe for You?
Cleaning roof stains is doable for many homeowners, but it is not worth a hospital visit or a damaged roof. Before mixing cleaner or setting up a ladder, take a calm look at your situation.
Consider hiring a professional if:
- Your roof is steep, high, or difficult to access.
- Your home is more than one story.
- The shingles are old, brittle, cracked, or missing granules.
- You see heavy moss, lichen, sagging areas, or signs of leaks.
- You are uncomfortable working from a ladder.
If you proceed, work from a stable ladder whenever possible instead of walking on the roof. Wear slip-resistant shoes, eye protection, gloves, long sleeves, and old clothes. Bleach spots on clothing have a magical ability to appear exactly where you do not want them.
What Not to Do When Cleaning Roof Stains
Let’s start with the roof-cleaning sins, because avoiding damage is half the job.
Do not pressure wash asphalt shingles
A pressure washer can strip away the protective granules on asphalt shingles. Those granules help shield the roof from sunlight, weather, and wear. Once they are gone, they do not grow back like grass after a rainy week. High pressure can also lift shingles and force water under the roof covering.
Do not scrub aggressively
A soft-bristled brush may be used carefully for loose debris, but hard scrubbing can damage shingles. If the stain does not come off immediately, apply cleaner again later rather than attacking the roof like you are cleaning a cast-iron skillet.
Do not mix cleaning chemicals
Never mix bleach with ammonia, vinegar, acids, or other cleaners. Dangerous gases can form. Use one cleaning method at a time, follow label directions, and rinse thoroughly.
Do not clean on a hot, sunny, windy day
A roof cleaner needs time to sit on the stain. Direct sun can dry the solution too quickly, and wind can blow mist onto your face, plants, windows, siding, or your neighbor’s prized convertible. Choose a calm, overcast day with no rain in the forecast.
Tools and Materials You Will Need
- Garden hose with spray nozzle
- Pump sprayer or hose-end sprayer
- Household liquid chlorine bleach or roof-safe cleaner
- Water
- Non-ammonia dish soap, optional, for cling
- Plastic sheeting or tarps for plants
- Gloves, goggles, long sleeves, and slip-resistant shoes
- Ladder with stabilizer, if needed
- Soft-bristled broom or brush for light debris only
For asphalt shingles, a common DIY solution is a diluted mix of household bleach and water. Many roof-cleaning recommendations use a 50/50 mixture for algae and moss, while some homeowners prefer a gentler starting ratio such as one part bleach to three parts water for lighter staining. The right strength depends on the stain, roof condition, and product instructions. When in doubt, start mild and repeat rather than going full mad scientist.
Step-by-Step: How to Clean Roof Stains DIY
Step 1: Inspect the roof from the ground
Walk around your home and look for missing shingles, damaged flashing, clogged gutters, loose granules, lifted edges, and heavy moss. Use binoculars if needed. If the roof already looks fragile, cleaning may make problems worse. In that case, call a roofer before spraying anything.
Step 2: Protect plants, grass, and outdoor surfaces
Bleach-based cleaners can damage landscaping. Before applying cleaner, thoroughly soak shrubs, flowers, grass, and nearby plants with plain water. Cover delicate plants with plastic sheeting, but do not leave plants covered too long on a warm day or they may overheat. Also move patio furniture, grills, pet bowls, and decorations away from the drip line.
Step 3: Clear loose debris
Remove leaves, sticks, and loose debris from the roof and gutters. Work gently. If you can do this from a ladder or with a roof rake from the ground, even better. Avoid dragging tools across shingles.
Step 4: Mix the cleaning solution
For common black algae streaks on asphalt shingles, mix household liquid chlorine bleach with water in a pump sprayer. A strong roof-cleaning mix is often equal parts bleach and water. For lighter stains, begin with one part bleach to two or three parts water. You may add a small amount of non-ammonia dish soap to help the solution cling to the shingles, but keep it minimal to avoid excessive suds.
Never use ammonia-based soap. Never add vinegar. Never combine bleach with another roof cleaner unless the product label specifically allows it. Your roof does not need a chemistry experiment with special effects.
Step 5: Apply from the bottom up or in small controlled sections
Spray the stained shingles evenly. Some pros prefer working from the lower area upward to reduce streaking and help manage runoff, while others work from the ridge downward with controlled spray. For DIY cleaning, the most important rule is to work in small sections and avoid oversaturating the roof.
Apply enough solution to wet the stains, not enough to create a bleach waterfall. Keep the spray low pressure. You are coating the shingles, not power-rinsing the roof.
Step 6: Let the cleaner dwell
Allow the solution to sit for about 15 to 20 minutes. Do not let it dry completely. If the roof starts drying too fast, lightly mist the area again. During this dwell time, the cleaner breaks down algae, mildew, and organic staining.
Step 7: Rinse with low-pressure water
Rinse thoroughly with a garden hose using low pressure. Spray downward with the slope of the roof so water does not push under shingles. Avoid blasting edges, vents, flashing, or ridge caps.
Some stains may fade immediately; others lighten over several days or weeks as weather helps wash away dead growth. Moss and lichen may turn brown or white before releasing naturally. Do not yank stubborn growth off the roof. Pulling moss can pull granules with it.
Step 8: Rinse landscaping again
After the roof is rinsed, rinse plants, grass, siding, windows, and any surfaces exposed to runoff. This step is not optional. Think of it as sending your shrubs a thank-you note for surviving your home improvement project.
How to Remove Different Types of Roof Stains
Black streaks
Black streaks are usually algae. A bleach-and-water soft wash is typically effective. If the streaks are light, start with a mild solution. If they are dark and widespread, a stronger 50/50 mix may be needed. Expect some stains to fade gradually after rinsing.
Green moss
Moss needs patience. Apply cleaner, let it dwell, and rinse gently. Thick moss may take repeat treatments. Once moss dies, it often loosens over time. Avoid scraping it aggressively because moss roots can be attached to shingle granules.
Lichen spots
Lichen is stubborn. Treat it gently and let weather do part of the work. A second application a few weeks later may help, but forceful scrubbing can do more harm than good.
Rust stains
Rust-colored stains may come from metal flashing, chimney caps, satellite mounts, or HVAC runoff. Bleach will not fix true rust. Use a cleaner labeled safe for your specific roof material, and test carefully. If rust is coming from a metal component, solve the source or the stain will return.
Tree stains and tannins
Leaves, acorns, pine needles, and overhanging branches can create brown stains. Remove debris regularly and trim branches to increase sunlight and airflow. A mild roof-safe cleaner may help, but prevention is the real hero.
Commercial Roof Cleaners vs. Homemade Solutions
Commercial roof cleaners can be convenient, especially hose-end products designed for algae, mold, and mildew. Some are bleach-based and work quickly. Others are bleach-free and may be gentler around plants, though they may require more time or repeated applications.
Homemade bleach-and-water solutions are inexpensive and effective for common algae stains, but they require careful handling. Commercial products usually provide clearer coverage rates, directions, and safety instructions. Whichever route you choose, make sure the cleaner is labeled safe for your roof type.
How to Prevent Roof Stains from Coming Back
Cleaning roof stains is satisfying, but preventing them is even better. Algae and moss love shade, moisture, and debris. Change those conditions and your roof has a better chance of staying clean.
Trim overhanging branches
Branches shade the roof and drop organic debris. Trimming them back allows more sunlight and airflow, which helps the roof dry faster after rain.
Keep gutters clean
Clogged gutters can trap moisture near the roof edge. Clean gutters at least twice a year, and more often if you have trees nearby.
Install zinc or copper strips
Zinc or copper strips installed near the roof ridge can help reduce future algae growth. When rainwater passes over the metal, trace amounts wash down the roof surface and discourage growth. This is not instant magic, but it can help over time.
Consider algae-resistant shingles
If your roof is nearing replacement, algae-resistant shingles may be worth considering. Many modern asphalt shingles include copper-containing granules designed to resist blue-green algae discoloration.
Common DIY Roof Cleaning Mistakes
Using too much cleaner
More is not always better. Oversaturating the roof increases runoff, wastes product, and raises the risk of plant damage. Apply enough to wet the stain and let the solution work.
Letting bleach dry on shingles
Bleach solution should not dry completely on the roof. Work in manageable sections and rinse thoroughly.
Cleaning during the wrong weather
Hot sun, strong wind, freezing temperatures, and incoming rain are all bad news. Choose a mild, cloudy day.
Ignoring roof age
An older roof may not tolerate cleaning as well as a newer one. If shingles are brittle or shedding lots of granules, cleaning may expose bigger problems.
When to Call a Professional Roof Cleaner
DIY roof cleaning is best for light to moderate stains on a roof that is safe to access. Call a professional if the roof is steep, tall, heavily stained, covered with thick moss, or visibly damaged. Professionals have soft-wash equipment, safety gear, runoff-control practices, and experience reading roof conditions.
Also call a roofer if stains are accompanied by missing shingles, leaks, sagging, rot, or unusual dark patches inside the attic. Not every roof problem is cosmetic. Sometimes the stain is just the messenger wearing an ugly hat.
DIY Experience Notes: What Homeowners Learn the First Time
The first lesson many homeowners learn is that roof cleaning is slower than it looks in online videos. In a video, the stain disappears in a satisfying swipe, birds sing, and the house instantly looks ready for a real estate brochure. In real life, you spend half the project moving hoses, adjusting ladders, protecting plants, and wondering why you own so many shrubs directly beneath the dirtiest section of roof.
One practical experience tip is to test a small area first. Pick a stained section that is not front-and-center, apply your cleaner, wait, rinse, and check the result. This helps you confirm that the solution is strong enough without overdoing it. It also shows whether the “stain” is actually algae or something else, such as rust, worn shingles, or old granule loss. If the color does not change at all, more bleach may not be the answer.
Another lesson: plant protection takes more water than expected. Wet the landscaping before covering it, then rinse it during and after the job. If runoff is heavy, pause and rinse again. Many DIYers focus so hard on the roof that they forget what is below it. The roof looks cleaner, but the hydrangeas look personally betrayed. Avoid that drama by assigning one person to monitor plants and runoff if possible.
It also helps to plan your hose route. A hose snagged around a porch chair, downspout, garden statue, or bicycle can turn a simple rinse into a slapstick routine. Clear the work area first. Keep pets and kids indoors. Let nearby family members know you are working with bleach solution so nobody wanders outside barefoot asking why the patio smells like a swimming pool.
Expect gradual improvement, especially with moss and lichen. Algae streaks may lighten quickly, but moss can take time to die, dry, and release. Do not panic if everything is not perfect the moment you rinse. A second light treatment later is safer than one harsh cleaning session. The roof did not get stained overnight, and it does not always return to magazine-cover status in one afternoon.
Finally, the best DIY roof-cleaning experience comes from knowing when to stop. If the ladder feels unstable, the roof feels slippery, the wind picks up, or the cleaner is drifting, stop. If you discover damaged shingles or soft spots, stop. A clean roof is nice; a safe homeowner is better. The smartest DIYers are not the ones who do everything themselves. They are the ones who know which jobs are reasonable, which jobs need better conditions, and which jobs deserve a trained pro with the right gear.
Conclusion
Cleaning roof stains DIY can dramatically improve your home’s curb appeal, but the safest method is not the loudest or fastest one. For asphalt shingles, low-pressure soft washing with a roof-safe cleaner is the standard approach. Avoid pressure washing, harsh scrubbing, chemical mixing, and sunny-day shortcuts. Protect your plants, rinse thoroughly, and let the cleaner do the work.
Black streaks, moss, and mildew may look intimidating, but with patience and the right process, many stains can be handled without damaging your roof. Start mild, work carefully, and keep prevention in mind by trimming branches, cleaning gutters, and improving airflow. Your roof protects everything under it, so treat it less like a sidewalk and more like the expensive, weather-beaten hat your house wears every day.
Note: Always follow your roofing manufacturer’s maintenance instructions and the label directions on any cleaning product. If your roof is steep, high, fragile, or heavily covered with growth, hire a qualified professional instead of attempting the job yourself.