Editorial note: This article is original content written for web publication and is based on current WeatherTech care guidance, automotive detailing best practices, and general vehicle floor-mat safety recommendations.
WeatherTech floor mats are the bodyguards of your car’s interior. They stand between your carpet and a daily parade of mud, coffee drips, road salt, beach sand, melted snow, drive-thru French fries, and whatever mysterious crumb colony is living under the driver’s seat. But even the toughest all-weather mats need a proper cleaning routine. Otherwise, those deep grooves that are supposed to trap messes start looking like a tiny topographical map of bad decisions.
The good news is that learning how to clean WeatherTech floor mats is simple. You do not need a professional detailing bay, a hazmat suit, or a $400 gadget that sounds like it belongs on a spaceship. With warm water, the right cleaner, a brush, and a little elbow grease, you can restore your WeatherTech FloorLiners or floor mats to a clean, matte, safe-to-drive finish.
This step-by-step guide explains exactly how to clean WeatherTech floor mats, what products to use, what mistakes to avoid, and how to keep your mats looking fresh through rain, snow, school drop-off chaos, pet adventures, and snack-related emergencies.
Why WeatherTech Floor Mats Need Special Care
WeatherTech mats are popular because they are designed to protect vehicle interiors from heavy everyday abuse. Many WeatherTech FloorLiners are custom-fit to the shape of the vehicle floor, with raised edges and channels that help contain dirt, slush, spills, and debris. That design is excellent for protection, but it also means grime can settle into grooves, corners, and textured areas.
Unlike carpet mats, WeatherTech floor mats are not meant to be tossed into a washing machine or blasted with random household chemicals. They are usually made from durable rubber-like or thermoplastic materials that respond best to gentle but thorough cleaning. The goal is to remove dirt without damaging the finish, leaving residue, or making the surface slippery.
That last point matters. A floor mat that looks shiny but feels slick is not “detailed.” It is a banana peel wearing a seat belt. Driver-side mats should always dry to a non-slippery finish and be reinstalled correctly using the vehicle’s retention hooks or clips. Never stack mats, never use a loose mat on the driver’s side, and never apply greasy tire shine or silicone dressing to a mat near your pedals.
Supplies You Need to Clean WeatherTech Floor Mats
Before you start, gather everything in one place. Cleaning goes faster when you are not wandering around the garage holding a muddy mat and yelling, “Where is the brush?” like a very specific kind of villain.
Recommended Cleaning Supplies
- Garden hose or bucket of clean water
- WeatherTech FloorLiner and FloorMat Cleaner, or a mild detergent mixed with warm water
- Medium-bristle brush or detailing brush
- Microfiber towels
- Vacuum or small hand broom
- Soft sponge for applying protectant
- WeatherTech FloorLiner and FloorMat Protector, if you want a conditioned finish
- Optional: pressure washer on a gentle setting for heavily soiled mats
- Optional: steam cleaner for stubborn salt buildup and deep grooves
Products to Avoid
Avoid harsh chemicals such as bleach, strong solvents, or aggressive degreasers used at full strength. Also avoid tire shine, oily dressings, and glossy silicone-based protectants. These products can leave the mat slick, transfer residue to your shoes, and create a safety risk near the accelerator and brake pedals. WeatherTech mats should look clean and rich, not like they just auditioned for a bodybuilder competition.
How to Clean WeatherTech Floor Mats: Step-by-Step
The best cleaning method is simple: remove, shake, rinse, clean, scrub, rinse again, dry completely, and protect only if needed. Here is the full process.
Step 1: Remove the Mats from Your Vehicle
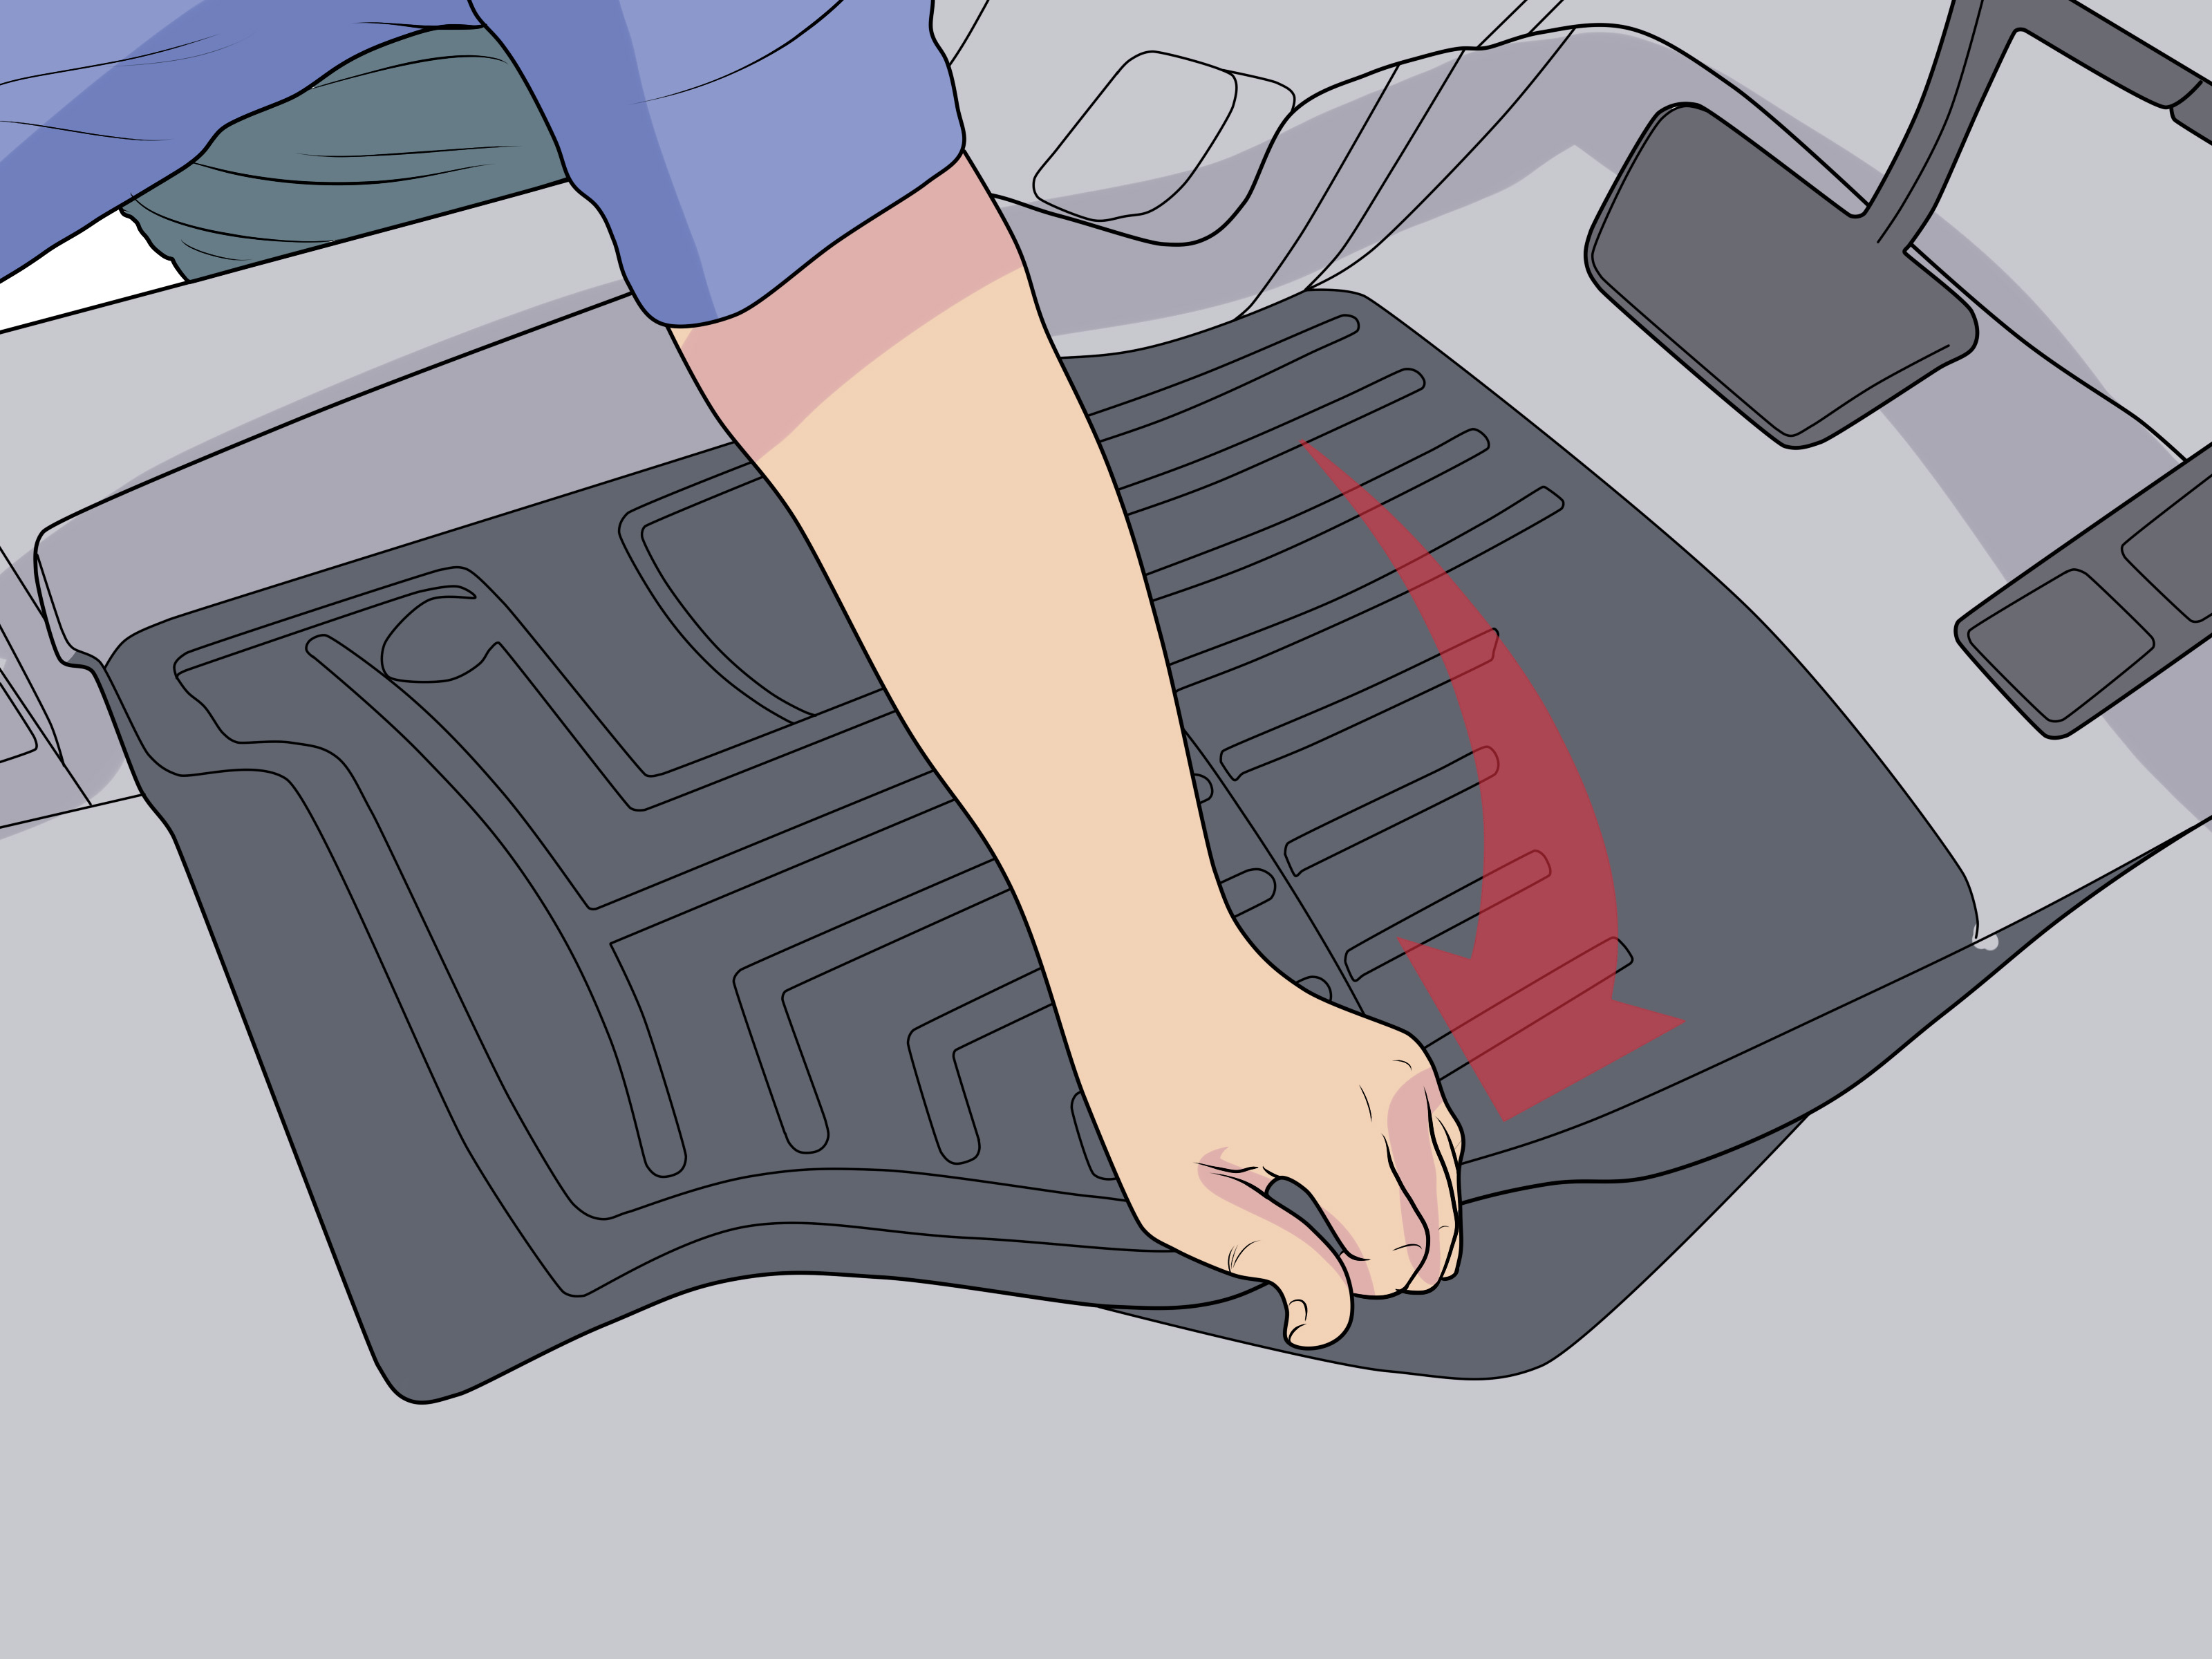
Start by carefully removing each mat from the car. Do not try to deep clean WeatherTech mats while they are still inside the vehicle. Water, soap, and loosened grime can run onto your carpet, wiring, seat tracks, or trim. That turns one cleaning job into three cleaning jobs, and nobody needs that kind of character development.
For the driver’s mat, unhook it from the floor retainers before lifting. Tilt the mat slightly to keep trapped dirt, pebbles, or melted slush from dumping onto the carpet. If the mat is packed with loose debris, vacuum it first while it is still in place, then remove it.
Step 2: Shake Off Loose Dirt and Debris
Take the mats outside and give them a good shake. Tap them gently against a clean driveway, patio, or garage floor to knock loose sand, gravel, dried mud, and snack fossils. Use a vacuum or hand broom to remove anything stuck in the grooves.
This step seems basic, but it makes the rest of the cleaning easier. If you skip it, you end up scrubbing wet dirt into the mat like you are making artisan mud frosting. Remove dry debris first, then move on to water.
Step 3: Rinse the Mats Thoroughly
Rinse each mat with fresh water. A garden hose works well for normal dirt. Hold the mat at an angle so water can run down the channels and carry debris away. Focus on the grooves, raised edges, heel pad area, and corners where dirt collects.
If the mats are coated with road salt, dried mud, or winter grime, spend extra time rinsing before applying cleaner. Salt residue can cling stubbornly to textured surfaces, and a strong rinse helps break it up. A pressure washer can be useful on heavily soiled mats, but use a controlled setting and keep the nozzle at a reasonable distance. You want to clean the mat, not launch it into the neighbor’s yard.
Step 4: Apply WeatherTech Cleaner or Mild Soap
Spray WeatherTech FloorLiner and FloorMat Cleaner evenly across the mat surface. If you do not have the official cleaner, use a mild detergent mixed with warm water. Warm soapy water is often enough for routine cleaning, especially when paired with good brushing.
Cover the entire top surface, including the edges and channels. Do not let the cleaner dry on the mat. If you are working in direct sun, clean one mat at a time so the product stays wet long enough to loosen dirt.
Step 5: Scrub with a Medium-Bristle Brush
Now comes the satisfying part. Use a medium-bristle brush to scrub the mat in circular and back-and-forth motions. Pay special attention to the driver’s heel area, where shoe oils, salt, and grit often collect. Scrub into the grooves and around the raised lip of the mat.
A brush that is too soft may not remove embedded grime. A brush that is too aggressive can scuff the surface. Medium-bristle is the sweet spot: firm enough to clean, gentle enough to avoid turning your mat into a crime scene.
For narrow corners, use a small detailing brush. For large mats, such as cargo liners, work in sections so the cleaner does not dry before you rinse.
Step 6: Rinse Until the Water Runs Clear
Rinse the mat again with clean water. Remove all soap, foam, dirt, and loosened residue. This is an important step because leftover cleaner can make the surface dull, sticky, or slippery.
Turn the mat different directions while rinsing so water flows through every channel. If you still see brown water, white salt streaks, or soap bubbles, keep rinsing. Your mat is not done until it looks clean and feels residue-free.
Step 7: Dry Completely
Shake off excess water, then dry the mats with microfiber towels or let them air-dry in a shaded, well-ventilated area. Avoid reinstalling wet mats. Moisture trapped underneath can encourage odors, damp carpet, and mildew. Also, a wet mat can shift more easily underfoot.
Dry both sides, not just the top. The underside matters because it touches your vehicle’s carpet and retention system. If you are in a hurry, towel-dry first, then let the mats sit for a few minutes before reinstalling.
Step 8: Apply a WeatherTech Protector if Desired
Once the mats are completely clean and dry, you can apply WeatherTech FloorLiner and FloorMat Protector. This step is optional, but it can help maintain a like-new appearance and resist future staining. Spray lightly and evenly, then use a damp sponge to spread the product over the top surface.
The key word is lightly. More product does not mean more protection. It means more drying time, uneven spots, and possibly a surface that feels wrong under your shoes. Use only a product designed for floor mats and make sure it dries to an anti-slip finish.
Step 9: Reinstall the Mats Correctly
Before reinstalling, check that the mats are fully dry and that no cleaner or protectant residue remains. Place each mat back into its correct position. On the driver’s side, secure the mat with the vehicle’s floor hooks, clips, or retention posts.
Never stack WeatherTech mats over carpet mats. Never use a mat that does not fit properly. Never leave the driver’s mat loose. Floor mats should not interfere with the accelerator, brake, clutch, seat rails, or pedals in any way. After installation, press each pedal fully to confirm clear movement.
How to Deep Clean Heavily Stained WeatherTech Mats
Sometimes a regular wash is not enough. Maybe your mats survived a snowy winter. Maybe your dog treated the cargo liner like a private beach. Maybe someone spilled a latte and chose silence. For stubborn messes, use a deeper cleaning approach.
For Road Salt and White Streaks
Road salt is one of the most common reasons WeatherTech mats look cloudy or chalky. Start with a long rinse to dissolve as much salt as possible. Then apply cleaner, let it dwell briefly, scrub the grooves, and rinse thoroughly. For stubborn salt, repeat the process instead of reaching for harsh chemicals.
A steam cleaner can help loosen salt trapped in textured channels. Steam is especially useful because it softens residue without soaking the mat in aggressive cleaners. After steaming, wipe with a microfiber towel and rinse if needed.
For Mud and Clay
Let thick mud dry before removing the mat if it is still wet and sloppy. Once dry, knock off the chunks outside, vacuum or brush away dust, then rinse. Clay can cling to grooves, so use a medium-bristle brush and work the cleaner into the texture.
For Grease, Shoe Marks, and Scuffs
Scuff marks often appear in the driver’s heel area. Use WeatherTech cleaner or a floor-mat-safe automotive cleaner and scrub with steady pressure. Avoid petroleum-heavy solvents or tire products. If a mark does not disappear completely, remember that mats are protective equipment. A few battle scars mean they are doing their job.
For Odors
If your mats smell musty, clean both sides and dry them completely in fresh air. Odors often come from trapped moisture under the mat, not just dirt on top. Check your vehicle carpet before reinstalling. If the carpet underneath is damp, clean and dry that area too.
Common Mistakes When Cleaning WeatherTech Floor Mats
Cleaning WeatherTech mats is easy, but a few mistakes can make them look worse or create safety issues. Avoid these common problems.
Mistake 1: Using Tire Shine
Tire shine belongs on tires, not floor mats. It may create a glossy finish, but it can also make mats slippery. A slick driver’s mat is dangerous because residue can transfer to your shoes and pedals.
Mistake 2: Leaving Soap Residue Behind
If the mat feels sticky, slick, or filmy after drying, it probably was not rinsed well enough. Rinse again with clean water and wipe dry.
Mistake 3: Reinstalling Wet Mats
Wet mats can trap moisture and create odors. Always dry both sides before putting them back in your vehicle.
Mistake 4: Scrubbing with a Wire Brush
A wire brush is too aggressive for WeatherTech mats. It can scratch the surface and leave permanent marks. Use a medium-bristle brush instead.
Mistake 5: Cleaning Only When the Mats Look Terrible
Waiting until your mats look like they survived a monster truck rally makes the job harder. A quick monthly rinse and scrub can prevent buildup and keep the mats easier to maintain.
How Often Should You Clean WeatherTech Floor Mats?
For most drivers, cleaning WeatherTech floor mats once a month is enough. If you live in a snowy region, drive on dirt roads, haul sports gear, transport pets, or regularly eat in the car, clean them more often. During winter, rinse salt and slush weekly if possible. Road salt can leave stubborn residue and make mats look faded if it sits too long.
A simple schedule works well:
- Weekly: Shake out loose dirt, crumbs, and gravel.
- Monthly: Rinse, scrub, and dry the mats.
- Seasonally: Deep clean and apply a mat-safe protector if needed.
- After major messes: Clean immediately, especially after spills, salt, mud, or pet accidents.
Can You Use Dish Soap on WeatherTech Floor Mats?
Yes, a small amount of mild dish soap mixed with warm water can be used when you do not have WeatherTech cleaner available. Use only a few drops, scrub thoroughly, and rinse very well. Too much soap can leave residue, which attracts dirt and may make the surface feel slick.
For best results, use a cleaner designed for floor mats or rubber-like automotive surfaces. These products are formulated to remove grime without leaving a glossy, greasy finish.
Can You Pressure Wash WeatherTech Floor Mats?
Yes, you can pressure wash WeatherTech mats carefully, especially when they are covered in salt, mud, or embedded grime. Use a moderate setting, keep the nozzle moving, and do not hold it too close to the mat. Pressure washing is effective for blasting dirt out of deep channels, but it should not replace scrubbing when oily residue or scuffs are present.
Think of the pressure washer as the power rinse, not the whole cleaning routine. Cleaner plus brush plus rinse is still the winning team.
How to Keep WeatherTech Mats Looking New Longer
Once your mats are clean, maintenance becomes much easier. Shake them out regularly, rinse off salt quickly, and wipe spills before they dry. Keep a small microfiber towel in the trunk for quick cleanups. If you apply a protector, use only a floor-mat-safe product that dries to a matte, anti-slip finish.
Also, rotate your attention. The driver’s mat usually gets dirty fastest, but rear mats and cargo liners collect plenty of mess too. Kids, pets, groceries, gym bags, and leaky plant pots all have impressive talent for creating interior chaos.
Real-World Experience: What Actually Works When Cleaning WeatherTech Floor Mats
In real life, the best WeatherTech mat cleaning routine is not always the fanciest one. The routine that works best is the one you will actually do. After enough muddy shoes, grocery runs, rainy commutes, and “who spilled this?” moments, a few practical lessons become obvious.
First, warm water and brushing do more than people expect. Many drivers assume they need an intense chemical cleaner because their mats look gray, streaky, or permanently stained. Often, the problem is layered residue. Dirt dries, then road salt sticks to it, then shoe oils hold everything in place. A long rinse followed by warm soapy water and a proper scrub can remove most of that buildup. The magic is not in scrubbing harder like you are mad at the mat. The magic is giving the cleaner time to loosen the grime and using the brush to reach the texture.
Second, the driver’s mat deserves extra attention. It usually has the worst heel marks because your right foot lives there rent-free. When cleaning, spend more time around the pedal area and heel pad. Scrub in multiple directions because the grooves may hold dirt from different angles. If a mark remains after one cleaning, repeat the process once. If it still remains, accept that your mat has earned a tiny scar in the line of duty. Better a scuffed mat than a stained carpet.
Third, drying is not optional. A mat can look dry on top while the underside is still damp. Reinstalling it too soon can make the car smell musty, especially in humid weather. The best trick is to stand the mats upright or lean them against a wall in the shade. Air moves across both sides, and water drains out of the channels. A microfiber towel speeds things up, but a few extra minutes of air drying prevents future odor problems.
Fourth, avoid the temptation to chase shine. Clean WeatherTech mats should have a natural matte finish. Shiny mats may look dramatic in a photo, but they can feel slick under shoes. This is especially important on the driver’s side. If a product promises a high-gloss finish, skip it for floor mats. Save the showroom sparkle for exterior trim, not the place where your foot needs steady traction.
Fifth, winter maintenance is easier when you do not wait until spring. Salt is stubborn. If you let it sit for months, it can leave white marks that take repeated cleaning to remove. A quick hose rinse every week or two during winter helps prevent buildup. It does not have to be a full detail session. Even a five-minute rinse can make the spring deep clean much easier.
Finally, reinstalling the mats correctly is part of cleaning. A spotless mat that is loose, stacked, or placed on the wrong side is not a finished job. Always secure the driver’s mat to the factory anchors and check pedal clearance. Cleaning is about appearance, but floor-mat care is also about safety. When the mats are clean, dry, properly placed, and not slippery, your car feels fresher and your interior is better protected. That is the sweet spot: clean enough to impress passengers, practical enough for daily life, and safe enough that your pedals remain drama-free.
Conclusion
Cleaning WeatherTech floor mats is one of the easiest ways to refresh your vehicle interior without spending a fortune. Remove the mats, shake off debris, rinse thoroughly, apply WeatherTech cleaner or mild detergent, scrub with a medium-bristle brush, rinse again, dry completely, and reinstall them securely. For extra care, use a WeatherTech-approved protector that dries to an anti-slip finish.
The biggest secret is consistency. Do not wait until your mats look like they have been excavated from an ancient parking lot. A quick monthly cleaning keeps dirt, salt, and stains under control. Use the right products, avoid slippery dressings, and always make sure the driver’s mat is properly anchored before driving.
WeatherTech mats are built to take abuse, but they still appreciate a little spa day. Give them water, soap, a brush, and a few minutes of attention, and they will go right back to protecting your car from the beautiful disaster known as everyday life.