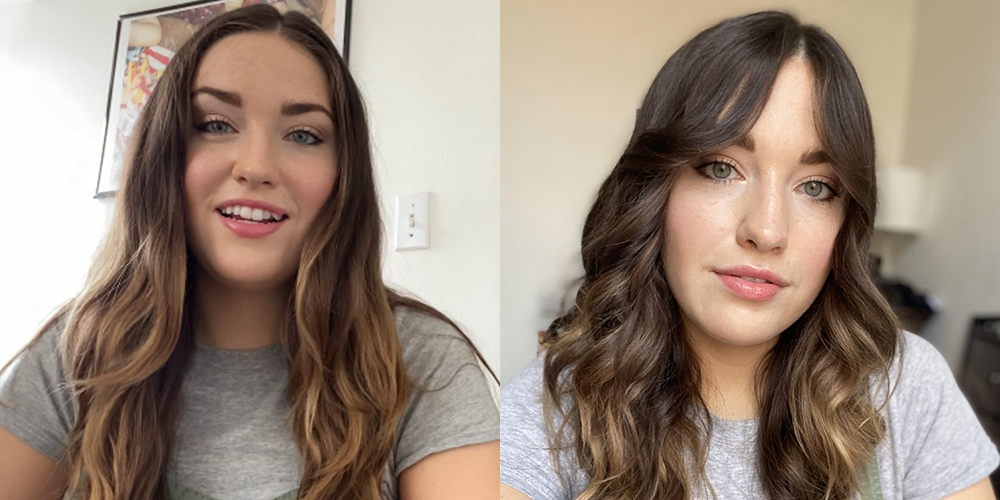
Cutting bangs at home sounds simple until you are standing in front of the bathroom mirror holding scissors, negotiating with your reflection like it owes you money. Bangs are small, but they are mighty. They sit right in the center of your face, which means a tiny mistake can suddenly become the main character of every selfie, video call, and grocery-store encounter for the next three weeks.
The good news? Learning how to cut bangs at home is possible when you slow down, use the right tools, and avoid the famous “just one more snip” trap. The best bang cutting tips are not dramatic. They are boring in the most beautiful way: cut dry, cut less than you think, section cleanly, point-cut carefully, and check your work from every angle before making another move.
This guide breaks down how to trim bangs at home, how to choose a bang style that works with your hair texture, and how to fix common bang-cutting mistakes before panic becomes a styling product.
Should You Cut Bangs at Home?
Let’s start with the honest answer: a professional hairstylist is still the safest option, especially if you want brand-new bangs, a major shape change, very short micro bangs, or a precise blunt fringe. But if you already have bangs and need a small trim, or you want soft curtain bangs with a forgiving shape, a careful at-home bang cut can work.
The keyword here is “careful.” Cutting bangs at home should feel less like a makeover montage and more like a tiny maintenance project. Think of it as dusting the ends, not redesigning your entire identity before lunch.
Tools You Need Before Cutting Bangs
Before you make the first cut, gather your supplies. Do not use kitchen scissors, craft scissors, paper scissors, or that mysterious pair from the junk drawer that has opened packing tape since 2014. Dull scissors push hair around and create uneven, chunky lines.
Best tools for cutting bangs at home
- Sharp haircutting shears or small precision scissors
- A fine-tooth comb
- Hair clips to separate the rest of your hair
- A mirror with good lighting
- A second mirror or phone camera to check the sides
- A spray bottle only for controlling flyaways, not soaking the hair
- Optional: a flat iron or blow-dryer for styling before trimming
Your goal is to cut your bangs in the way you normally wear them. If you wear your bangs straight, style them straight first. If you wear curtain bangs with a middle part, part and dry them that way. If you have curly bangs, let your curls dry naturally so you can see their real length and bounce.
The Golden Rule: Cut Bangs Dry
If you remember only one thing from this entire guide, make it this: cut bangs dry. Wet hair stretches. Once it dries, it shrinks upward, and suddenly your eyebrow-grazing bangs are waving hello from the middle of your forehead.
Dry cutting lets you see cowlicks, natural bends, curl shrinkage, and how your bangs actually sit on your face. This is especially important for wavy, curly, and coily hair, where shrinkage can be dramatic. For textured hair, allow the hair to dry in its natural pattern before trimming. Cutting curls wet is how “just a little trim” becomes “surprise baby bangs.”
How to Section Bangs Correctly
Clean sectioning is the difference between bangs and accidentally cutting the front half of your haircut. Start by separating only the hair that already belongs to your bangs. If you are creating bangs for the first time, be conservative. Begin with a small triangle section at the front hairline.
Simple bang sectioning method
- Find the center point of your hairline.
- Create a small triangle, with the point going back toward the crown.
- Keep the sides of the triangle near the outer edges of your eyebrows, not your temples.
- Clip the rest of your hair away securely.
- Comb the bang section forward with light tension.
Do not pull the hair too tightly. Too much tension stretches the hair and can make you cut more than intended. Let the hair fall naturally. Bangs should be cut where they live, not where they are being held hostage by your comb.
How to Cut Bangs at Home Step by Step
Once your hair is dry, styled, and sectioned, you are ready to begin. Take a deep breath. Put on good lighting. Remove distractions. This is not the moment to watch a thriller, answer a group chat, or cut while emotionally processing a breakup.
Step 1: Start longer than your desired length
Decide where you want your bangs to land, then cut below that point. If you want eyebrow-length bangs, begin around the bridge of the nose or slightly lower, depending on your current length. You can always cut more. You cannot politely ask the hair to come back by dinner.
Step 2: Cut the center first
Take a small center section of your bangs. This will become your guide. Hold the hair lightly between two fingers, keeping your fingers parallel to the floor. Instead of chopping straight across in one bold move, make small vertical snips into the ends. This is called point cutting, and it creates a softer, more natural edge.
Step 3: Work outward slowly
Use the center section as your guide and move outward in tiny sections. Cut a little on one side, then a little on the other side. This helps keep the shape balanced. Step back from the mirror often. Bang trimming is not a race; it is a negotiation.
Step 4: Point-cut the ends
Hold your scissors vertically or at a slight angle and snip upward into the ends. This removes weight and softens harsh lines. Point cutting is especially useful for wispy bangs, curtain bangs, shaggy bangs, and any fringe that should look relaxed instead of ruler-straight.
Step 5: Stop before you think you are done
This may be the most important bang cutting tip of all. Stop early. Shake your hair out. Style it again. Look from the front and sides. Wait a few minutes before deciding whether to cut more. Hair can shift after brushing and styling, and what looked too long thirty seconds ago may suddenly look exactly right.
How to Cut Curtain Bangs at Home
Curtain bangs are one of the most forgiving bang styles because they are longer at the sides and designed to frame the face. They are ideal for beginners because they do not require a perfectly straight line across the forehead.
Curtain bang cutting tips
- Part your hair down the middle.
- Section a small triangle at the front.
- Start longer, around the nose or upper lip area.
- Cut the center slightly shorter than the outer edges.
- Angle the scissors downward as you move toward the cheekbones.
- Blend the sides with small vertical snips.
The classic curtain bang shape is shorter in the middle and longer toward the edges. The goal is a soft frame, not a hard shelf. If you are nervous, keep the bangs cheekbone-length first. You can make them shorter later after you see how they behave.
How to Trim Blunt Bangs
Blunt bangs are bold, polished, and a little bossyin a good way. They require more precision than curtain or wispy bangs, so move slowly. For a true blunt fringe, comb the hair down naturally and trim tiny amounts across the bottom.
Even with blunt bangs, avoid making one giant horizontal chop. Use your comb as a guide, cut small sections, and refine the line gradually. If the ends look too heavy, use light point cutting at the very tips. Do not over-texturize, or your blunt bangs may turn into accidental confetti.
How to Cut Wispy Bangs
Wispy bangs are lighter, airier, and more flexible than thick blunt bangs. They work well for anyone who wants fringe without committing to a dramatic block of hair across the forehead.
To cut wispy bangs at home, start with a smaller section of hair. Point-cut vertically into the ends, removing tiny pieces at a time. Keep the center soft and slightly uneven in a natural-looking way. The beauty of wispy bangs is that they are not supposed to look too perfect. They should whisper, not shout.
How to Cut Curly Bangs at Home
Curly bangs deserve their own rulebook. Because curls shrink, spring, and change shape depending on humidity, they should be cut dry and in their natural curl pattern. Do not stretch the curl straight and cut it at eyebrow level unless you are emotionally prepared for bangs that bounce up much shorter.
Curly bang cutting tips
- Cut curl by curl instead of cutting straight across.
- Trim less than one-quarter inch at a time.
- Let each curl sit naturally before cutting.
- Keep curly bangs longer than straight bangs.
- Check the shape after gently shaking the curls out.
For curly hair, shape matters more than perfect symmetry. A slightly varied length often looks more natural because curls do not fall in a flat sheet. If your curls are very tight or you want a major change, book a stylist who specializes in textured hair.
Common Bang Cutting Mistakes to Avoid
Cutting too much at once
This is the classic mistake. Bangs live in a high-risk neighborhood: the middle of your face. Trim tiny amounts and reassess constantly.
Using the wrong scissors
Dull scissors create jagged ends and uneven lines. Proper haircutting shears make cleaner cuts and give you more control.
Cutting wet hair
Wet hair can look longer than it really is. When it dries, it may shrink above your intended length, especially if your hair is curly or wavy.
Pulling the hair too tightly
Tension stretches the hair. When released, your bangs may jump upward and look shorter than expected.
Widening the bang section too much
If you keep grabbing more hair from the sides, your bangs can become too wide and heavy. Stay within your original section.
How to Fix Bangs That Went Wrong
First, do not keep cutting in panic mode. Put the scissors down. Step away from the mirror. Drink water. Text a calm friend, not the dramatic one.
If your bangs are too blunt, soften the ends with tiny vertical snips. If one side is longer, trim only the longer side and check after every small cut. If your bangs are too short, styling can help. Try a flat iron to smooth them downward, a lightweight styling cream to control lift, or accessories like clips, headbands, and side parts while they grow.
If the shape is severely uneven, a stylist can usually blend it better than you can at home. There is no shame in getting professional help. Hair grows, but professional blending can make the growing process much less theatrical.
Best Styling Tips After Cutting Bangs
Freshly cut bangs often need a little training. Blow-dry them soon after washing so they do not dry in odd directions. Use a small round brush or flat brush, moving the hair side to side while drying to soften cowlicks and prevent separation.
For curtain bangs, blow-dry each side away from the face or use a round brush to create a soft bend. For blunt bangs, blow-dry downward with the nozzle pointing from roots to ends. For wispy bangs, use a small amount of texturizing spray or dry shampoo to keep them light and separated.
How Often Should You Trim Bangs?
Bangs grow quickly because even a small amount of growth changes how they sit on your face. Short bangs may need trimming every two to three weeks. Longer curtain bangs can usually go three to six weeks, depending on the shape and your styling routine.
If you are maintaining your bangs at home, trim only the smallest amount needed. A “dusting” is usually enough. The goal is to refresh the shape, not restart the haircut every time.
At-Home Bang Cutting Experiences and Real-Life Lessons
Anyone who has cut bangs at home has a story. Some are triumphant. Some involve hats. Most begin with confidence and end with a deep respect for hairstylists. The biggest lesson from real-life bang trimming is that preparation beats bravery every time.
One common experience is cutting bangs after seeing a beautiful photo online. The style looks effortless: soft fringe, perfect texture, cheekbones suddenly behaving like they hired a publicist. But photos do not show the daily styling, the hair texture, the cowlicks, or the fact that the model probably had a professional team nearby. Before cutting, it helps to ask: “Does my hair naturally do this?” If the answer is no, choose a longer, softer version of the look.
Another lesson is that bathroom lighting can lie. Overhead lighting may cast shadows that make one side look longer. Natural light is better if you have it. After the first few snips, check your bangs in a different mirror or take a quick phone photo. A photo often reveals unevenness that your mirror misses because your brain is busy saying, “This is fine,” while quietly sweating.
Many people also discover that bangs behave differently on day one, day two, and humid day three. Right after washing, bangs may look fluffy and obedient. By afternoon, they may separate, curl, or cling to skincare products on your forehead. This is why it is smart to cut bangs when your hair is clean, dry, and styled as usual, but not overly flat-ironed into a temporary personality. You want to cut the bangs you actually live with.
A helpful personal rule is the “three-cut maximum.” Make one tiny trim, check the shape, make a second tiny trim if needed, then stop. If you are still tempted to keep going, wait until tomorrow. This simple rule prevents the slow-motion disaster where a person begins with eyebrow bangs and ends with a fringe visible only to astronauts.
For beginners, curtain bangs often create the best at-home experience. They are forgiving, flattering, and easier to blend into the rest of the hair. If they are too long, they still look intentional. If they are slightly uneven, styling can hide it. Blunt bangs, on the other hand, are less forgiving because the eye immediately notices a crooked line. If you love blunt bangs, trim them in tiny sections and keep your expectations realistic.
Curly-haired people often learn the most dramatic lesson: shrinkage is real. A curl that looks long when stretched may spring up much shorter when released. Cutting curl by curl feels slower, but it gives better control. The most successful curly bang trims usually involve patience, dry hair, and stopping before the bangs look “finished,” because curls continue to settle after touching and styling.
The final experience-based tip is emotional: do not cut bangs when you are stressed, rushed, angry, bored, or trying to become a new person at 11:47 p.m. Bangs can be fun, stylish, and face-framing magic, but they should not be an emergency decision. Cut them when you have time, good lighting, sharp scissors, and a realistic plan. Your forehead will thank you.
Conclusion
Learning how to cut bangs at home is all about patience, precision, and knowing when to stop. Use sharp shears, cut your bangs dry, section carefully, start longer than you think, and make small vertical snips instead of one dramatic chop. Curtain bangs and wispy bangs are the most beginner-friendly, while blunt and curly bangs require extra caution. When in doubt, trim less, style first, and let a professional handle major changes.
Bangs can completely refresh your look without changing your whole haircut. Done carefully, an at-home bang trim can keep your fringe looking fresh between salon visits. Done impulsively, it can become a character-building exercise. Choose the first option. It photographs better.