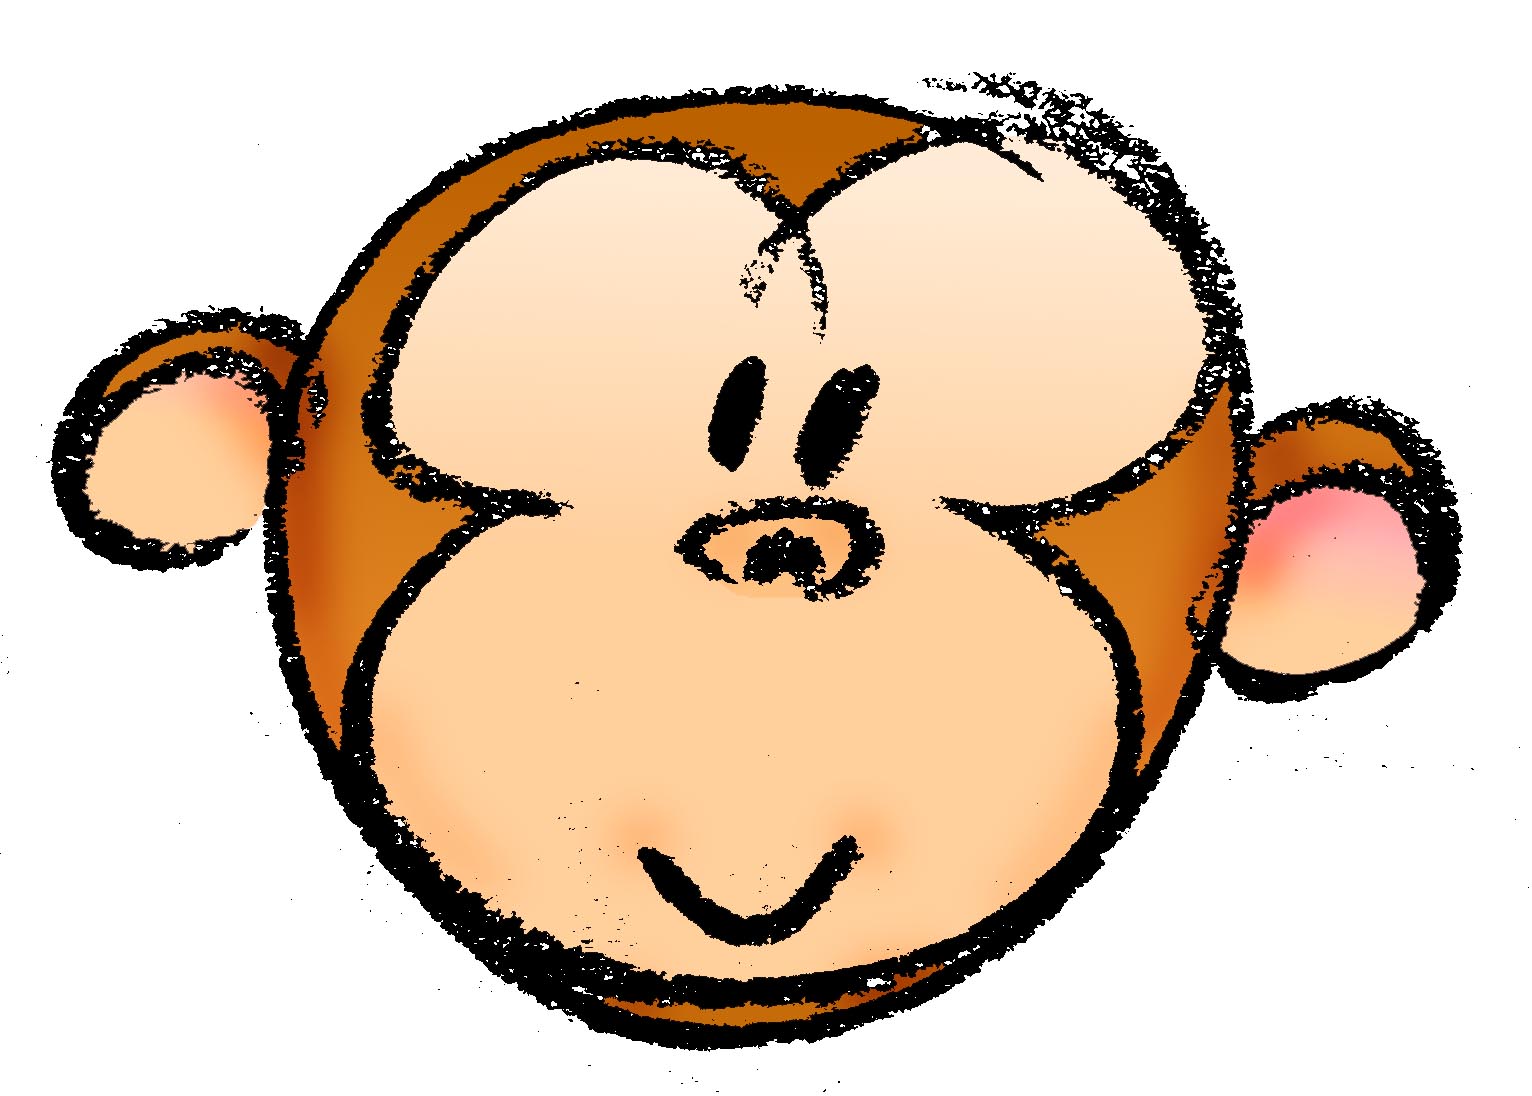
Learning how to draw a cartoon monkey face is one of those art projects that looks delightfully simple until your “cute jungle buddy” accidentally turns into a worried potato with ears. Good news: that is completely normal. Even professional illustrators begin with awkward circles, lopsided guidelines, and a lot of erasing. The trick is not magic; it is structure.
A great cartoon monkey face usually starts with friendly shapes: circles, ovals, soft curves, big ears, a rounded muzzle, and expressive eyes. Unlike realistic animal drawing, cartoon drawing gives you permission to exaggerate. Want giant ears? Go for it. Want a smile big enough to suggest your monkey just stole the last banana? Perfect. Cartoon art works because it simplifies real features into a design that feels lively, readable, and fun.
In this step-by-step guide, you will learn how to draw a cartoon monkey face in 14 clear steps. The method is beginner-friendly, kid-friendly, and also useful for anyone practicing character design, doodling, classroom art, digital illustration, or sketchbook warmups. Grab a pencil, eraser, paper, and a black marker if you want a clean final outline. Optional supplies include colored pencils, crayons, markers, or a tablet and stylus. Now let’s turn a few humble circles into a monkey with personality.
Why Cartoon Monkey Faces Are Great for Beginners
A cartoon monkey face is ideal for beginners because it teaches several core drawing skills without becoming too intimidating. You practice symmetry, facial spacing, line confidence, shape building, expression, and simple coloring. Better yet, monkeys already have playful visual features: round heads, noticeable ears, curious eyes, and a muzzle area that can be simplified into a soft oval or bean shape.
Real monkeys vary widely. Some have flatter faces, some have longer muzzles, some have shaggy fur, and others have dramatic brow shapes or colorful skin. For a cartoon version, you do not need to copy every detail. Instead, you borrow the recognizable basics: round face, large ears, expressive eyes, nose, mouth, and a little fur texture. Think of this project as “monkey essence,” not a biology exam with pencils.
Materials You Need
- Pencil for sketching light guidelines
- Eraser for cleaning construction lines
- Drawing paper or a sketchbook
- Black marker, fineliner, or dark pencil for outlining
- Brown, tan, peach, pink, black, and cream coloring tools
- Optional: digital drawing app with layers
If you are drawing digitally, place your rough sketch on one layer, lower the opacity, then create a new layer for the clean line art. This keeps your final monkey face tidy and saves you from the ancient artist ritual known as “erasing until the paper gives up.”
How to Draw a Cartoon Monkey Face: 14 Steps
Step 1: Draw a Large Circle for the Head
Start with a large circle in the center of your page. It does not have to be perfect. In fact, a slightly imperfect circle can make the cartoon monkey face feel more natural and handmade. Draw lightly, because this first shape is only your guide. Leave space on both sides for the ears and a little room above the head if you want to add a tuft of fur later.
This circle is the foundation of the whole face. If it is too small, the features may feel cramped. If it is too large, the ears might run off the paper like they have somewhere important to be. Aim for a comfortable size that gives you room to build.
Step 2: Add a Vertical Guideline
Draw a light vertical line down the center of the circle. This line helps keep the eyes, nose, mouth, and muzzle balanced. Cartoon drawings can be playful and exaggerated, but they still need enough structure to look intentional. A center guideline is like a quiet art coach whispering, “Maybe put the nose in the middle.”
If you want your monkey looking straight ahead, keep the guideline vertical. If you want the monkey turned slightly to one side, curve the line gently toward that direction. For this beginner tutorial, a front-facing monkey face is easiest.
Step 3: Add a Horizontal Eye Guideline
Next, draw a light horizontal line across the upper half of the circle. This will help place the eyes. In many cute cartoon characters, the eyes sit slightly lower than the exact middle of the head, which makes the forehead look bigger and the character feel younger and friendlier.
Do not press hard. These guidelines are temporary and will be erased later. Keep your pencil lines soft, loose, and easy to adjust.
Step 4: Sketch Two Big Round Ears
Draw a large round ear on the left side of the head and another on the right side. Monkey ears are one of the easiest ways to make the character instantly recognizable. For a cute cartoon style, make the ears almost as tall as the lower half of the head. Big ears create charm and exaggeration.
Inside each ear, draw a smaller curved shape following the same general outline. This inner ear detail adds depth without making the drawing complicated. You can make the inner ear look like a C-shape, a swirl, or a simple oval. Choose the version that matches your style.
Step 5: Draw the Face Patch
Inside the head circle, draw a large rounded shape that looks a bit like a heart without a sharp bottom, or like two soft bumps connected above a rounded muzzle. This will become the lighter face patch around the eyes and mouth. Many cartoon monkeys use this contrast: darker fur around the head and lighter color around the face.
Begin near the upper left side of the face, curve inward above one eye, dip slightly between the eyes, curve over the other eye, and bring the shape down toward the cheeks. The bottom should round around the muzzle area. Do not worry if it takes a few tries. The face patch is where your monkey starts developing personality.
Step 6: Add the Muzzle Shape
Draw a wide oval or rounded bean shape in the lower half of the face patch. This is the muzzle, where the nose and mouth will sit. Keep it centered on the vertical guideline. A large muzzle makes the monkey look friendly and cartoonish, while a smaller muzzle can make it look older or more realistic.
For a super cute style, make the muzzle wide and soft. Avoid sharp corners. Cartoon monkey faces usually look best when the features feel bouncy, rounded, and approachable.
Step 7: Draw Two Expressive Eyes
Place two eyes along the horizontal guideline. You can draw simple circles, ovals, or even rounded rectangles. For a cheerful monkey face, make the eyes large and slightly close together. Add small black pupils inside each eye, then leave a tiny white highlight. That little highlight is powerful. It can turn a flat stare into a sparkling “I definitely did not eat the bananas” expression.
If you want a silly monkey, make one eye slightly bigger than the other. If you want a calm monkey, use half-circle eyelids. If you want an excited monkey, raise the eyes and make the pupils larger.
Step 8: Add Eyebrows for Personality
Draw two curved eyebrows above the eyes. Eyebrows are small, but they control the mood of the entire character. Upward-curving brows create a happy, curious look. Angled brows can make the monkey mischievous. Flat brows may make it look sleepy or unimpressed, as if someone offered it a salad instead of a banana.
Keep the eyebrows simple. Thick curved lines work well in cartoon drawing because they are readable from a distance.
Step 9: Draw the Nose
In the upper part of the muzzle, draw a small rounded triangle, oval, or heart-like nose. Add two tiny nostrils if you want extra detail. For a softer cartoon style, use a dark oval with two small shine spots. For a more classic monkey look, make the nose flatter and wider.
The nose should sit on the vertical guideline. If it drifts too far left or right, your monkey may look like it just smelled something suspicious. That can be funny, but only if you meant to do it.
Step 10: Draw the Mouth and Smile
Under the nose, draw a short vertical line downward, then add a wide curved smile. You can keep the mouth closed with one simple curve, or open it into a big grin. If you draw an open mouth, add a curved tongue and shade the inside darker.
For a friendly beginner version, draw a soft U-shaped smile. If you want a playful cartoon monkey, push the smile wider and add cheek lines. A tiny smile can look shy, while a giant grin says, “I have plans, and none of them involve behaving.”
Step 11: Shape the Cheeks and Chin
Now refine the outside of the face. Use the original circle as a guide, but make the cheeks a little rounder. You can add slight bumps on both sides to suggest fluffy fur. At the bottom, round out the chin so it connects naturally to the muzzle area.
This is a great moment to adjust the silhouette. A strong cartoon face is recognizable even as an outline. If the head shape looks cute before you add color, you are on the right track.
Step 12: Add Fur Tufts
At the top of the head, draw three or four small curved spikes or soft zigzags for a tuft of fur. Keep them rounded rather than sharp. You can also add little fur marks along the sides of the head or cheeks. These details should support the drawing, not cover it like a furry explosion.
Use short curved strokes to suggest texture. Cartoon fur works best when it is simple and selective. A few marks say “fur.” Too many marks say “this monkey lost a fight with a broom.”
Step 13: Outline the Final Drawing
Once you like the sketch, trace the final lines with a black marker, fineliner, or darker pencil. Use smooth, confident strokes. You can make the outer outline slightly thicker than the inner details. This simple line-weight trick helps the cartoon monkey face stand out and look polished.
Let the ink dry before erasing pencil guidelines. If you erase too soon, the lines may smear, and your monkey may suddenly look like it has been through a tropical rainstorm.
Step 14: Color Your Cartoon Monkey Face
Color the outer fur brown, chocolate, reddish-brown, gray-brown, or even a fun fantasy color like blue or purple. Use tan, cream, peach, or light brown for the face patch and muzzle. The inner ears can be pink, peach, or light tan. Color the eyes black or dark brown, leaving the highlights white.
To add depth, shade lightly under the ears, around the lower head, and beneath the muzzle. Keep the colors soft if you want a cute look. Use stronger contrast if you want a bold sticker-style character. When finished, you can add a jungle background, banana pattern, speech bubble, vines, leaves, or a tiny crown because, honestly, why should lions get all the royalty?
Helpful Tips for a Better Cartoon Monkey Face
Use Simple Shapes First
The easiest way to draw a cartoon monkey face is to break it into circles, ovals, and curves. The head is a circle. The ears are circles. The muzzle is an oval. The eyes are small circles or ovals. This approach makes the drawing less scary and more adjustable.
Keep the Features Symmetrical, But Not Robotic
Symmetry helps a front-facing monkey look balanced, but perfect symmetry can feel stiff. Let the eyebrows, smile, or ear details vary slightly. Tiny imperfections make the character feel alive.
Exaggerate One Feature
Cartoon characters often become memorable because one feature is exaggerated. Try giant ears, extra-round eyes, a huge smile, a tiny nose, or dramatic eyebrows. Do not exaggerate everything at once, or the design may become visually noisy.
Practice Different Expressions
Once you can draw one monkey face, create a whole expression sheet. Draw a happy monkey, sleepy monkey, surprised monkey, grumpy monkey, laughing monkey, and sneaky monkey. Change only the eyebrows, eyes, and mouth. You will quickly see how small adjustments create big emotional differences.
Common Mistakes and How to Fix Them
Mistake 1: The Ears Are Too Small
Small ears can make the drawing look more like a bear, dog, or mystery forest creature. Enlarge the ears and place them on the sides of the head, roughly level with the eyes and muzzle.
Mistake 2: The Muzzle Is Too Low
If the muzzle sits too close to the bottom of the head, the face may look stretched. Move the muzzle slightly upward and keep it centered. A balanced muzzle makes the monkey face look cuter and cleaner.
Mistake 3: Too Many Fur Lines
Beginners often add lots of little strokes because they want the monkey to look furry. Use fewer marks instead. Place them strategically on the cheeks, top of the head, and outer edges.
Mistake 4: Coloring Without Contrast
If the face patch and fur are too similar in color, the design may look flat. Use a darker color for the outer fur and a lighter color for the muzzle and face patch. Contrast helps the cartoon monkey face read clearly.
Creative Variations to Try
After completing the basic monkey face drawing, try changing the style. Draw a baby monkey with larger eyes and a smaller nose. Draw a jungle explorer monkey with a tiny hat. Draw a superhero monkey with a mask. Draw a sleepy monkey with half-closed eyelids. Draw a sticker-style monkey using thick outlines and bright colors.
You can also experiment with different species-inspired details. A capuchin-style cartoon monkey might have a lighter face and darker cap-like fur. A macaque-inspired monkey might have a rounder face and softer pink tones around the muzzle. A baboon-inspired cartoon could have a longer muzzle and stronger brow shape. Keep it playful and simplified; the goal is character, not scientific illustration.
Experience Notes: What Drawing a Cartoon Monkey Face Teaches You
The first time you sit down to draw a cartoon monkey face, you may expect it to be quick. After all, it is just a circle, two ears, and a smile, right? Then you realize the left ear is floating away, the eyes are having a disagreement, and the muzzle looks like it belongs to a completely different animal. That moment is not failure. It is the beginning of learning how visual balance works.
One of the most useful experiences from drawing this subject is discovering how important guidelines are. Beginners sometimes want to skip them because construction lines feel boring. But once you use a vertical centerline and a horizontal eye line, the face becomes easier to control. The eyes line up. The nose lands in the right place. The smile stops drifting into strange territory. Guidelines are not training wheels for “bad artists.” They are planning tools used by artists at every level.
Another valuable lesson is that expression matters more than detail. You can draw a monkey face with only a few lines, and it will still feel charming if the eyes and mouth are expressive. A slight eyebrow tilt can make the monkey look curious. A tiny open mouth can make it look surprised. A wide grin can make it look like it knows exactly where the cookies are hidden. This teaches a larger art principle: emotion often comes from simple design choices, not complicated rendering.
Coloring also provides a practical learning experience. Many beginners color the whole face one shade of brown, then wonder why it looks flat. When you separate the darker fur from the lighter muzzle and inner face, the character suddenly becomes readable. Add a little shading under the ears or muzzle, and the face gains form. You do not need advanced painting skills; you just need contrast, clean edges, and patience.
Drawing a cartoon monkey face is also a great confidence-builder because it invites repetition. The first version might be wobbly. The second will be better. By the fifth, you may start inventing personalities: shy monkey, pirate monkey, banana chef monkey, dramatic opera monkey. Repetition turns the steps into muscle memory. You stop asking, “Where does the nose go?” and start asking, “What kind of attitude should this monkey have?” That shift is where drawing becomes genuinely fun.
For classroom activities, this project works especially well because students can follow the same 14 steps but still create different results. One student may draw giant ears. Another may add glasses. Someone else may give the monkey a bow tie, because apparently this monkey has dinner reservations. The structure keeps everyone on track, while the details allow personal style to shine.
If you are practicing alone, save your early attempts instead of throwing them away. Date the page. Come back a week later and draw the same cartoon monkey face again. You will notice improvements in line quality, spacing, shape confidence, and expression. That visible progress is motivating. It reminds you that drawing is not a mysterious talent handed out by the art fairy. It is a skill built through observation, simple shapes, and a willingness to draw a few goofy monkeys along the way.
Conclusion
Drawing a cartoon monkey face is a friendly, flexible project that teaches the basics of character design while keeping the process lighthearted. Start with simple shapes, use guidelines, build the ears and muzzle, add expressive eyes, refine the smile, outline the final sketch, and color with clear contrast. The more you practice, the more personality your monkey will have.
Whether you are making a classroom worksheet, a sketchbook doodle, a digital sticker, a jungle-themed birthday card, or just a happy little face to brighten your day, these 14 steps give you a reliable path from blank page to playful cartoon character. And remember: if your first monkey looks odd, congratulations. You have officially joined the grand artistic tradition of learning by drawing something wonderfully weird before drawing something wonderful.
Note: This original article is written for web publishing in standard American English and is structured for readability, SEO, and beginner-friendly art instruction without unnecessary source-link clutter.