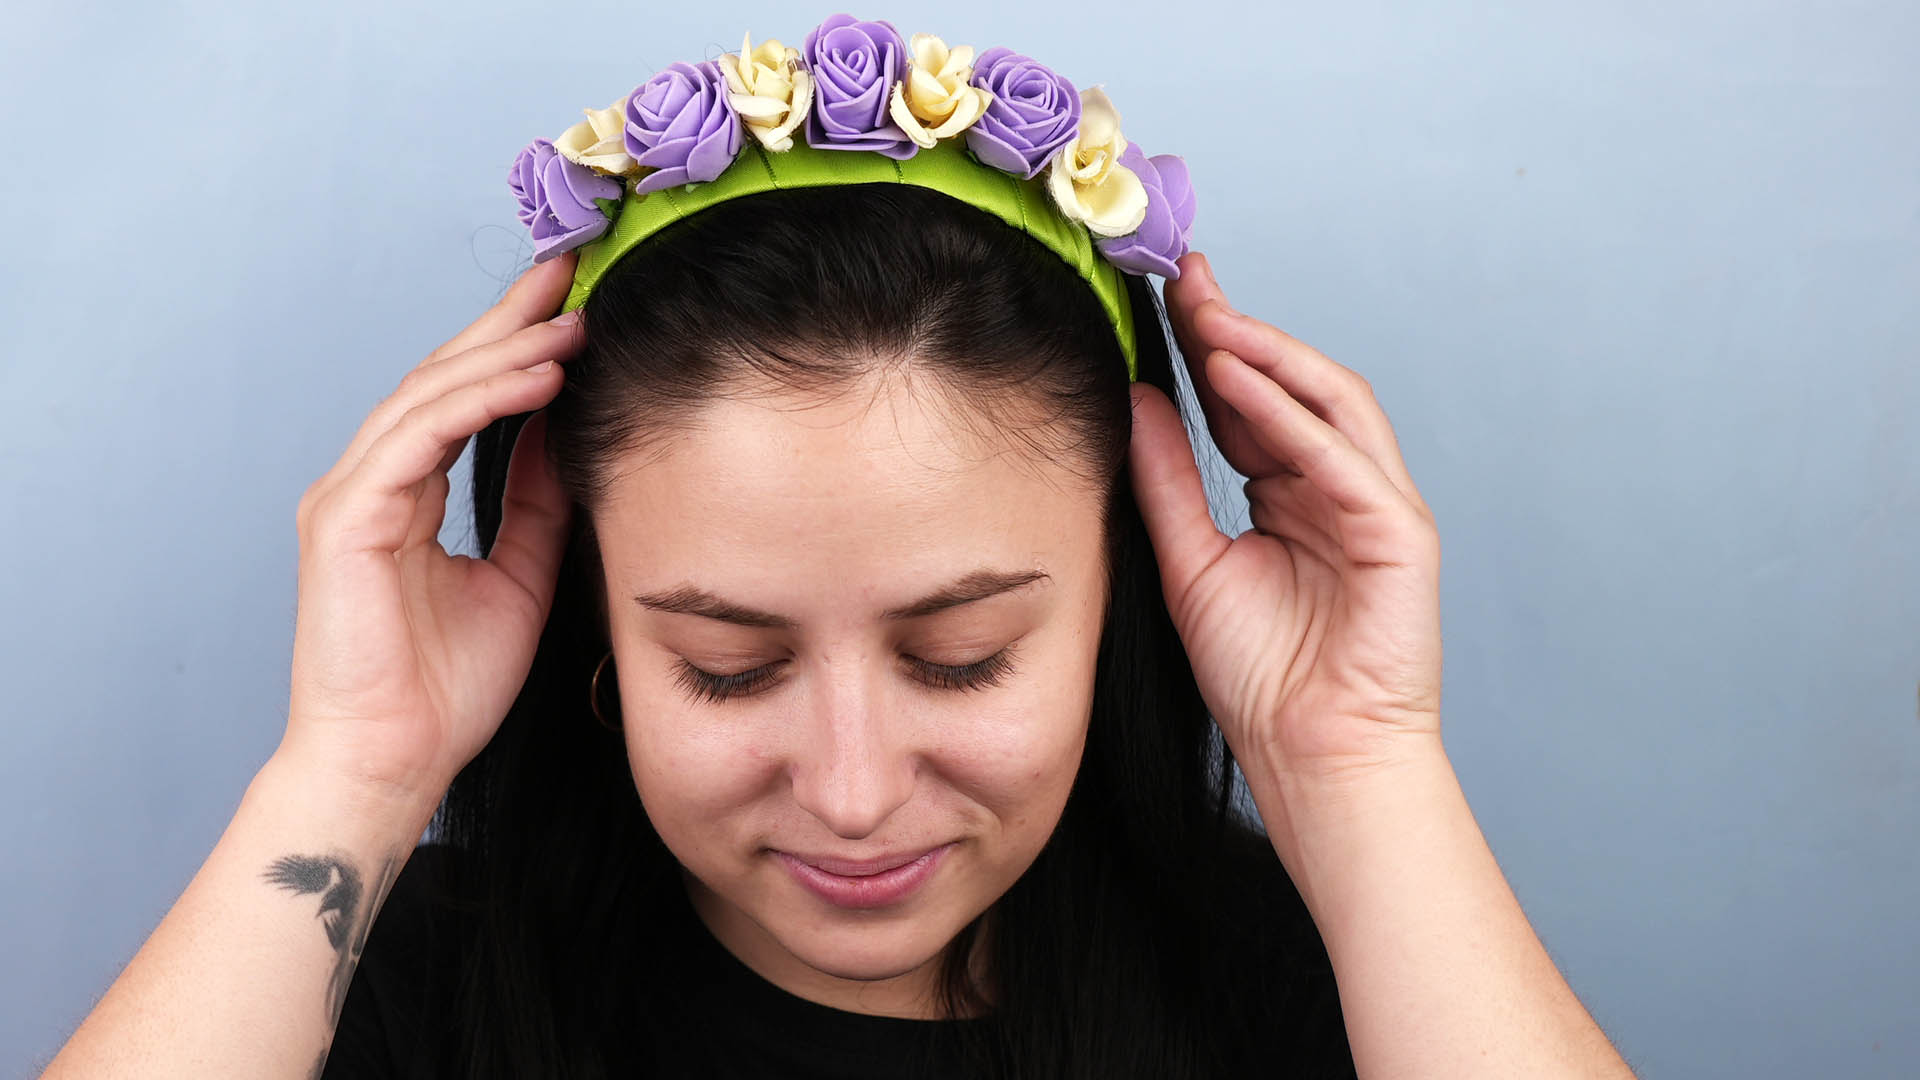
Note: This HTML includes the body-only article content for direct publishing and excludes source links, citation placeholders, and unnecessary web artifacts.
Few accessories say “I’m effortlessly whimsical” quite like a flower crown. Whether you are dressing up for a wedding, a music festival, a birthday party, a spring photo shoot, or a backyard picnic where the lemonade deserves its own Instagram account, a handmade floral headpiece can turn an ordinary outfit into something magical.
The best part? You do not need to be a professional florist to make one. You need a few basic supplies, a little patience, and the willingness to forgive yourself when one daisy decides to face north while the rest of the crown is clearly facing east. Handmade flower crowns are wonderfully customizable: soft and romantic with fresh roses, playful and long-lasting with faux flowers, or bright and kid-friendly with paper blooms.
In this guide, you will learn how to make a flower crown using three different DIY craft projects: a fresh flower crown, a faux flower crown, and a paper flower crown. Each project includes supplies, step-by-step instructions, design tips, and practical troubleshooting advice so your crown looks charming instead of “garden accident, but make it fashion.”
Before You Start: Flower Crown Basics
A flower crown is essentially a wearable wreath. Most designs begin with a circular base made from floral wire, vine wire, a headband, ribbon, or paper. Flowers, greenery, leaves, or handmade embellishments are then attached using floral tape, craft glue, hot glue, or wire.
The right method depends on how you plan to use the crown. Fresh flowers are perfect for weddings, showers, and special events where you want natural beauty. Faux flowers are better when you need something reusable, durable, and travel-friendly. Paper flower crowns are ideal for children, classrooms, party crafts, and anyone who wants color without worrying about wilted petals.
Basic Supplies You May Need
- Floral wire or vine-covered craft wire
- Floral tape
- Wire cutters
- Scissors or floral shears
- Fresh, faux, or paper flowers
- Greenery, leaves, or ribbon
- Hot glue gun and glue sticks for faux or paper crowns
- Measuring tape
- Ribbon for an adjustable back closure
How to Choose the Best Flowers for a DIY Flower Crown
For a fresh flower crown, choose blooms that can handle being out of water for several hours. Spray roses, baby’s breath, wax flowers, carnations, mums, lavender, rosemary, eucalyptus, and small daisies are popular choices because they hold their shape well. Delicate flowers such as poppies, some ranunculus, and thin-petaled blooms may wilt faster, especially in heat.
For faux flower crowns, look for small silk flowers with flexible stems. Oversized blooms can be beautiful, but they may make the crown heavy. A good rule is to choose one or two focal flowers, several medium flowers, and plenty of filler greenery. Think of it like decorating a cake: one giant flower can be stunning, but twenty giant flowers may make your head look like it is being lovingly attacked by a shrub.
For paper flower crowns, lightweight paper works best. Construction paper, cardstock, tissue paper, crepe paper, scrapbook paper, and cupcake liners can all become petals, leaves, or flower centers. Paper crowns are less realistic than fresh crowns, but they offer endless color choices and are easier for beginners.
Project 1: Classic Fresh Flower Crown
This is the traditional floral crown: fresh blooms attached to a wire base with floral tape. It is beautiful, fragrant, and perfect for weddings, garden parties, engagement photos, baby showers, and spring celebrations.
Best For
Special events, bridal looks, maternity photos, garden parties, and one-day wear.
Supplies
- Floral wire, preferably medium-gauge
- Floral tape
- Wire cutters
- Fresh flowers and greenery
- Ribbon, optional
- Scissors or floral shears
- Measuring tape
Step 1: Measure Your Head
Wrap measuring tape around the part of your head where you want the crown to sit. Some people like flower crowns high on the forehead for a boho look, while others prefer them slightly higher like a headband. Add about two inches to your measurement if you plan to twist the ends together. If you want an adjustable crown, leave extra wire at both ends and finish with ribbon loops.
Step 2: Make the Wire Base
Cut a piece of floral wire to your measured length. For extra strength, double the wire or twist two pieces together. Shape it into a circle and test the fit before securing the ends. The crown should feel comfortable, not tight. Remember that flowers and greenery will add bulk, so a slightly loose base is usually better than one that squeezes your head like a tiny floral helmet.
Step 3: Wrap the Base with Floral Tape
Stretch the floral tape slightly as you wrap it around the wire. Floral tape becomes tacky when pulled, which helps it grip the wire and flower stems. Cover any sharp wire ends completely so the crown is comfortable to wear.
Step 4: Trim and Prepare the Flowers
Cut flower stems to about one to two inches long. Remove excess leaves from the lower stems so the flowers sit neatly on the crown. Keep flowers in water until you are ready to use them. If the event is later in the day, prepare the flowers as close to the wearing time as possible.
Step 5: Start with Greenery
Attach small pieces of greenery to the wire base using floral tape. Place each stem along the wire and wrap the tape around both the stem and the base. Greenery creates a soft foundation and helps hide mechanics. Eucalyptus, fern, rosemary, ruscus, and ivy-style greenery all work beautifully.
Step 6: Add Focal Flowers
Choose your larger or most eye-catching flowers and place them first. You can cluster them at the front for a dramatic look, arrange them evenly around the whole crown, or place them slightly off-center for a romantic asymmetrical style. Wrap each stem securely with floral tape.
Step 7: Fill Gaps with Smaller Flowers
Add smaller blooms and filler flowers between the focal flowers. Baby’s breath, wax flowers, mini daisies, and small carnations are great for this step. Keep turning the crown as you work so you can see it from every angle. A flower crown is three-dimensional, which means the back deserves attention too, even if it is mostly there to support your main-character moment.
Step 8: Finish and Store
Once the crown looks full, check for loose stems, exposed wire, or uneven areas. Add more tape where needed. If you are not wearing the crown immediately, lightly mist it with water, place it in a breathable bag or container, and store it in the refrigerator away from fruit. Many fruits release gases that can make flowers age faster.
Fresh Flower Crown Design Tips
- Use odd numbers of focal flowers for a natural look.
- Keep heavy blooms near the front or sides where they can be supported.
- Use greenery to cover tape and wire.
- Choose hardy flowers if the crown will be worn outdoors.
- Make the crown on the day of the event when possible.
Project 2: Long-Lasting Faux Flower Crown
A faux flower crown is the best choice when you want something reusable, budget-friendly, and low-stress. It will not wilt, it can survive a suitcase, and it does not care if your outdoor party suddenly becomes “humidity: the musical.”
Best For
Festivals, costumes, birthday parties, photo props, bridal showers, kids’ dress-up bins, and reusable event accessories.
Supplies
- Artificial flowers
- Floral wire, vine wire, or a plain headband
- Wire cutters
- Hot glue gun and glue sticks
- Floral tape
- Leaf ribbon or faux greenery
- Optional ribbon for ties
Step 1: Choose Your Base
You can make a full circular crown with floral wire or use a headband for an easier version. A wire crown gives a traditional halo shape, while a headband is simpler and more stable for children or active wear. If you are making the crown for dancing, running around, or dramatic hair flips, the headband may be your loyal best friend.
Step 2: Remove Flower Heads and Leaves
Use wire cutters to separate flowers and leaves from their main stems. Leave a small stem if possible because it gives you something to glue or tape down. Sort flowers by size before attaching them. This helps you build a balanced design instead of accidentally placing all your largest flowers on one side.
Step 3: Wrap the Base
If you are using wire, wrap it with floral tape or vine ribbon. If you are using a headband, you can wrap it with green ribbon, floral tape, or fabric to create a more natural background. This step also helps glue adhere better and hides the plastic or metal base.
Step 4: Attach the Main Flowers
Place the largest flowers first. Add hot glue directly to the base, press the flower in place, and hold it for a few seconds while the glue sets. If the flower has a short stem, tuck it along the base and secure it with floral tape before gluing. This gives extra stability.
Step 5: Add Greenery and Fillers
Use smaller flowers, leaves, and vines to fill empty spaces. Layering is the secret to a fuller faux flower crown. Place leaves behind flowers, tuck small blossoms between larger ones, and use trailing greenery at the sides for movement.
Step 6: Check Comfort and Security
Look inside the crown. If you see dried glue lumps, sharp wire tips, or scratchy plastic stems, cover them with ribbon or felt. A gorgeous crown is less impressive when it pokes the wearer every seven seconds. Comfort matters.
Faux Flower Crown Variations
- Boho crown: Use muted roses, eucalyptus, pampas-style accents, and ivory ribbon.
- Festival crown: Use bright flowers, glitter accents, and oversized blooms.
- Woodland crown: Use moss, tiny mushrooms, fern leaves, and small white flowers.
- Minimal crown: Decorate only the front half of a headband with small blossoms.
Project 3: Easy Paper Flower Crown
A paper flower crown is cheerful, affordable, and perfect for group crafting. It is also a great choice if you want to make a flower crown with kids because the supplies are simple and the finished crown can be lightweight and colorful.
Best For
Classrooms, birthday parties, spring crafts, rainy-day activities, summer camps, pretend play, and family craft nights.
Supplies
- Construction paper, cardstock, tissue paper, or crepe paper
- Scissors
- Glue stick or craft glue
- Stapler or tape
- Markers or crayons
- Optional cupcake liners
- Optional flower and leaf templates
Step 1: Make the Paper Band
Cut two long strips of green construction paper or cardstock. Wrap them around the wearer’s head and tape or staple them together to create a band. Leave a little extra room so the crown is comfortable. If you are working with children, fit the band before adding flowers.
Step 2: Cut Flowers and Leaves
Cut flower shapes from colorful paper. You can make simple five-petal flowers, layered circles, fringed crepe paper blossoms, or folded tissue paper blooms. Cut leaves from green paper. For younger children, pre-cut shapes can make the project easier and less likely to turn into a confetti storm.
Step 3: Add Details
Use markers, crayons, or small paper circles to create flower centers. Cupcake liners can make excellent ruffled flowers. Fold the petals upward slightly to give them dimension. Layering two or three paper flowers together creates a fuller bloom.
Step 4: Glue Flowers to the Band
Arrange flowers along the paper band before gluing. Once you like the placement, attach each flower with glue. Add leaves between flowers to make the crown look fuller. Let everything dry before wearing.
Step 5: Reinforce the Crown
If the crown feels floppy, add a second paper strip behind the first one. You can also use tape on the inside to strengthen the band. For parties or classrooms, write each child’s name on the inside so no one accidentally goes home with someone else’s masterpiece.
How to Make Your Flower Crown Look Professional
The difference between a charming handmade flower crown and a messy one often comes down to spacing, layering, and finishing. Start with a clear design plan. Decide whether your crown will be full and lush, delicate and minimal, or bold and dramatic. Then choose materials that fit that style.
Layer greenery before flowers. Place larger flowers first. Use smaller flowers to blend edges and fill gaps. Keep the crown lightweight, especially if it will be worn for several hours. A heavy crown may look impressive on the table but feel like a floral dumbbell on your head.
Color also matters. For a soft romantic look, try blush, ivory, sage, and lavender. For a cheerful spring crown, use yellow, coral, pink, and fresh green. For a dramatic evening crown, try deep red, burgundy, plum, and dark greenery. If you are making crowns for an event, match the flowers to the outfit, theme, or season.
Common Flower Crown Mistakes to Avoid
Using Flowers That Are Too Heavy
Large flowers can look beautiful, but too many of them can pull the crown forward or make it uncomfortable. Balance big blooms with smaller filler flowers and greenery.
Making the Base Too Tight
Always test the base before decorating. Once flowers are added, the crown will feel smaller. When in doubt, make it slightly adjustable with ribbon.
Skipping the Greenery
Greenery hides wire, tape, glue, and gaps. It also makes the crown look more natural and polished.
Forgetting the Back
The back does not need to be as full as the front, but it should still look tidy. Cover exposed wire, tape ends, and glue spots.
Making It Too Early
Fresh flower crowns look best when made close to the event. If you must make one ahead of time, store it properly and choose hardy flowers.
Care Tips for Fresh Flower Crowns
Fresh flower crowns are living accessories, which is both beautiful and slightly dramatic. To keep yours looking its best, hydrate the flowers before crafting. Let them drink clean water for at least an hour before you begin. Keep the finished crown cool and mist it lightly if needed.
Avoid leaving a fresh crown in direct sunlight, a hot car, or near heaters. Heat speeds up wilting. If you are wearing the crown outdoors in warm weather, choose sturdy flowers and include plenty of greenery. The crown may not last forever, but with good preparation, it can stay lovely through your event.
Flower Crown Ideas for Different Occasions
- Wedding: Use spray roses, baby’s breath, eucalyptus, and soft ribbon.
- Music festival: Try faux sunflowers, daisies, bright roses, and metallic accents.
- Birthday party: Use colorful paper flowers or faux blooms that match the theme.
- Baby shower: Choose pastel flowers, delicate greenery, and a half-crown design.
- Fall event: Use faux mums, burgundy leaves, dried grasses, and warm orange tones.
- Kids’ craft: Use construction paper, cupcake liners, glue sticks, and pre-cut leaves.
Experience Notes: What Actually Works When Making Flower Crowns
After making several flower crowns for parties, photos, and family craft days, one lesson becomes clear very quickly: the crown always looks better when you slow down at the beginning. Measuring the head, shaping the base, and laying out the flowers before attaching anything may feel like boring prep work, but it saves you from the classic DIY panic moment where one side looks like a bridal accessory and the other side looks like it got into a fight with a craft drawer.
For fresh flower crowns, the most helpful habit is preparing more greenery and filler flowers than you think you need. Beginners often focus on the main flowers because they are the stars of the show. However, greenery is what makes the crown look finished. It hides floral tape, softens awkward gaps, and gives the whole piece a natural flow. Small filler flowers are also magic. They can rescue uneven spacing, cover a visible stem, or make a sparse section look intentional.
Another real-world tip: floral tape takes a little practice. It does not behave like regular tape. It becomes sticky when stretched, so if it seems useless at first, give it a gentle pull as you wrap. Once you get the rhythm, it becomes much easier. Keep your wraps snug but not bulky. Too much tape can make the crown stiff and heavy.
Faux flower crowns are more forgiving, especially for beginners. If you place a flower in the wrong spot, you can usually remove it and try again before the glue fully sets. Still, hot glue can get messy, so use small dots instead of giant blobs. A neat trick is to glue leaves over attachment points. This hides the mechanics and makes the design look layered. Faux crowns also benefit from asymmetry. A cluster of flowers slightly to one side often looks more stylish than a perfectly even ring.
Paper flower crowns are the most fun when you let go of perfection. Kids may create giant flowers, tiny flowers, upside-down leaves, and color combinations that no garden has ever attempted. That is part of the charm. For group crafts, prepare the bands ahead of time and offer a tray of flower shapes, leaves, markers, and glue sticks. This keeps the activity moving and prevents everyone from waiting for scissors. If the paper band feels weak, double it before decorating. A stronger base means fewer mid-party crown emergencies.
Comfort is another detail people forget. Always check the inside of the crown before wearing it. Wire ends, glue bumps, or rough stems can turn a lovely accessory into a tiny torture device. Cover scratchy areas with floral tape, felt, ribbon, or extra paper. If the wearer is a child, an adjustable ribbon closure or paper band is usually better than a tight wire circle.
Finally, flower crowns look best when they reflect the wearer. A delicate crown with tiny blossoms feels sweet and romantic. A bold crown with oversized flowers feels playful and confident. A paper crown covered in rainbow blooms feels joyful and imaginative. There is no single correct style. The goal is not to create a museum-worthy floral sculpture. The goal is to make something beautiful, wearable, and memorable with your own hands. If a petal tilts the wrong way, call it movement. If the colors are unexpected, call it artistic. That is the secret spirit of DIY crafting: confidence, creativity, and a little glue on your fingers.
Conclusion
Learning how to make a flower crown is easier than it looks, and it gives you endless room to be creative. A fresh flower crown brings natural beauty to weddings and special events. A faux flower crown gives you a reusable accessory that can handle travel, festivals, and repeat wear. A paper flower crown turns simple supplies into a cheerful craft for kids and adults alike.
The key is to start with a comfortable base, layer greenery and flowers thoughtfully, and finish the inside so it feels good to wear. Once you understand the basics, you can customize your crown for any season, outfit, party theme, or personality. Whether your style is soft and romantic or bright enough to make a sunflower jealous, your DIY flower crown can become the finishing touch that makes the whole look bloom.