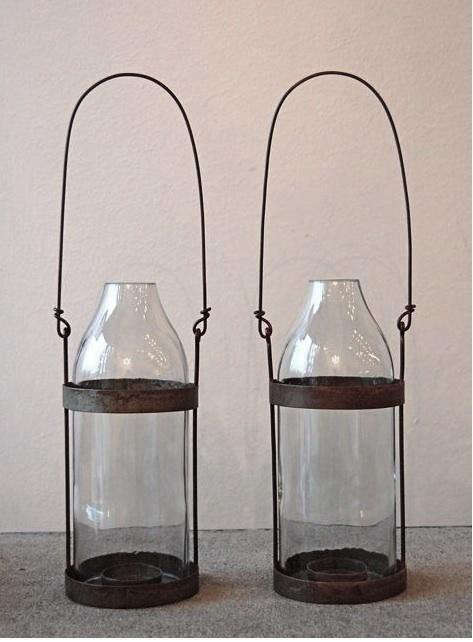
A recycled bottle tealight holder is proof that home décor does not need to arrive in a glossy box, cost half your grocery budget, or require a design degree from a school with very expensive chairs. Sometimes, the prettiest little glow on your table starts as an empty bottle headed for the recycling bin. Add a little cleaning, cutting, decorating, and common sense, and suddenly that “trash” becomes a handmade candle accent with personality.
This DIY project is especially popular because it sits at the cozy intersection of eco-friendly crafting, budget decorating, and “I made this myself, please admire it immediately.” Whether you use a glass bottle, small jar, wine bottle, soda bottle, or plastic bottle with a battery-operated tealight, the idea is simple: reuse a container, make it beautiful, and turn it into a soft light source for a shelf, patio table, centerpiece, wedding display, holiday mantel, or relaxing bath setup.
Even better, a recycled bottle tealight holder is beginner-friendly. You do not need a garage full of tools. You do not need to know the difference between twelve types of artisan glue. You simply need the right bottle, a safe lighting choice, a few decorative materials, and a willingness to let your first attempt look “rustic,” which is craft language for charmingly imperfect.
Why Make a Recycled Bottle Tealight Holder?
The biggest reason is obvious: it looks lovely. A tealight inside a translucent bottle creates a warm, flickering glow that feels calm, intimate, and slightly magical. Glass bottles scatter light beautifully, especially when they are green, amber, blue, frosted, or lightly painted. Clear bottles can look modern and minimal, while decorated jars bring a cottage, boho, farmhouse, coastal, or holiday feel.
The second reason is sustainability. Recycling and reusing containers helps reduce waste and gives materials a second life before they are discarded. The U.S. Environmental Protection Agency notes that recycling can conserve energy, reduce waste sent to landfills and incinerators, and help lower pollution. The EPA also gives a memorable example: recycling 10 plastic bottles can save enough energy to power a laptop for more than 25 hours. That is a small but satisfying win for your craft table and your conscience.
The third reason is cost. Store-bought candle holders can be beautiful, but they can also be oddly expensive for something that mostly sits still. A recycled bottle project turns common household packaging into custom home décor for just a few dollars. Ribbon, twine, paint, stickers, dried flowers, sea glass, pebbles, beads, lace, wire, and metallic markers can all transform an ordinary bottle into something gift-worthy.
Best Bottles to Use for Tealight Holders
Not all bottles are equally suited for this project. The best choice depends on whether you want to use a real candle or a flameless LED tealight. This matters because candle safety is not optional. It is the difference between cozy ambiance and a dramatic evening no one asked for.
Glass Bottles and Jars
Glass bottles are the best choice if you want a holder that looks elegant and lasts a long time. Wine bottles, kombucha bottles, olive oil bottles, sauce jars, baby food jars, jam jars, and small mason jars all work well. Wide-mouth jars are especially easy because you can simply place a tealight inside without cutting the glass.
If you are using a real flame, choose heat-safe glass and keep the flame away from any decorations, labels, string, paper, fabric, or paint that could burn. A glass jar with a wide opening is safer than a narrow-neck bottle because heat can escape more easily. For enclosed or narrow bottle designs, a battery-operated tealight is the better option.
Plastic Bottles
Plastic bottles can make fun, lightweight tealight holders, but only with flameless LED tealights. Do not put a real flame inside or near a plastic bottle. Plastic can melt, warp, smoke, or ignite. A recycled plastic bottle tealight holder should be treated as a decorative lantern for battery-powered lights only.
Clear water bottles, soda bottles, shampoo bottles, and detergent bottles can all be used creatively. PET and HDPE bottles are common in U.S. recycling programs, though local rules vary. For crafting, plastic bottles are easy to cut, punch, paint, and decorate, making them great for kids’ crafts when adults handle the sharp tools.
Colored Bottles
Colored glass bottles are excellent for mood lighting. Amber bottles create a cozy golden glow. Green bottles feel rustic and natural. Blue bottles look coastal and calm. Frosted bottles soften the light, while clear bottles show off interior fillers such as pebbles, glass gems, sand, shells, or dried botanicals.
Materials You Will Need
Here is a simple supply list for a recycled bottle tealight holder. You can adjust it based on the design you want.
- Clean recycled glass bottle, jar, or plastic bottle
- Battery-operated LED tealight, especially for plastic or enclosed bottles
- Real tealight only for safe, open, heat-resistant glass holders
- Dish soap, warm water, and vinegar for cleaning
- Rubbing alcohol for removing residue
- Scissors or craft knife
- Glass cutter, if cutting glass
- Sandpaper or sanding sponge for smoothing edges
- Twine, ribbon, lace, jute, wire, or beads
- Glass paint, acrylic paint, paint pens, or spray paint
- Mod Podge or craft sealant
- Decorative fillers such as stones, sand, shells, or sea glass
- Hot glue gun or strong craft adhesive
- Protective gloves and safety glasses if cutting glass
How to Make a Recycled Bottle Tealight Holder
The easiest version of this project uses a small glass jar and an LED tealight. It requires no glass cutting, no complicated tools, and very little cleanup. It is perfect for beginners, parties, school projects, and anyone who wants a quick win before dinner.
Step 1: Choose and Clean the Bottle
Start by choosing a bottle or jar with a shape you like. Remove the label by soaking the container in warm, soapy water. If the glue refuses to surrender, rub it with baking soda and oil, vinegar, or rubbing alcohol. Rinse well and let the bottle dry completely.
A clean surface is important because paint, glue, and decorative wrap stick better when the bottle is free of grease and label residue. This is the unglamorous part of the project, but skipping it is how you end up with a ribbon sliding off your candle holder like it has somewhere better to be.
Step 2: Decide on the Lighting Style
Before decorating, decide whether you will use a real tealight or a flameless LED tealight. For plastic bottles, use LED only. For narrow glass bottles, use LED only. For open glass jars, you may use a real tealight if the jar is stable, heat-resistant, and clear of flammable materials.
Fire-safety organizations recommend caution with candles because an open flame can ignite nearby materials. The U.S. Fire Administration advises keeping candles at least 12 inches away from anything that burns and using stable holders that cannot be knocked over easily. Battery-operated flameless candles are a safer choice for most recycled bottle designs.
Step 3: Create an Opening
If you are using a jar, you may not need to cut anything. Simply leave the top open and place the tealight inside. If you are using a plastic bottle, an adult can cut off the top or bottom to create a lantern shape. Smooth any rough edges with sandpaper, washi tape, ribbon, or folded fabric trim.
If you want to cut a glass bottle, use a proper glass bottle cutter and follow the tool instructions carefully. After cutting, sand the edge thoroughly until it is smooth. Glass cutting can be beautiful, but it is not the best first step for children or impatient adults who believe “careful” is a personality flaw.
Step 4: Add Decorative Details
Now comes the fun part. Wrap twine around the neck for a rustic look. Paint dots, stars, vines, snowflakes, leaves, or geometric patterns on the surface. Use frosted glass spray for a soft glow. Add lace for vintage charm, metallic paint for glamour, or sea glass for coastal style.
For a farmhouse recycled bottle tealight holder, wrap the lower third in jute twine and tie a small tag around the neck. For a holiday version, add white paint dots like falling snow and place tiny pine sprigs around the base. For a summer patio lantern, fill the bottom with sand and shells, then use a warm LED tealight.
Step 5: Place the Tealight
Place the tealight on a stable, flat surface inside the bottle or jar. If the opening is narrow, use long tweezers or tongs to position an LED tealight. Do not force a real candle into a tight space. It needs airflow and safe clearance. When in doubt, go flameless. The glow is still pretty, and nobody has to hover nearby like a nervous camp counselor.
Step 6: Display Safely
Set your recycled bottle tealight holder on a level surface away from curtains, papers, dried flowers, table runners, and anything that could tip it over. If you are making several holders for a table centerpiece, keep decorations low and leave space between pieces. For outdoor use, choose LED candles so wind does not turn your beautiful display into a tiny, panicked weather event.
Design Ideas for Every Style
Boho Bottle Tealight Holder
Use an amber or green glass bottle, wrap the neck with macramé cord, and add wooden beads. Place an LED tealight inside and pair it with dried pampas grass nearby. This design works well for bedrooms, reading corners, patios, and relaxed dinner tables.
Coastal Tealight Holder
Fill a clear jar with a shallow layer of sand, tiny shells, and blue glass pebbles. Add a flameless tealight on top. Wrap the rim with thin rope and finish with a small shell charm. This is a great way to reuse jars from sauces, jams, or pickles.
Holiday Bottle Lantern
Paint a clean jar with frosted glass paint, then dot the outside with white, silver, or gold paint. Add a red ribbon or evergreen-style trim around the top. Use an LED tealight for a cozy holiday glow on mantels, entry tables, or windowsills.
Modern Minimalist Holder
Choose a clear glass bottle or jar with a simple shape. Remove all labels, polish the glass, and add only one thin black ribbon, metallic line, or painted stripe. Minimalist design works best when the bottle shape is strong and the decoration is restrained.
Garden Party Lantern
Wrap wire around the rim of a jar to create a handle, then hang it from a shepherd’s hook or sturdy branch. Use LED tealights outdoors. Add small stones at the bottom for weight. This creates charming recycled bottle lanterns for barbecues, weddings, and backyard dinners.
Safety Tips You Should Not Skip
A recycled bottle tealight holder is simple, but safety still matters. The National Fire Protection Association describes a candle as an open flame that can easily ignite anything that burns. That is why flameless candles are strongly recommended for plastic bottles, narrow bottles, hanging lanterns, children’s crafts, and outdoor displays.
If you use real candles, keep them in stable holders and never leave them unattended. The Consumer Product Safety Commission has advised consumers to keep burning candles within sight and put them out before leaving a room or going to bed. This is not the glamorous part of DIY, but it is the part that keeps the evening from becoming a neighborhood story.
Also avoid placing real flames near dried flowers, paper labels, burlap, lace, twine, ribbon, faux greenery, or painted plastic. Many of those materials look adorable next to candlelight, but they are not flame-friendly. Use LED tealights whenever your design includes decorative materials close to the light source.
Eco-Friendly Crafting Tips
To make this project even greener, use supplies you already own. Leftover ribbon from gift wrapping, old buttons, fabric scraps, broken jewelry, spare beads, and leftover paint can all become part of the design. The goal is not to buy a cart full of new craft materials just to prove you are recycling. That would be like driving across town to buy a reusable bag.
When a bottle does not work for your project, recycle it properly if your local program accepts it. How2Recycle recommends keeping recycling loose in the bin, giving food and drink containers a quick rinse, and screwing tops back onto bottles when instructed by the label. Recycling rules vary by city, so check your local guidelines for glass, plastic caps, and mixed materials.
If you use plastic bottles, try to design them so they can be disassembled later. Avoid permanently gluing mixed materials all over a bottle you may eventually recycle. Removable decorations, tied-on twine, and reusable LED lights help extend the life of the project without creating a hard-to-recycle mess later.
Common Mistakes to Avoid
Using Real Flames in Plastic Bottles
This is the biggest no. Plastic bottle tealight holders are for LED tealights only. Real flames and plastic do not belong together, no matter how cute the design looks on a table.
Forgetting to Smooth Cut Edges
Cut glass and plastic can be sharp. Always smooth edges with sandpaper, tape, trim, or edging materials. A candle holder should create ambiance, not bandages.
Overdecorating the Bottle
Too many decorations can block the glow. Leave some open space so the light can shine through. Think of the bottle as a lantern, not a scrapbook page in cylinder form.
Ignoring Stability
Tall bottles can tip easily, especially outdoors. Add stones, sand, or glass gems to the bottom for weight. Place holders on flat surfaces and avoid crowded table arrangements.
Where to Use Recycled Bottle Tealight Holders
These holders are surprisingly versatile. Use them as dinner table centerpieces, mantel accents, bathroom spa lights, wedding aisle markers, patio lanterns, holiday decorations, or handmade gifts. A set of three in different heights looks especially polished. Grouping odd numbers often feels more natural in home décor, so try one tall bottle, one medium jar, and one small tealight holder together.
They also make thoughtful homemade gifts. Pair a decorated bottle holder with a pack of LED tealights and a handwritten tag. For housewarmings, use neutral colors. For holidays, add seasonal ribbon. For birthdays, paint the bottle in the recipient’s favorite color. Handmade gifts feel personal because they carry time, effort, and the faint evidence that you wrestled with a glue gun and won.
My Experience Making Recycled Bottle Tealight Holders
The first recycled bottle tealight holder I made was not the elegant masterpiece I had imagined. In my head, it looked like something from a boutique home store where everything smells faintly of cedar and costs more than expected. In reality, I had a spaghetti sauce jar, some twine, cloudy glass from inadequate rinsing, and a hot glue string stretching across the table like a spider had joined the craft session.
But that first attempt taught me the most important lesson: simple is usually better. I cleaned the next jar more carefully, removed the label completely, and used rubbing alcohol to get rid of the last sticky spots. Then I wrapped twine around only the top third of the jar instead of covering the whole thing. I added a few small dots of metallic paint, dropped in an LED tealight, and suddenly it worked. The light came through the clear glass, the twine added texture, and the whole piece looked intentional instead of rescued from a recycling bin five minutes before guests arrived.
Another useful experience came from experimenting with colored bottles. Amber glass was my favorite for cozy evening lighting because it made the LED flame look warmer. Green glass felt earthy and worked beautifully with jute twine and small stones. Clear glass was the most flexible, but it also showed every fingerprint, streak, and glue smudge. If you use clear bottles, clean them thoroughly and handle them with a cloth before displaying them.
I also learned that scale matters. A tiny tealight can disappear inside a large bottle unless the bottle is frosted, tinted, or filled at the base with decorative materials. For bigger bottles, adding pebbles, sand, glass gems, or shells lifts the light slightly and gives the holder more visual weight. For small jars, less filler is better. Too much sand or too many stones can make the tealight sit awkwardly near the rim.
One of the best versions I made used a short glass yogurt jar, frosted spray, and white paint dots. It looked like soft snowfall when lit from within. Another favorite used a clear jar wrapped with lace from an old gift package. The lace pattern cast faint shadows on the table, which made it look far more expensive than it was. That is the magic of recycled crafts: the materials may be humble, but the result can feel special.
The biggest practical tip from experience is to make several holders at once. Since you already have the cleaning supplies, paint, glue, and decorations out, it is much easier to batch the project. Make three or five in one session, then mix and match them around your home. A single holder is pretty, but a small group creates atmosphere. Place them along a dining table, cluster them on a tray, or line them on outdoor steps with LED lights.
I also recommend testing the glow in a dark room before declaring the project finished. Some paint colors look beautiful in daylight but block too much light at night. Heavy ribbon can hide the candle effect. Metallic paint looks best in small details rather than thick coverage. The finished piece should look attractive when unlit, but the real test is how it behaves after sunset.
Finally, do not chase perfection. A recycled bottle tealight holder should look handmade. Slightly uneven twine, hand-painted dots, and repurposed materials are part of the charm. The point is not to create identical factory décor. The point is to turn something ordinary into something warm, useful, and personal. If your first holder looks a little quirky, congratulations. You have made art with a backstory.
Conclusion
A recycled bottle tealight holder is one of those rare DIY projects that checks nearly every box. It is affordable, attractive, customizable, beginner-friendly, and eco-conscious. It can be rustic, modern, romantic, seasonal, playful, or elegant depending on the bottle and decorations you choose. Most importantly, it gives everyday materials a second life instead of sending them straight to the bin.
For the safest and most flexible results, use flameless LED tealights, especially with plastic bottles, narrow glass bottles, hanging lanterns, or heavily decorated designs. Clean the container well, keep the design simple enough to let light shine through, and display your finished holder on a stable surface. With a little imagination, yesterday’s empty bottle can become tonight’s cozy glow.
Note: This article is based on real recycling, candle-safety, and upcycling guidance from reputable U.S. sources, including the EPA, NFPA, U.S. Fire Administration, CPSC, How2Recycle, Earth911, HGTV, Better Homes & Gardens, Martha Stewart, and The Spruce Crafts.