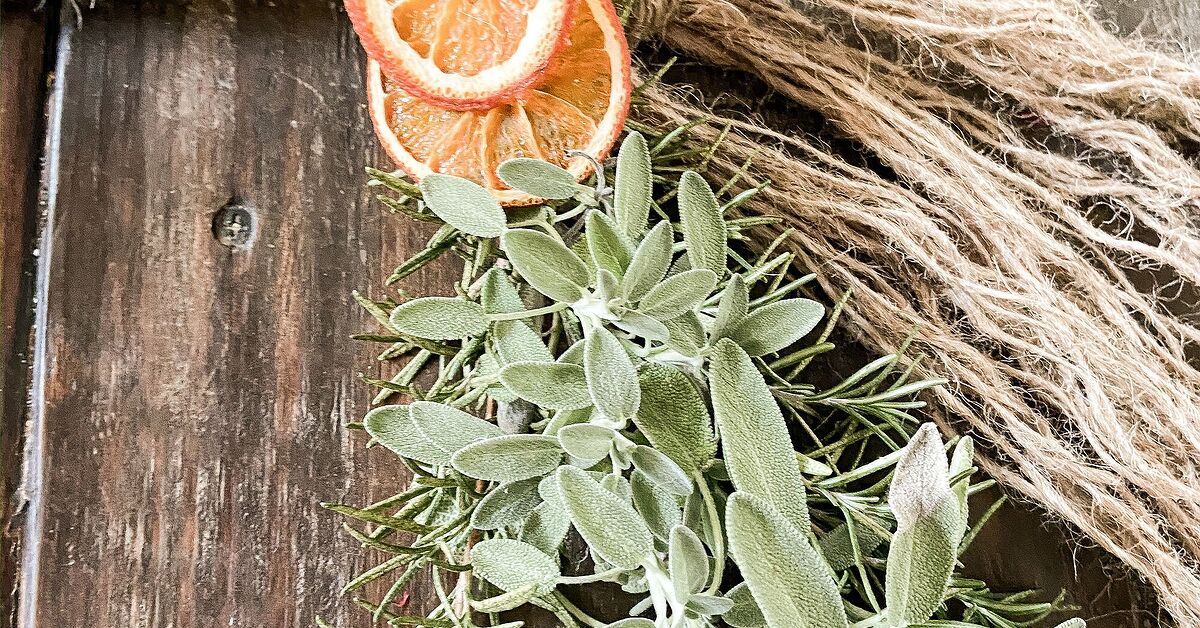
If your kitchen has ever felt like it needed a tiny personality upgrade, herb garland may be the answer. It is fragrant, useful, pretty, surprisingly forgiving, and just rustic enough to make people think you have your life together. Whether you drape it across a window, hang it in the kitchen, style it on a mantel, or use it as a table runner that smells like an herb garden after rain, herb garland is one of those rare DIY projects that is both decorative and practical.
The beauty of making herb garland is that it does not require fancy floral-school credentials, a dramatic crafting montage, or a suspiciously expensive shopping cart. You need herbs, a few basic supplies, and a plan. Better yet, this project works whether you are using fresh cuttings from the backyard, bunches from the farmers market, or extra stems from grocery-store herbs that are one tiny step away from becoming compost.
In this guide, you will learn which herbs work best, how to assemble garland so it looks lush instead of limp, how to dry it without inviting mold to the party, and how to style it so it actually suits your space. By the end, you will have a garland that smells amazing, looks custom-made, and may even become your favorite seasonal tradition.
Why Make Herb Garland in the First Place?
Because it does three jobs at once. First, herb garland adds natural texture and softness to a room. Second, it fills the air with a subtle garden fragrance that beats synthetic air fresheners by a mile. Third, depending on how you make it, it can double as a functional kitchen decoration. Snip a little rosemary here, a little thyme there, and suddenly your decor is contributing to dinner.
Herb garland also fits a lot of styles. It can look farmhouse, cottagecore, modern organic, holiday-ready, or just plain cozy. A simple strand of rosemary and bay leaves feels clean and classic. A fuller mix with sage, thyme, lavender, and dried flowers looks more layered and romantic. Add citrus slices, ribbon, or seed heads and it becomes instantly festive without looking like it raided a craft store at midnight.
Best Herbs for Herb Garland
Not all herbs behave the same way once they are cut. Some stay handsome and structured. Others wilt like they have received devastating news. The best herb garland usually combines sturdy herbs that create shape with softer herbs that add fullness and scent.
Best structural herbs
Rosemary is the all-star. It has woody stems, holds its shape beautifully, smells wonderful, and creates a strong visual backbone. Sage is another winner because its velvety leaves add softness and a silvery-green color. Thyme works well as a filler, especially in smaller, delicate garlands. Bay leaves add a polished, culinary look that feels timeless.
Great aromatic fillers
Oregano, marjoram, and lavender all add scent and texture. Mint can smell incredible, but it is more delicate and usually works best when the garland will dry fairly quickly rather than hang fresh for too long. Lemon balm gives a bright, citrusy note, though it is softer and may need support from sturdier stems.
Pretty extras
If you want more visual interest, add basil flower spikes, strawflowers, yarrow, or dried seed heads. These extras can make the garland feel more designed and less like a very ambitious salad. Just keep the look balanced. You want “thoughtfully gathered from the garden,” not “yard debris with confidence.”
Tools and Materials
You do not need much:
- Fresh or partially dried herbs
- Garden snips or sharp scissors
- Natural twine, jute, or thin rope
- Floral wire or paddle wire
- Rubber bands or cotton string for bunches
- Optional ribbon, dried citrus slices, or dried flowers
- Command hooks, nails, or removable wall hooks for hanging
If you want a loose, draping garland, twine is perfect. If you want a thicker, fuller piece for a mantel or table, you can build it over a stronger rope or attach bundles to a premade greenery base. For a super tidy look, keep floral wire hidden underneath the stems as you go.
How to Make Herb Garland Step by Step
1. Harvest or buy the right herbs
Cut herbs when they are dry, not wet from watering or morning moisture. This matters more than most first-timers realize. Damp herbs are far more likely to mildew, and mildew is not the rustic look we are going for. Morning is usually ideal once the dew has evaporated, especially before the day gets hot and the herbs lose some of their best flavor and fragrance.
Use longer stems when possible. Six to ten inches is a friendly range for most garlands because the stems are long enough to tie, overlap, and layer without fighting you every step of the way.
2. Clean them gently
Shake the stems to remove dirt and tiny garden hitchhikers. If the herbs are visibly dirty, rinse them lightly and dry them thoroughly before you do anything else. Really thoroughly. Pat them dry, then let them air out. Wet herbs rot faster than leftover lettuce in the back of the fridge.
3. Strip the lower stems
Remove the leaves from the bottom inch or two of each stem. This gives you a cleaner tying area and makes the finished garland look neater. Save those stripped leaves for cooking, tea, compound butter, or a heroic attempt at homemade focaccia.
4. Make small bundles
Group herbs into small clusters instead of trying to attach giant handfuls at once. Small bundles dry better, look tidier, and are easier to overlap. A good bundle might include one rosemary stem, one sage stem, a couple of thyme sprigs, and a lighter filler like oregano or lavender. Tie each bundle with string or wrap it tightly with floral wire.
If your herbs are soft and leafy, keep the bundles smaller so air can move through them. Think of it as crowd control for plants.
5. Attach bundles to your base
Lay out your twine or rope flat on a table. Start at one end and place the first bundle so the leafy tips point in one direction. Tie or wire it in place. Add the next bundle slightly over the stems of the first, overlapping them so the mechanics disappear and the garland looks full. Continue in the same direction, repeating the pattern all the way down.
This overlapping method is the magic trick. It creates movement, hides the wiring, and gives the garland that lush handmade look you see in magazine photos and think, “Sure, but who actually has time for that?” Apparently, you do now.
6. Check the shape as you go
Pause every few bundles and hold the garland up. If it looks too skinny, add fuller clusters. If it looks bulky and uneven, remove a few stems or spread the material out more evenly. Garland is one of those projects where tiny adjustments make a big difference.
7. Add optional accents
Once the herb base is finished, weave in dried orange slices, thin ribbon, or dried flower heads. Keep the extras light. The herbs should still be the stars of the show. A few lavender spikes or lemon slices can add color and charm without turning the whole thing into a holiday craft explosion.
8. Hang it correctly
If your garland is fresh, hang it away from direct sunlight, heater vents, fireplaces, and hot windows. Heat dries greenery too fast and can make it shed, fade, or crisp unevenly. If you want the herbs to dry naturally, place the garland where air can circulate well. A shaded kitchen wall, pantry entrance, or covered porch often works beautifully.
Fresh vs. Dried Herb Garland
You have two good options, and both are valid.
Fresh herb garland looks lush and vibrant right away. It is ideal for parties, seasonal decorating, and short-term display. It smells stronger at first and feels more dramatic. The downside is that it is temporary and more sensitive to heat and dryness.
Dried herb garland is more durable and often easier to manage long term. It has a slightly softer color palette and a more old-world look. If you love the idea of a garland that can hang for weeks or even months, dried is the smarter route.
A hybrid method works well too: make the garland with fresh herbs, then let it dry in place. This is often the easiest approach because the stems are flexible during assembly and then set into their final shape as they dry.
How to Keep Herb Garland Looking Good
For fresh garland, hydration matters. If the herbs are especially dry when you start, you can condition them for a short time before building. Once hung, keep the garland cool and out of harsh light. A light mist may help certain fresh garlands in dry indoor air, but do not soak soft leafy herbs once they are assembled or you may slow drying too much.
For dried garland, leave it alone more often than not. Too much touching causes shedding. Dust it gently if needed. If you made the garland for cooking, keep it away from grease, smoke, and random kitchen splatter. “Decorative oregano with notes of bacon grease” is not a flavor profile anyone requested.
Common Mistakes to Avoid
Using herbs that are too wet: This is the fastest route to mold.
Making giant bundles: Thick clusters trap moisture and dry unevenly.
Ignoring stem strength: Soft herbs alone can collapse. Pair them with woody stems.
Hanging it in full sun: Direct sun fades herbs and can cook fresh garland faster than expected.
Overdecorating: A few accents are lovely. Thirty accents are a cry for help.
Can You Cook With a Herb Garland?
Yes, but only if you build it with food use in mind. That means no chemical sprays, no glitter, no painted decorations, and no questionable craft-store add-ons touching the herbs. Keep the garland in a clean indoor area, and use only herbs you would normally cook with. Snip from the outer edges as needed. Rosemary, thyme, sage, oregano, and bay are especially practical choices for a kitchen garland because they dry well and hold their aroma nicely.
If the garland is purely decorative, that is also perfectly fine. In that case, you can be more playful with the design and add non-edible elements. Just do not mix the two goals carelessly. Decorative herbs and dinner herbs should know what kind of relationship they are in.
Easy Herb Garland Design Ideas
Classic kitchen garland: Rosemary, thyme, sage, and bay on natural twine.
Soft cottage garland: Lavender, lemon balm, oregano, sage, and dried flowers.
Holiday herb garland: Rosemary, bay, sage, dried orange slices, and velvet ribbon.
Minimal modern garland: Mostly bay leaves with small rosemary clusters and lots of negative space.
Table runner garland: A fuller mix laid along the center of the table with candles nearby, but never close enough to turn dinner into a fire-safety lesson.
Final Thoughts
Making herb garland is simple once you understand the rhythm: choose the right herbs, work in small bundles, overlap as you build, and let airflow do the rest. The finished piece is equal parts garden craft and practical decor. It looks beautiful, smells even better, and makes a room feel more personal. Best of all, it does not need to be perfect. A slightly wild herb garland often looks more charming than one that is too polished. Plants are allowed to look like plants. That is part of the magic.
So gather your rosemary, grab your twine, and give your walls, windows, or table a little herbal drama. It is one of the easiest ways to make a home feel warm, seasonal, and alive without buying something plastic that will eventually live out its final years in a storage bin labeled “misc holiday stuff.”
Real-Life Experiences and Tips From Making Herb Garland
The first thing most people notice when they make herb garland is that the experience is slower and more satisfying than expected. You start by clipping a few stems, thinking it will be a quick craft, and then suddenly you are standing in the kitchen deciding whether thyme looks better next to sage or next to lavender. It becomes less about racing to a finished product and more about paying attention to small details: how different leaves feel, how scent changes from bundle to bundle, and how a simple length of twine can turn into something striking.
One of the most memorable parts is the fragrance. Fresh rosemary wakes up the whole room. Sage adds an earthy softness. Lavender changes the mood instantly. Even before the garland is finished, the worktable starts to smell like an herb garden and a cozy kitchen got together and decided to improve your day. That sensory part is what makes this project stand out from a lot of other decorations. It is not only visual. It creates an atmosphere.
There is also a learning curve that becomes part of the fun. On the first try, many people make bundles that are too large, tie things too tightly, or use herbs that are too tender to hold their shape. Then the adjustment happens. The second section looks better than the first. By the middle of the garland, you start to understand balance. You realize rosemary can do the heavy lifting, thyme can soften the edges, and a small sprig of lavender can keep the whole thing from looking flat. It feels a little like cooking without a strict recipe. You learn by noticing.
Another common experience is discovering how personal the final result becomes. No two herb garlands really look alike. Someone with a garden full of sage and oregano will create something fuller and more rustic. Someone using market herbs and a few dried flowers may end up with a cleaner, more styled piece. Even the place where the garland hangs changes its personality. In a kitchen, it feels useful and homey. Over a mantel, it feels more decorative. Along the center of a table, it suddenly becomes a conversation starter.
People also tend to remember the little imperfections fondly. A slightly crooked section, a stray stem, a bundle that dried into a different shape than planned, all of that adds character. Herb garland often looks better when it is not too controlled. That handmade quality is what gives it warmth. It tells people that a real person made it, not a factory trying very hard to imitate “authentic rustic charm.”
Finally, making herb garland often turns into a repeat project. Once you do it once, you start noticing opportunities everywhere. Summer clippings become kitchen decor. Fall herbs become wreaths and swags. Winter tables get dressed up with dried rosemary and bay. It is the kind of craft that sneaks into your routine because it is useful, beautiful, and adaptable. And that may be the best experience of all: realizing that something so simple can make your home feel richer, calmer, and much more alive.