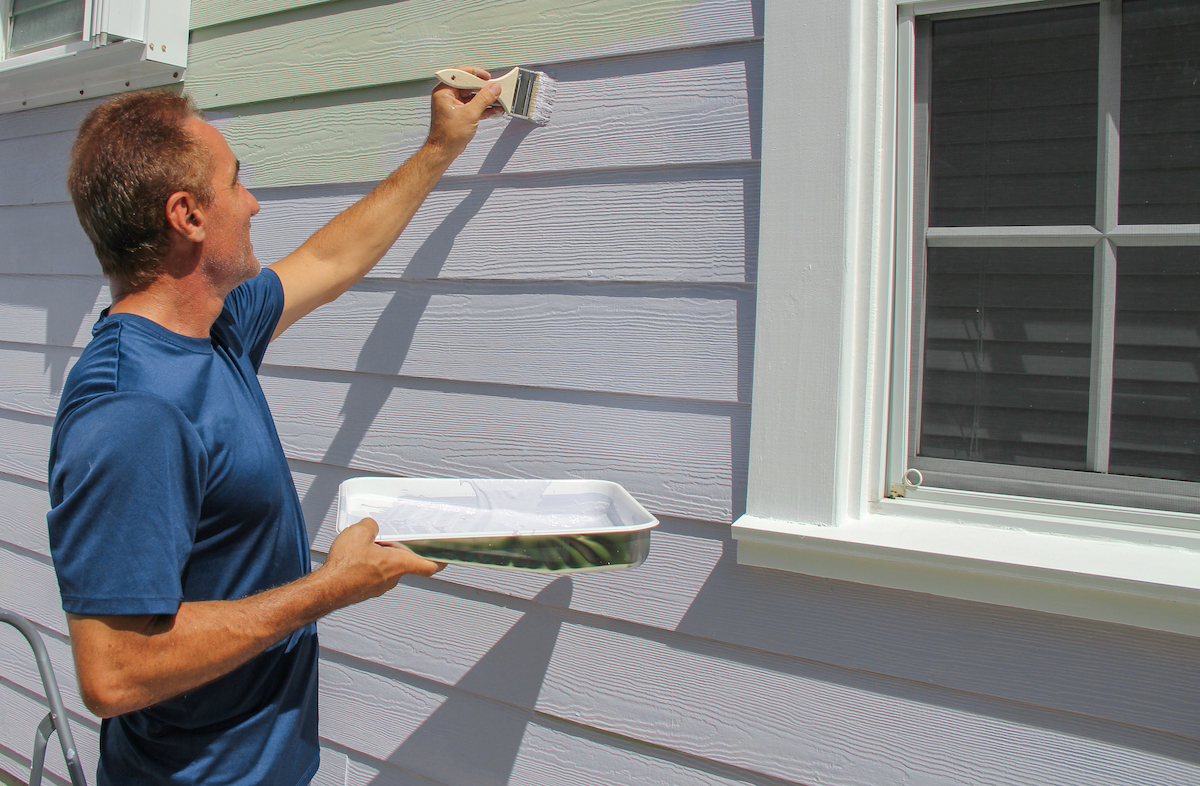
Vinyl siding is the sweatpants of home exteriors: practical, comfortable, and not always as stylish as we wish. The good news? If your siding is faded, chalky, or stuck in a color chosen by someone with suspiciously beige taste, you do not necessarily need to replace it. You can paint vinyl siding and give your home a fresh, clean, curb-appeal-boosting makeover without handing your wallet over to a siding crew.
That said, painting vinyl siding is not the same as painting a bedroom wall. Vinyl expands, contracts, flexes, heats up in the sun, and can warp if you choose the wrong paint color. The secret is simple: clean thoroughly, use the right exterior paint, pick a vinyl-safe color, paint in friendly weather, and apply thin, even coats. Do that, and your home can go from “well, it has potential” to “wait, did you get new siding?”
This guide explains how to paint vinyl siding step by step, what tools and materials you need, how to avoid peeling and warping, and what real-world lessons make the difference between a crisp finish and a weekend project that haunts you every time you pull into the driveway.
Can You Paint Vinyl Siding?
Yes, you can paint vinyl siding. In fact, painting is often a smart option when the siding is still structurally sound but looks faded, oxidized, stained, or outdated. Vinyl siding does not rot like wood, but the surface can lose its original color after years of sun exposure. A quality paint job can refresh the exterior and extend the visual life of the siding.
The key phrase is “structurally sound.” Paint is not a magic wand. It will not fix cracked panels, loose sections, moisture problems, buckling, brittle siding, or installation issues. If the siding is damaged, repair or replace those sections before painting. Otherwise, you are basically putting a tuxedo on a raccoon: impressive from a distance, chaotic up close.
When Painting Vinyl Siding Makes Sense
Painting vinyl siding is a good idea when the siding is faded but intact, the current color makes your house look tired, replacement is not in the budget, or you want to improve curb appeal before selling. It can also be useful when different sides of the home have faded unevenly because of sun exposure.
However, replacement may be smarter if the siding is badly warped, cracked, loose, brittle, or near the end of its expected service life. If your siding crumbles when you touch it, painting it will only create a prettier problem. Also check the warranty. Some siding manufacturers may limit or void coverage if the siding is painted, especially if you use an unapproved color or coating.
Choose the Right Paint for Vinyl Siding
The best paint for vinyl siding is a high-quality exterior acrylic latex paint or an exterior paint formulated specifically for vinyl. Look for products that offer strong adhesion, flexibility, UV resistance, mildew resistance, and durability. Vinyl moves with temperature changes, so the paint must be flexible enough to expand and contract without cracking or peeling.
Avoid oil-based paints. They are usually too rigid for vinyl siding and may crack as the siding flexes. Also avoid bargain-bin exterior paints that do not list vinyl as an appropriate surface. Saving a little money on paint can cost you a lot more when you have to repaint the entire house sooner than expected.
Should You Use Primer?
Primer is not always required on clean, sound vinyl siding when using a premium exterior paint designed for vinyl. Many modern exterior paints adhere well without primer. However, primer may be helpful if the siding is badly weathered, chalky after cleaning, uneven in sheen, pitted, stained, or previously painted with an unknown coating.
When in doubt, follow the paint manufacturer’s technical instructions. If the label says primer is needed for your siding condition, do not argue with the label. Paint labels are boring, yes, but they are usually boring because they are trying to save you from disaster.
Pick a Vinyl-Safe Color
Color choice matters more on vinyl siding than it does on many other exterior surfaces. Dark colors absorb more heat. When vinyl gets too hot, it can warp, buckle, or twist. That is why most experts recommend choosing a color that is the same shade or lighter than the original siding color unless you are using a vinyl-safe paint color specifically engineered for darker applications.
Light grays, warm whites, soft beiges, pale greens, muted blues, and greige shades are usually safer choices for older vinyl. If you dream of charcoal, navy, black, or deep forest green, choose a paint line with vinyl-safe color technology and confirm the color is approved for vinyl siding. Do not rely on a tiny paint chip and optimism. Optimism does not prevent heat warping.
Tools and Materials You Will Need
- Exterior acrylic latex paint or vinyl-safe exterior paint
- Exterior primer, if required
- Soft-bristle brush or siding cleaning brush
- Garden hose with spray nozzle
- Mild detergent or vinyl siding cleaner
- Bucket and sponge
- Painter’s tape
- Plastic sheeting or drop cloths
- Paint sprayer, roller, or high-quality synthetic brush
- Extension pole
- Ladder with stabilizer
- Caulk for exterior gaps, if needed
- Replacement siding pieces for damaged panels
- Safety glasses and gloves
Step 1: Inspect the Siding
Before cleaning or painting, walk around the house and inspect every wall. Look for cracked panels, loose seams, warped areas, open gaps, missing trim, mildew, chalky residue, and places where water may be getting behind the siding. Pay special attention around windows, doors, vents, corners, hose bibs, and utility penetrations.
Repair damaged panels before painting. If the siding is loose, secure it properly while still allowing for normal movement. Vinyl siding should not be nailed tightly because it needs room to expand and contract. Painting over loose or buckled siding only makes the problem more noticeable.
Step 2: Clean the Vinyl Siding Thoroughly
Cleaning is the most important step in painting vinyl siding. Paint will not bond well to dirt, pollen, mildew, algae, chalky oxidation, spider webs, or the mysterious gray film that appears on houses after a few seasons of weather. If you skip cleaning, the paint may peel, streak, or fail prematurely.
For general cleaning, use a bucket of warm water with mild dish soap or a vinyl siding cleaner. Scrub with a soft-bristle brush, working from the bottom up to reduce streaking, then rinse from the top down with a garden hose. For mildew, a diluted vinegar-and-water solution can help. Avoid harsh solvents, abrasive scrubbers, and aggressive pressure washing that can force water behind the siding.
If you use a pressure washer, keep the pressure low, use a wide-angle tip, and spray straight at the wall rather than upward under the laps. Vinyl siding overlaps for drainage, not for receiving a high-pressure water cannon from below. Let the siding dry completely before moving on. Depending on weather, drying may take 24 hours or more.
Step 3: Protect Windows, Doors, Plants, and Fixtures
Once the siding is dry, tape off trim, windows, doors, light fixtures, outlets, shutters, house numbers, and anything else that should not become part of your new color scheme. Cover shrubs, flowers, porch floors, decks, walkways, and outdoor furniture with plastic sheeting or drop cloths.
Do not wrap plants tightly for hours in direct sun. Plants dislike being cooked in plastic, which is reasonable. Cover them while painting nearby, then uncover them as soon as possible.
Step 4: Check the Weather
Paint vinyl siding on a mild, dry day. Ideal conditions are usually moderate temperatures, low humidity, light wind, and no rain in the forecast for at least 24 hours. Avoid painting in direct, blazing sunlight because the paint can dry too quickly, leading to lap marks and poor adhesion.
Many exterior paints perform best between about 50°F and 90°F, although some specialty products allow lower-temperature application. Always check the label. If the surface is too hot to comfortably touch, it is too hot to paint. Start on the shaded side of the house and follow the shade as the sun moves.
Step 5: Apply Primer if Needed
If your siding needs primer, apply a thin, even coat using a sprayer, roller, or brush. Use a primer approved for exterior vinyl or difficult-to-coat surfaces. Do not apply heavy coats. Thick primer can create texture, runs, and drying problems.
Let primer dry according to the manufacturer’s instructions before painting. Dry time depends on temperature, humidity, air movement, and product formula. If the surface still feels tacky, wait. Paint is not impressed by impatience.
Step 6: Paint the First Coat
A paint sprayer is often the fastest method for vinyl siding and can create a smooth, professional-looking finish when used correctly. Work in manageable sections, keep the sprayer moving, and overlap each pass slightly. Back-brushing or back-rolling may help work paint into grooves and edges, depending on the siding profile and paint instructions.
If you are using a roller, choose a high-quality roller cover with a nap suited to the siding texture. Roll horizontally with the siding lines and use a brush for edges, corners, and tight spots. Apply thin coats rather than trying to achieve full coverage in one heroic pass. Heavy paint can sag, collect in seams, and look uneven.
Step 7: Apply the Second Coat
Most vinyl siding paint jobs look better and last longer with two coats. The first coat creates adhesion and coverage; the second coat deepens the color, evens the sheen, and improves durability. Wait the recommended recoat time before applying the second coat.
Use the same technique as the first coat. Keep a wet edge where possible, avoid stopping in the middle of large sections, and watch for drips under laps and trim. If you see a drip, smooth it while wet. Once it dries, it becomes a tiny monument to your distraction.
Step 8: Remove Tape and Inspect the Finish
Remove painter’s tape before the paint fully hardens, unless the tape instructions say otherwise. Pull slowly at an angle to avoid lifting the fresh paint. Inspect the siding from different angles and in different light. Touch up thin spots, edges, and missed grooves with a brush.
Do not scrub the new paint immediately. Exterior paint needs time to cure, even after it feels dry. Wait at least a couple of weeks before washing the surface, or follow the curing guidance on the paint label.
Common Mistakes to Avoid
Painting Dirty Siding
This is the classic mistake. Dirt under paint is like crumbs in bed: technically survivable, but deeply unpleasant. Clean thoroughly and rinse well.
Choosing a Color That Is Too Dark
Dark colors can overheat vinyl and cause warping. Use the same or lighter color unless your paint manufacturer confirms the darker shade is vinyl-safe.
Painting in Direct Sun
Hot siding can make paint dry too fast, causing poor adhesion and visible lap marks. Paint in shade whenever possible.
Applying Paint Too Thick
Two thin coats are better than one thick coat. Thick paint can sag, dry unevenly, and trap moisture.
Ignoring Repairs
Paint will not fix cracked, loose, or warped siding. Repair first, paint second, admire third.
How Much Paint Do You Need?
Most exterior paints cover about 250 to 400 square feet per gallon per coat, depending on the siding texture, color change, application method, and product. To estimate your paint needs, measure the perimeter of the house and multiply by the wall height. Add gable areas, then subtract large windows and doors if you want a more precise estimate.
For example, if your home has about 1,800 square feet of paintable siding and your paint covers 350 square feet per gallon, you need a little over five gallons per coat. For two coats, plan on about 10 to 11 gallons, plus extra for touch-ups. Buying slightly more than the math suggests is wise because running out halfway through a wall is how homeowners learn new vocabulary.
How Long Does Painted Vinyl Siding Last?
A well-prepared vinyl siding paint job using high-quality exterior paint can last five to 10 years or longer, depending on climate, sun exposure, color, maintenance, and product quality. Homes in harsh sun, coastal air, heavy humidity, or freeze-thaw climates may need repainting sooner.
To extend the life of the finish, wash the siding gently once or twice a year, trim plants away from the walls, clean mildew early, and touch up damaged areas before they spread. The goal is simple: do not let dirt and moisture throw a block party on your paint film.
DIY vs. Hiring a Professional
Painting vinyl siding can be a DIY project if your home is one story, the siding is in good shape, and you are comfortable with ladders, prep work, and exterior painting. A DIY job can save money, especially if you already own basic tools.
Hiring a professional is worth considering for two-story homes, steep lots, complicated trim, large areas, severe staining, or if you want a sprayed finish without renting and learning sprayer equipment. Pros can also help choose vinyl-safe paint systems and avoid application mistakes. A professional job costs more, but it may save time, reduce risk, and produce a cleaner finish.
Real-World Experience: What Actually Matters When Painting Vinyl Siding
The biggest lesson from painting vinyl siding is that the glamorous partthe color transformationis only about 20% of the project. The other 80% is cleaning, waiting, taping, checking weather, moving ladders, and wondering why one tiny corner near the downspout has collected enough dirt to qualify as farmland.
One practical experience is that siding often looks clean from the driveway but tells a different story up close. Run your hand across an older panel and you may see a chalky residue on your fingers. That residue must be removed before painting. A soft brush and patient rinsing can do more for the final result than the fanciest paint sprayer. If the rinse water still looks dirty, keep cleaning.
Another real-world tip: test your color on more than one side of the house. A soft gray on the shaded north wall may look almost white, while the same color on the sunny south wall can appear brighter and cooler. Paint large sample patches or sample boards and look at them in morning, afternoon, and evening light. The exterior color you love at noon might look like wet cement at sunset. Houses have moods, apparently.
Spraying can be fast, but it requires discipline. Wind is the enemy. Even a light breeze can carry overspray onto windows, brick, cars, patio furniture, or your neighbor’s suspiciously clean fence. If you spray, mask generously and keep a brush or roller nearby for back-brushing edges. If you roll, work in smaller sections and keep the roller pressure even. Pressing hard to “stretch” paint usually leaves thin spots and roller marks.
Do not rush drying time. This is especially important after washing. Vinyl laps can hold water in seams and behind trim. A wall may look dry on the surface while hidden moisture waits to interfere with adhesion. Give the siding a full dry day when possible, especially in humid weather. Paint applied over trapped moisture can blister or peel later, and it will not send you a polite apology.
Finally, plan the project around shade. Start early, paint the side of the house that is not being blasted by the sun, and move around the home as light changes. Keep a small touch-up container labeled with the paint color, sheen, brand, and date. Future you will be grateful when a ladder scrape or storm-tossed branch leaves a mark. Painting vinyl siding is not difficult, but it rewards patience. Prep like a professional, paint like a calm person, and your siding will look fresh without needing replacement.
Conclusion
Learning how to paint vinyl siding is mostly about respecting the material. Vinyl is flexible, heat-sensitive, and surprisingly picky about color and prep. Clean it thoroughly, repair damaged panels, choose a vinyl-safe exterior acrylic paint, avoid overly dark colors unless approved, and apply two thin coats in mild weather. Done right, painting vinyl siding can dramatically improve curb appeal for far less than full replacement.
Note: Always check your siding warranty and the paint manufacturer’s instructions before starting. Product formulas, approved colors, temperature limits, and primer requirements can vary.