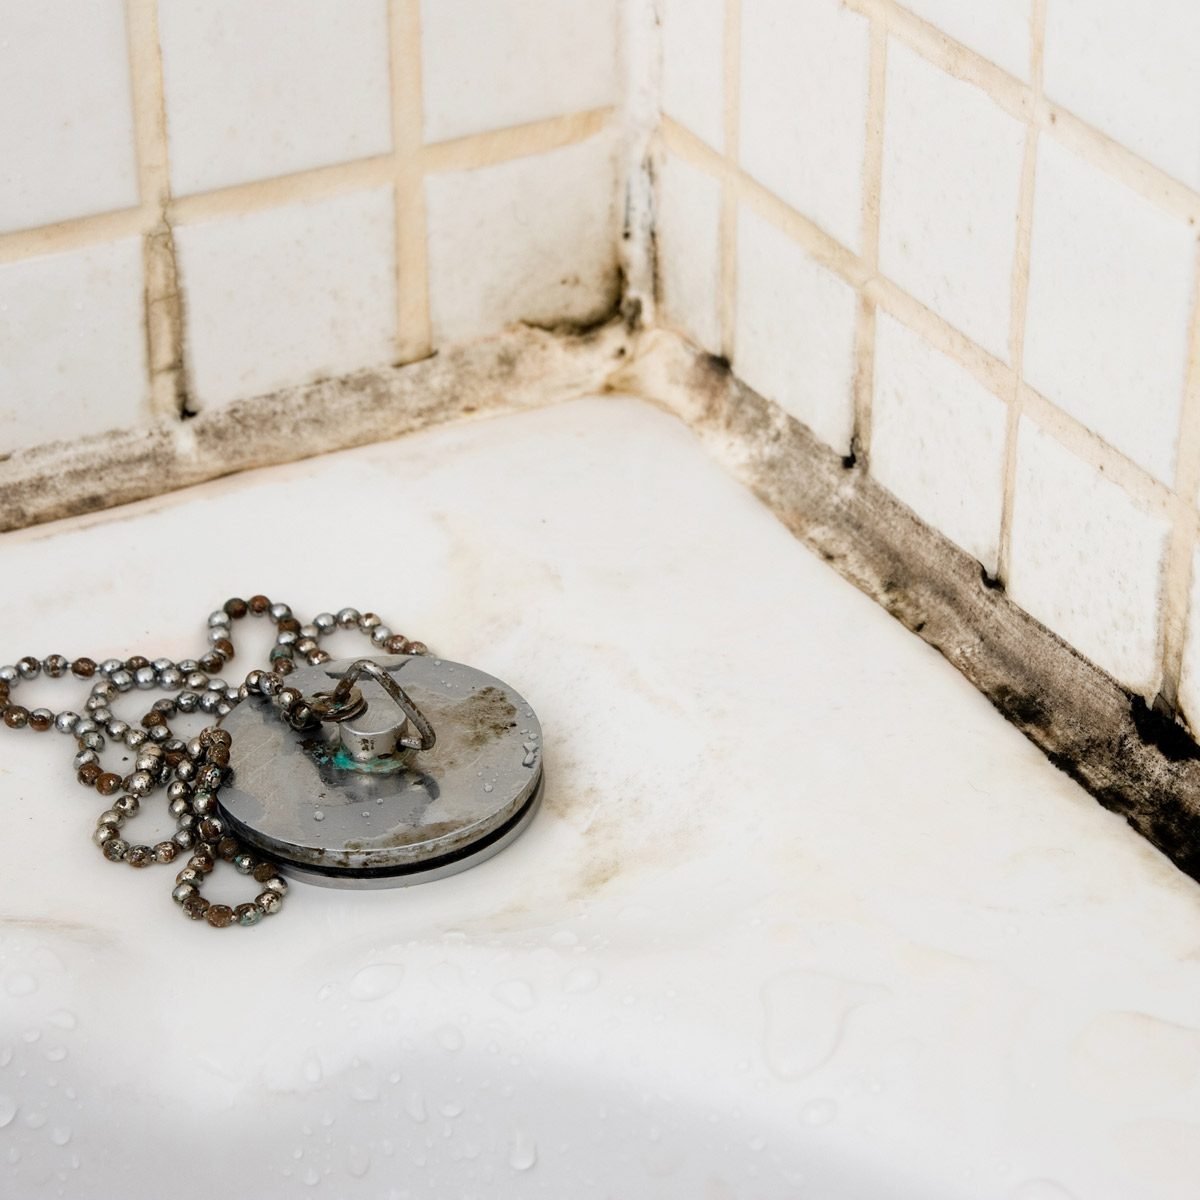
Bathroom mold is like that one guest who shows up uninvited, overstays, and somehow finds the dampest corner of the party. It loves steam, poor airflow, wet grout, leaky fixtures, and towels that never quite dry. The good news? You do not need to remodel your entire bathroom or buy a hazmat suit to keep mold under control. In most homes, preventing bathroom mold is a practical DIY project built around one big idea: remove moisture faster than mold can enjoy it.
Mold needs moisture, a food source, and time. Bathrooms generously provide all three: water from showers, organic dust and soap residue, and warm air trapped after bathing. The key is not trying to make your bathroom “mold-proof” forever, because bathrooms are wet by nature. The real goal is to make your bathroom a terrible place for mold to settle down, unpack, and start a family.
Why Bathroom Mold Happens
Bathroom mold usually appears when moisture lingers on surfaces or inside materials. Common hotspots include shower grout, silicone caulk, ceilings above showers, window frames, vanity cabinets, exhaust fan covers, and the back side of shower curtains. If a surface stays damp for long periods, mold has a much better chance of growing.
According to public health and home-maintenance guidance, controlling moisture is the most important step. Cleaning visible mold without fixing the humidity problem is like mopping the floor while the faucet is still running. You may feel productive, but the bathroom is quietly laughing at you.
The DIY Mold Prevention Rule: Dry It, Vent It, Fix It
The simplest bathroom mold prevention strategy has three parts: dry wet surfaces, ventilate humid air, and fix leaks quickly. These steps sound basic, but they work because they attack mold at its source. Mold does not need luxury. It needs dampness. Take that away, and you make its life extremely inconvenient.
1. Run the Bathroom Fan Every Time You Shower
Your bathroom exhaust fan is not decoration. It is the tiny ceiling-mounted hero trying to save your paint, grout, caulk, mirror, and nose from musty smells. Turn the fan on before or at the start of a shower, and leave it running afterward long enough to clear steam and moisture.
A good rule for many homes is to run the fan for at least 20 to 30 minutes after showering. If your mirror stays foggy, walls feel damp, or the room smells humid after the fan shuts off, run it longer. A timer switch or humidity-sensing switch can make this automatic, which is helpful if your household treats the fan switch like it is guarded by lasers.
2. Make Sure the Fan Vents Outdoors
A bathroom fan should move moist air outside the home, not into the attic, crawl space, wall cavity, or another hidden area. Venting into an attic is basically relocating the mold problem and giving it a larger apartment. If you can access the attic safely, check whether the fan duct leads to an exterior vent. If you are unsure, hire a qualified professional to inspect it.
For bathrooms up to about 100 square feet, ventilation experts commonly recommend around 1 CFM of fan airflow per square foot. Larger bathrooms may need more airflow depending on fixtures such as tubs, showers, toilets, and jetted tubs. If your bathroom fan is old, noisy, weak, or barely able to hold a tissue to the grille, upgrading it can be one of the best DIY improvements for mold prevention.
3. Keep Indoor Humidity Under Control
Mold grows more easily when indoor humidity stays high. A simple digital hygrometer can tell you whether your bathroom or nearby rooms are staying too damp. Many health and housing experts recommend keeping indoor relative humidity around 30% to 50%, and avoiding levels above 60% whenever possible.
If your bathroom has no exhaust fan, use a window when weather allows, leave the door open after showering, and consider a small dehumidifier nearby. In humid climates or tight modern homes, a whole-house humidity issue may require better ventilation or a properly sized dehumidifier. The goal is simple: after a shower, the room should dry quickly instead of feeling like a rainforest with shampoo bottles.
Daily Habits That Stop Mold Before It Starts
Bathroom mold prevention is less about heroic deep-cleaning marathons and more about tiny habits that reduce moisture every day. These habits take minutes, but they save hours of scrubbing later.
Squeegee Shower Walls and Doors
After showering, use a squeegee on glass doors, tile walls, and flat shower surfaces. This removes standing water before it can sit in grout lines, corners, and caulk seams. It is not glamorous, but neither is discovering black spots around the tub on a Saturday morning.
Keep the squeegee hanging in the shower so it becomes part of the routine. A quick wipe-down can make a big difference, especially in bathrooms with limited ventilation.
Open the Shower Curtain or Door Correctly
After a shower, spread the curtain out instead of leaving it bunched up. Mold loves folds because they trap water and block airflow. If you have a glass door, leave it partly open so air can circulate through the shower enclosure.
Also keep the bathroom door open after bathing when privacy is no longer needed. This helps humid air escape and dry air enter. If your fan works well, you can run the fan with the door slightly open to encourage better airflow.
Dry Wet Towels and Bath Mats
Wet towels piled on the floor are basically mold’s version of a memory foam mattress. Hang towels so they can dry fully between uses. Wash bath mats regularly and choose quick-drying versions when possible. If the mat stays damp underneath, hang it over the tub or a towel bar after use.
Clean Smarter, Not Harder
Regular cleaning removes soap scum, body oils, dust, and mineral buildup that help mold cling to surfaces. You do not need to wage chemical warfare every day. A consistent weekly cleaning routine is usually more effective than one dramatic cleaning session every few months.
Clean Grout and Caulk Weekly
Focus on grout lines, caulk seams, corners, shower shelves, and the area where the tub meets the wall. These areas collect residue and moisture. Use a bathroom cleaner appropriate for your surface, then rinse and dry thoroughly. For mild mildew stains, many homeowners use hydrogen peroxide, vinegar on suitable surfaces, or commercial bathroom cleaners. Always follow product labels.
Never mix cleaning products, especially bleach with ammonia or acidic cleaners. That can create dangerous fumes. Use gloves, ventilate the room, and keep children and pets away while cleaning. DIY does not mean “discover chemistry the hard way.”
Wash or Replace Shower Liners
Plastic shower liners can develop mildew because they stay wet and collect soap residue. Wash reusable liners according to the care label. Replace liners that remain stained, slimy, or smelly even after cleaning. A fresh liner is inexpensive and often easier than trying to resurrect one that looks like it survived a swamp expedition.
Do Not Ignore the Exhaust Fan Cover
Dust buildup on the fan grille reduces airflow. Remove and clean the cover regularly. Before cleaning, turn off power to the fan if needed and follow the manufacturer’s instructions. A clogged fan cannot remove moisture efficiently, which means steam lingers longer and mold gets more opportunities.
Fix Leaks Quickly
Leaks create hidden moisture, and hidden moisture creates hidden mold. Check under the sink, around the toilet base, near the tub, around shower valves, and beneath bathroom windows. Look for water stains, swollen baseboards, peeling paint, soft drywall, musty odors, or flooring that feels loose.
A dripping faucet or slow pipe leak may seem minor, but constant moisture is exactly what mold needs. Tighten simple fittings if you know how, replace worn washers when appropriate, and call a plumber for leaks you cannot confidently repair. The faster you stop water intrusion, the easier mold prevention becomes.
Re-Caulk and Seal Problem Areas
Old caulk can crack, shrink, peel, or trap mold behind it. Once mold grows inside caulk, surface cleaning may not solve the problem. In that case, removing and replacing the caulk is often the better DIY fix.
How to Re-Caulk for Mold Prevention
First, remove the old caulk completely using a caulk removal tool or utility knife. Clean the joint, remove residue, and allow the area to dry fully. This drying step matters. Applying new caulk over moisture is like putting a lid on a wet lunchbox and hoping for the best.
Use a high-quality bathroom-rated silicone caulk labeled for kitchen, bath, tub, or shower use. Apply a smooth bead, tool it neatly, and follow the cure time on the label before using the shower. Mold-resistant caulk helps, but it is not magic. It still needs good ventilation and regular drying.
Seal Grout When Needed
Cement-based grout is porous and may benefit from sealing, depending on the type of tile and grout. Sealer helps reduce water absorption and staining, but it does not replace cleaning or ventilation. If grout is cracked, missing, or crumbling, repair it instead of simply sealing over the damage.
Use Mold-Resistant Materials in Bathroom Updates
If you are painting or making small upgrades, choose materials designed for damp spaces. Mold-resistant bathroom paint, moisture-resistant drywall in appropriate areas, quality silicone caulk, and non-porous shower panels can all help. These materials do not eliminate maintenance, but they give your bathroom a better defense.
For paint, use a bathroom-friendly finish that can handle humidity and cleaning. Before painting, clean the surface, remove any existing mildew, repair damage, and let everything dry. Painting over mold is not prevention; it is hiding the problem under a fresh coat of denial.
Improve Airflow Without a Full Remodel
Not every bathroom has perfect ventilation. Some older homes have tiny windows, weak fans, or layouts that trap steam like a villain in a fog machine factory. Fortunately, you can still improve airflow with DIY-friendly changes.
Install a Timer Switch
A timer switch keeps the fan running after you leave the room. This is one of the simplest upgrades for busy households. Instead of relying on memory, you press a button and let the fan finish the job.
Upgrade to a Quieter Fan
People often avoid using loud fans because they sound like a small aircraft preparing for takeoff. A quieter, properly sized fan is more likely to be used consistently. Look for certified airflow ratings and a low sone rating if noise bothers you.
Keep Air Pathways Open
Air needs a way in and a way out. If the bathroom door seals tightly, the fan may struggle. Leaving the door slightly open after showering or adding an undercut at the door can improve airflow. For major changes, consult a contractor.
When DIY Is Not Enough
Small surface mold on tile, grout, or caulk is often manageable with DIY cleaning and moisture control. However, you should get professional help if mold covers a large area, returns quickly after cleaning, appears after flooding, grows on drywall or insulation, or comes with a strong musty smell you cannot locate.
Also be cautious if someone in the home has asthma, allergies, immune system concerns, or respiratory symptoms that worsen indoors. In those cases, mold cleanup and prevention may require extra care. When in doubt, focus first on safety, moisture control, and professional evaluation.
Bathroom Mold Prevention Checklist
- Run the exhaust fan during every shower and for 20 to 30 minutes afterward.
- Confirm the fan vents outdoors, not into an attic or wall cavity.
- Use a hygrometer to monitor humidity.
- Squeegee shower walls and glass after bathing.
- Spread out shower curtains and dry bath mats.
- Clean grout, caulk, and corners weekly.
- Repair leaks quickly.
- Replace moldy or damaged caulk.
- Clean the exhaust fan cover regularly.
- Use mold-resistant paint and bathroom-rated materials during updates.
DIY Experience: What Actually Works in a Real Bathroom
In real life, preventing bathroom mold is not a one-time project. It is a routine. The biggest lesson many DIY homeowners learn is that mold prevention is mostly moisture management wearing a cleaning apron. You can buy the strongest cleaner in the store, scrub until your elbows file a complaint, and still lose the battle if the shower stays damp for hours every day.
One practical experience is the “fan test.” After a hot shower, check the mirror, walls, and ceiling. If the mirror remains foggy for a long time or the ceiling feels damp, your ventilation is probably not keeping up. In one small bathroom, simply replacing an old rattling fan with a quieter, stronger model made the room dry noticeably faster. The best part was not just less mildew. The bathroom also smelled fresher, towels dried faster, and the paint stopped looking tired around the ceiling edges.
Another useful habit is keeping a squeegee in the shower and treating it like the final step of bathing. At first, it feels unnecessary. Then you notice the grout does not darken as quickly, glass doors stay clearer, and the lower corners of the shower are less slimy. The trick is making the tool visible and easy to reach. If the squeegee lives in a closet, nobody uses it. If it hangs right there in the shower, it becomes a 30-second habit.
Re-caulking is another DIY task that teaches patience. The mistake many beginners make is rushing the drying stage. Old caulk comes out, the area looks clean, and the temptation is to apply new caulk immediately. Do not do it. The joint must be clean and dry before new silicone goes in. Letting the area dry fully can be the difference between a repair that lasts and one that grows dark spots again in a few weeks.
One more experience: bath mats are sneaky. A bathroom can look clean while the underside of the mat stays damp against the floor. Hanging the mat after showers or switching to a faster-drying mat can reduce musty smells. The same goes for towels. A towel hook may look tidy, but a towel bar often dries fabric better because it spreads the towel out.
The most reliable DIY system is simple: ventilate, wipe down, clean weekly, and inspect monthly. Once a month, check caulk seams, grout lines, under-sink pipes, the toilet base, the fan grille, and the ceiling above the shower. This five-minute inspection can catch small problems before they become expensive repairs. Mold prevention is not glamorous, but neither is explaining to guests why your bathroom smells like a wet basement with candles.
Conclusion
Preventing bathroom mold is not about chasing every microscopic spore with panic and a spray bottle. It is about controlling the conditions mold needs to grow. Keep humidity low, remove standing water, improve ventilation, clean regularly, repair leaks quickly, and use bathroom-rated materials where moisture is unavoidable.
The best DIY mold prevention plan is the one you can actually maintain. A good fan, a squeegee, dry towels, sealed grout, fresh caulk, and a weekly cleaning routine can do more than a once-a-year scrubbing event powered by frustration. Make your bathroom dry faster, and mold will have to find somewhere less responsible to live.
Note: This article is written for general DIY home maintenance and prevention. For large mold areas, hidden water damage, recurring mold, or health concerns, consult a qualified mold remediation or building professional.