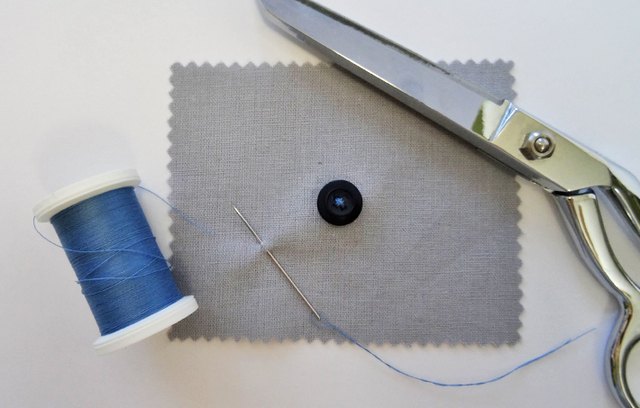
Every wardrobe has that one dramatic piece of clothing. You know the type: the coat that drops a button five minutes before you leave, the shirt that decides “business casual” now means “missing hardware,” or the jeans that suddenly can’t keep it together. The good news is that learning how to sew on a button is not some mystical lost art passed down only to grandmothers and theater costume departments. It is a practical, beginner-friendly skill that can save your favorite clothes, save money, and save you from awkward public wardrobe negotiations.
Better yet, sewing on a button is one of the fastest clothing repairs you can learn. Once you understand the basics, you can fix a loose button in minutes, replace a missing button without stress, and make the repair sturdy enough to survive real life: commuting, washing, sitting, standing, fidgeting, and all the other things clothes have to endure. In this guide, you’ll learn how to sew a button by hand, how to deal with different button types, how to attach one with a sewing machine, and how to make the repair last instead of popping off again next Tuesday.
Why This Tiny Skill Matters So Much
A button is small, but it does a lot of heavy lifting. It keeps a shirt closed, helps a coat hang properly, keeps pants neat, and frankly prevents a whole category of avoidable fashion disasters. Knowing button repair basics also means you do not need to set aside an otherwise good garment just because one little piece went rogue.
There is also a practical side to this skill that people tend to underestimate. When you can mend basic clothing issues yourself, you stretch the life of your clothes, reduce waste, and avoid paying someone else for a repair that often takes less time than reheating leftovers. Not bad for one needle, one thread, and a few calm breaths.
What You Need Before You Start
You do not need a fancy sewing studio. You need a few basic supplies and at least one reasonably cooperative mood.
- A replacement button
- A hand-sewing needle
- Matching thread or a close color
- Small scissors
- A toothpick, pin, matchstick, or spare needle for spacing
- An optional marking pencil or chalk
- An optional second small button for reinforcement on heavy garments
If the original button is still hanging by a thread, resist the urge to pretend it will be fine forever. It will not. Cut it off neatly and start fresh. If there are other buttons on the garment, use them as your guide for placement, size, and stitch pattern.
Know Your Button Before You Sew
Before you begin, identify what kind of button you are working with. This changes the method.
Flat two-hole button
This is the simplest option. The thread passes back and forth through two holes. Common on shirts, cuffs, and casual garments.
Flat four-hole button
This style gives you more stability and more choices. You can stitch it in parallel lines or in an X pattern. If you are replacing a missing button, the easiest move is to copy the other buttons on the garment so everything matches.
Shank button
A shank button has a loop or raised tunnel on the back instead of visible holes on top. These are often used on coats, jackets, and dressier garments because they sit nicely over thicker fabric.
Once you know the type, the repair becomes much easier. Sewing the wrong way is not usually catastrophic, but it can make the button sit awkwardly, pull the fabric, or wear out faster.
How to Sew On a Flat Button by Hand
1. Find the exact placement
If the old button fell off recently, you may still see thread marks. That is your target. If not, line the garment up with the buttonhole and mark where the center of the button should sit. On a shirt, compare it with the button above or below so spacing stays even. Eyeballing is allowed, but only if your eyeballs are being very responsible.
2. Thread the needle and knot the end
Cut a piece of thread about 18 to 24 inches long. Too short is annoying. Too long becomes a tangled soap opera. Many people double the thread for extra strength, especially on coats, skirts, and pants. Thread the needle and knot the end securely.
3. Make a few anchor stitches
Bring the needle up from the wrong side of the fabric where the button will sit. Make two or three tiny stitches in the same area to create a firm anchor. This gives the button something stable to hang onto and helps prevent wobbling later.
4. Position the button
Place the button over the anchor stitches. Sew up through one hole and down through the opposite hole. For a four-hole button, repeat with the second pair of holes. Keep the stitches neat and consistent.
If you are replacing an existing button, match the pattern used on the rest of the garment. If you are adding a new one, parallel bars or an X can both work. The important thing is consistency and enough stitches to hold the button securely.
5. Leave a little space
This part matters more than beginners expect. Do not pull the button flat against the fabric like you are trying to win a strength contest. Buttons need a little room so the buttonhole fabric can slide underneath comfortably. A toothpick, pin, matchstick, or spare needle laid across the top of the button while you sew helps create that spacing.
This small gap becomes especially important on thicker fabrics like flannel, denim, wool, and coats. Without it, the button may feel tight, strain the fabric, and pull loose faster.
6. Sew through the holes several times
Pass the needle through the holes enough times to build strength. On a lightweight shirt, several passes may be enough. On heavier garments, add a few more. The goal is a button that feels secure but still has a tiny bit of movement.
7. Create a thread shank
After the button is attached, bring the needle up under the button but not through the holes. Remove the toothpick or spacer, then wrap the thread around the stitches between the button and fabric several times. This creates a thread shank, which acts like a little stem. It gives the button enough lift to work with the buttonhole and reduces stress on the fabric.
8. Knot it off on the back
Push the needle to the wrong side of the fabric. Make a small knot by catching a bit of the stitching on the back and pulling through a loop. Do that once or twice, then trim the thread neatly. Give the button a gentle tug. Gentle. This is a test, not an interrogation.
How to Sew a Shank Button
If your button has a metal or molded loop on the back, the process is similar but simpler on the surface. Bring the needle up from the back of the fabric, pass it through the shank, then go back down through the fabric. Repeat several times until the button feels firm.
Because shank buttons are often used on outerwear, some people add a small backing button on the inside of the garment. That tiny inside button spreads out the stress, protects fabric fibers, and can help the repair last longer on coats and jackets that get heavy use. It is optional, but it is a smart move if the garment gets tugged a lot.
Once the button feels secure, finish on the back with a knot. Unlike a flat button, the shank already creates the needed space, so you do not need to build a thread stem underneath in the same way.
Can You Sew On a Button With a Sewing Machine?
Yes, you absolutely can. A sewing machine can attach many flat buttons quickly, especially if your machine has a button sewing foot or a dedicated button setting. This is handy if you are replacing several buttons or working on a garment with identical closures.
The basic idea is simple: lower or cover the feed dogs, place the button under the correct foot, set the stitch width to match the distance between the holes, and use a zigzag-style stitch that moves side to side without feeding the fabric forward. Before you start at full speed, always turn the handwheel manually to make sure the needle clears both holes without hitting the button. A broken needle is a fast way to ruin an otherwise peaceful afternoon.
Machine sewing works best for flat buttons with two or four holes. For four-hole buttons, you usually sew one pair of holes first, then reposition and sew the second pair. When finished, bring the thread tails to the back and tie them off by hand for a neat, secure finish.
If you are new to sewing, hand sewing is often easier for one-button emergencies. But machine attachment is worth learning if you do frequent clothing repair or want a faster method.
Common Mistakes That Make Buttons Fall Off Again
Pulling the stitches too tight
A button that is smashed flat against the fabric looks tidy for about six minutes, then starts causing problems. It needs breathing room.
Using thread that is too weak
Heavy coats, work pants, and jackets benefit from sturdy thread. Fine all-purpose thread can work, but stronger thread is often better for high-stress garments.
Skipping the thread shank
On medium or thick fabric, this is a classic mistake. Without that little stem of wrapped thread, the buttonhole has no room to settle under the button.
Ignoring placement
A perfectly sewn button in the wrong spot is still the wrong button. Check alignment before you commit.
Not matching the original stitch pattern
If the rest of the shirt has parallel stitching and one replacement button is sewn in a random crisscross, it will stand out. Functional, yes. Subtle, not exactly.
Forgetting to test the repair
Button the garment, unbutton it, and tug lightly. Better to discover a weak repair in your living room than in a meeting, on a date, or while reaching for coffee.
How to Make Your Button Repair Last
If you want the repair to hold up, think beyond the first stitch. Use enough passes through the holes, keep the button centered, make a clean knot, and trim the thread without cutting too close. On coats and blazers, consider using a backing button. On shirts, inspect nearby buttons too. If one button fell off, the others may be plotting.
It is also smart to save spare buttons from new clothes. Many garments come with extras sewn into a side seam or tucked inside the care label. Those little backup buttons are not decoration. They are future peace of mind.
Real-Life Experiences From the Button Repair Front Lines
The funny thing about learning how to sew on a button is that most people do not learn it because they woke up inspired by textile arts. They learn it because life cornered them. A button pops off during the least convenient moment imaginable, and suddenly a sewing kit becomes the hero of the day.
For some people, the first button repair happens in high school. A uniform shirt loses a button the night before a presentation, and there you are at the kitchen table with a flashlight, a needle, and the grim determination of someone trying not to get dress-coded at 7:45 in the morning. You may not sew beautifully that first time, but you remember the victory. The shirt closes. The day is saved. Confidence appears out of nowhere.
For others, it happens at work. Maybe it is a blazer before an interview, a pair of dress pants before a wedding, or a cuff button on a shirt right before a client meeting. That is when sewing stops being an old-fashioned hobby and becomes a practical survival skill. There is something deeply satisfying about fixing your own clothes instead of panicking, especially when the repair takes less time than sending frantic texts asking if anyone owns safety pins.
Then there is the travel experience, which deserves its own category of chaos. A suitcase gets overstuffed, a coat gets tugged, and suddenly the front button of your nicest jacket makes a break for freedom in a hotel room. People who travel with a mini sewing kit look wildly overprepared until exactly this moment. Then they look like wizards.
Button sewing also has a sneaky emotional side. Many people remember a parent, grandparent, or older relative quietly fixing things without ceremony: a hem, a seam, a missing button. As adults, learning to do it yourself can feel like reclaiming a small piece of competence that modern life forgot to teach. It is not just about thread and fabric. It is about being able to pause, repair something, and move on without throwing it away.
There is also the thrift-store angle. Anyone who loves vintage or secondhand shopping knows that a missing button can turn a great find into a bargain. What looks like a flaw to one person looks like a ten-minute project to someone who knows basic hand sewing repair. Suddenly that slightly imperfect blazer, cardigan, or wool coat is not a lost cause. It is a good deal waiting for a needle.
And yes, sometimes the experience is just plain ridiculous. Maybe you have sewn on a button while watching a show, only to realize you stitched through both sides of the shirt. Maybe you knotted the thread so badly it looked like you were trying to macramé the garment into submission. Maybe the button ended up secure, but sideways. That still counts as progress. Sewing, like cooking and parallel parking, gets easier after a few mildly humbling attempts.
Over time, the experience changes. What once felt fussy starts to feel efficient. You keep spare buttons in a jar. You buy better thread. You stop putting off tiny repairs. And one day you casually sew a button back on while talking to someone, as if this had always been part of your personality. That is when you know the skill has really settled in.
Final Stitch
Learning how to sew on a button is one of those classic small skills with a big payoff. It keeps clothes wearable, helps garments last longer, saves money, and turns minor wardrobe mishaps into manageable repairs. Whether you are dealing with a basic two-hole shirt button, a four-hole replacement, or a sturdy coat button with a shank, the fundamentals are the same: place it correctly, sew it securely, leave enough space, and finish neatly.
You do not need perfection. You just need a method that works, holds, and keeps your clothes in service. Once you have done it a couple of times, sewing on a button goes from intimidating to almost relaxing. Almost. Let’s not get carried away. But it does become one of those deeply useful skills you will be glad to have every single time a button tries to make a dramatic exit.