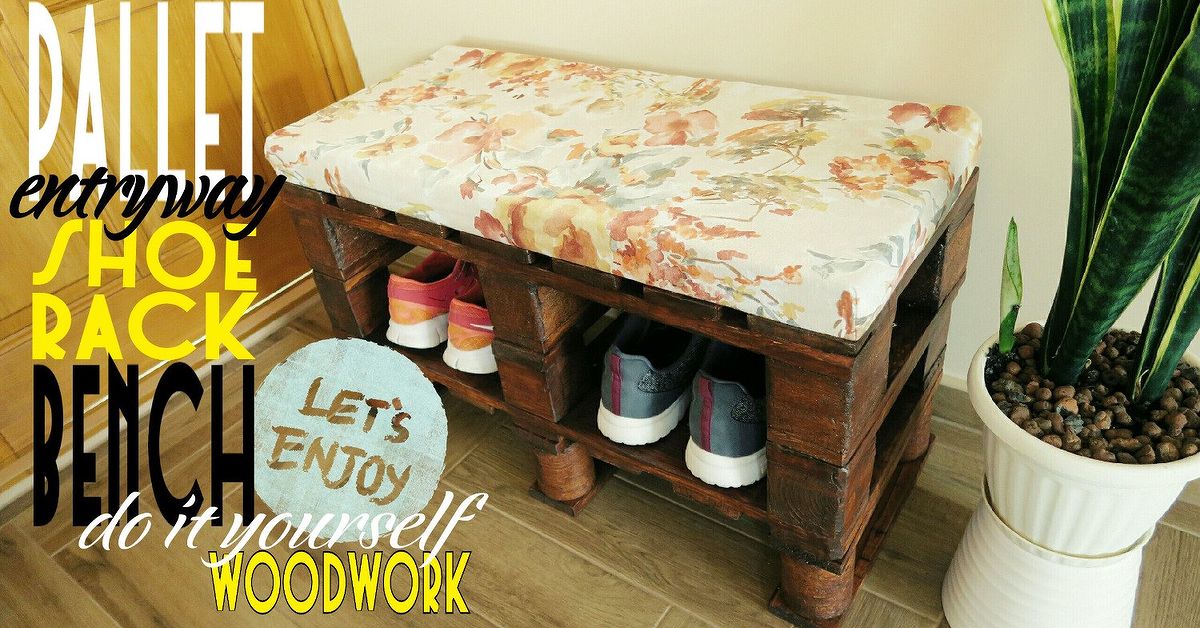
There are two kinds of people in this world: people with a tidy entryway, and people who step over a small mountain of sneakers every time they come home. If you belong to the second group, welcome. You are among friends. The good news is that one humble wooden pallet can help fix the chaos without draining your wallet or your weekend.
A pallet shoe rack is one of those DIY projects that feels almost suspiciously practical. It gives old wood a second life, adds rustic charm, and creates a hardworking storage piece that can make your entryway, mudroom, closet, or garage look far more put together. Even better, it can be customized to match your style, whether that style says “modern farmhouse,” “minimalist,” or “I just need somewhere for twelve shoes to stop reproducing by the front door.”
In this guide, you’ll learn how to turn a pallet into a stunning shoe rack step by step, how to choose a safe pallet, what tools you’ll need, how to sand and finish it properly, and how to make it look intentional instead of like a wood project that barely survived a Saturday afternoon. Let’s build something useful, good-looking, and slightly brag-worthy.
Why a Pallet Shoe Rack Is Worth Making
A pallet shoe rack checks a lot of boxes at once. It’s budget-friendly, beginner-friendly, and surprisingly stylish when done right. Unlike cheap plastic organizers that wobble after a month, a properly prepped pallet rack has character and sturdiness. It also gives you flexibility: you can keep the pallet vertical for a slim wall-mounted look, cut it down for a lower freestanding rack, or add shelves, hooks, labels, and even a bench top if you’re feeling ambitious.
It also solves a real-life problem. Shoes tend to gather near the door because that’s where daily life happens. A dedicated rack creates a landing zone, keeps pairs together, makes cleanup easier, and helps your home look less like a sporting goods clearance event. Function is great. Function with charm is even better.
Before You Start: Choose the Right Pallet
Not every pallet deserves a second act in your home. Some are perfectly suitable for indoor DIY projects, while others should be avoided. This is the part where you channel your inner detective.
Look for Safety Stamps
If you can, choose a pallet stamped HT, which means it was heat-treated. That is the gold star for a project like this. If you see MB, walk away. That marking indicates methyl bromide treatment, and it does not belong anywhere near your future shoe rack, entryway, or happy domestic life.
You should also skip pallets that smell strange, feel oily, show signs of spills, or have heavy staining you can’t identify. A pallet can look rugged and still be a bad decision. You want weathered charm, not mystery chemistry.
Check the Condition
Choose a pallet that is structurally sound. Some cosmetic wear is fine, even desirable, but major cracks, rotten boards, splintered edges, or loose nails will turn a simple project into a repair marathon. Look for boards that are relatively straight and thick enough to support everyday use.
Tools and Materials You’ll Need
- 1 heat-treated pallet in decent condition
- Work gloves
- Safety glasses
- Dust mask or respirator
- Hammer or pry bar
- Nail puller or pliers
- Measuring tape
- Pencil
- Circular saw, jigsaw, or handsaw
- Drill and wood screws
- Sandpaper in multiple grits
- Orbital sander, if available
- Wood filler
- Tack cloth or clean rag
- Paint, stain, or clear sealer
- Paintbrush or foam brush
- Wall anchors or mounting hardware if wall-mounted
If you don’t own every tool on this list, don’t panic. This project is forgiving. A power sander makes life easier, but hand sanding still works. Fancy tools are nice; a solid plan matters more.
Step-by-Step: How to Turn a Pallet into a Stunning Shoe Rack
1. Clean the Pallet Thoroughly
Start by brushing off dirt, cobwebs, and loose debris. Then wipe the pallet down well. If it’s especially grimy, use a damp cloth and mild soap, then let it dry fully before you do anything else. Wet wood and power tools are not a dream team.
This cleaning stage also helps you spot flaws more easily. Hidden nails, hairline cracks, and rough areas become much more obvious once the pallet is clean.
2. Decide on Your Shoe Rack Style
Before you cut or screw anything, decide what kind of rack you want. A vertical leaning rack is quick and works well in small spaces. A wall-mounted rack keeps the floor clear and looks sleek in a tight entryway. A low freestanding version is perfect for families, because it’s easy for kids and adults to use without turning shoe storage into an Olympic event.
Think about how many pairs you need to store. Daily-use shoes near the door need easy access. Special-occasion shoes can live elsewhere. A shoe rack that fits your routine will stay tidy longer than one that only looks pretty in photos.
3. Remove or Reinforce Boards as Needed
Some pallets are ready to go with very little modification. Others need a few boards removed, trimmed, or repositioned. If the gaps between slats are too narrow for shoes, detach a board and reset the spacing. If the pallet feels loose, reinforce it with screws before moving on.
This is also a good time to trim the overall size. A full pallet can be bulky, so don’t be afraid to cut it down to match your space. Measure your entryway first. Your shoe rack should solve a problem, not create a new obstacle course.
4. Sand Like You Mean It
Sanding is where a rough pallet starts becoming furniture. Begin with a coarser grit to knock down splinters, rough edges, and grime. Then move to medium and finer grits to smooth the wood. Sand with the grain, not against it. Your future self will appreciate the cleaner look and far fewer scratch marks.
Pay special attention to the edges, corners, and anywhere hands will touch. A pallet shoe rack does not need to feel baby-soft, but nobody wants a rustic sliver as a welcome-home gift. After sanding, wipe away dust with a tack cloth or clean rag before applying any finish.
5. Fill Holes and Fix the Ugly Bits
If you want a polished result, now’s the time to use wood filler on deep dents, nail holes, or damaged areas. Let it dry, then sand those spots smooth. This step is optional if you love the rough reclaimed look, but a little repair work can make the finished piece look intentional rather than accidental.
Think of this as the haircut phase. The pallet is still itself, just more presentable.
6. Assemble the Rack
How you assemble the rack depends on your design, but the basic goal is simple: create stable, accessible slots or shelves for shoes. For a vertical rack, you may only need to add a support at the back and secure the pallet to the wall. For a freestanding rack, you might attach side supports or a base for better stability.
If you want extra storage, add hooks along the top for keys, dog leashes, or reusable bags. You can also attach a top board to create a narrow shelf for mail, sunglasses, or a small basket. This is how a shoe rack graduates into an entryway station.
7. Make It Actually Stunning
Here’s the difference between “a pallet with shoes on it” and “a stunning pallet shoe rack”: finish. The finish is what gives the project personality.
For a warm rustic look, use a wood stain that enhances the grain. For a modern farmhouse feel, try a soft white, greige, black, or muted sage paint. For an industrial vibe, pair dark stain with matte black hooks or hardware. If your home is small, lighter finishes can help the piece feel less heavy visually.
Apply stain or paint in thin, even coats. Let each coat dry fully. If you’re using a clear protective finish, apply it after the stain or paint cures. A sealer helps the rack stand up to dirt, moisture, and the general abuse that shoes tend to bring into a home.
8. Seal It for Real Life
A shoe rack sits in one of the hardest-working zones of a house. It deals with wet soles, dusty sneakers, and the occasional muddy boot that absolutely should have stayed outside. A protective finish helps a lot.
For indoor use, a clear polyurethane or similar durable topcoat can help protect the wood from scratches and grime. If you want a low-sheen, more natural look, go with a satin finish. Gloss can work too, but it tends to show imperfections more clearly. In other words, gloss is beautiful and also a little dramatic.
9. Install It Safely
If your rack is wall-mounted or tall enough to tip, secure it properly. This is especially important in homes with children, pets, or one enthusiastic adult who treats every piece of furniture like a ladder for no good reason. Mounting into wall studs is the strongest option. If the rack is freestanding, make sure it sits flat and steady on the floor.
Safety is not the glamorous part of DIY, but it is the part that keeps your beautiful project from becoming a cautionary tale.
Easy Design Ideas to Upgrade the Look
Add a Bench Top
Attach a wider board or a trimmed wood panel to the top of a low pallet rack and you’ve instantly created a bench-and-storage combo. This works especially well in mudrooms and family entryways where people need a place to sit while taking shoes on and off.
Use Baskets for Small Items
Slide woven baskets or labeled bins on the top shelf or beside the rack. They’re great for socks, shoe polish, insoles, or the tiny household objects that normally vanish the second you need them.
Mix Materials
Wood alone is lovely, but wood plus metal can look even better. Add black hooks, a metal number tag, small casters, or simple leather pulls to give the rack a more custom feel.
Create Family Zones
If the rack is for a busy household, assign rows or sections by person. This sounds obvious, but it works. People are surprisingly good at putting their shoes away when their section is clearly defined and mildly judgmental.
Common Mistakes to Avoid
- Using the wrong pallet: If the wood is unsafe, heavily contaminated, or falling apart, it is not worth the risk.
- Skipping sanding: Rough wood may look charming from six feet away, but your hands will disagree up close.
- Ignoring measurements: A rack that blocks the door or sticks out too far will become annoying fast.
- Overloading the design: Keep it functional. You’re making a shoe rack, not a tiny wooden theme park.
- Skipping a protective finish: Bare wood in a high-traffic entryway can get grimy in a hurry.
How Many Shoes Can a Pallet Rack Hold?
That depends on the size of the pallet, the shoe styles, and whether you store pairs flat, angled, or toe-in. A compact design may hold six to eight pairs, while a full-size or expanded version can handle much more. The smartest approach is to build for your daily-use collection, not every shoe you have ever owned since middle school.
If you need more capacity, consider stacking two smaller pallet sections vertically, adding an extra shelf, or pairing the rack with a nearby basket for sandals and slippers. Good shoe storage is less about squeezing in the maximum number of pairs and more about making everyday life easier.
How to Keep It Looking Good Over Time
Once your pallet shoe rack is finished, maintenance is simple. Wipe it down regularly, especially after rainy days. Shake out dirt from the lower shelf area. Touch up paint or stain if scuffs show up. If the finish begins to dull, a light sanding and refresher coat can bring it back to life.
You can also rotate shoes by season. Boots don’t need prime front-door real estate in July, and flip-flops can take a vacation in winter. A little seasonal editing helps the rack stay clean, useful, and visually calm.
Real-Life Experiences and Lessons from Making a Pallet Shoe Rack
One of the most interesting things about a pallet shoe rack project is how quickly it stops being “just a craft” and starts changing the way a space works. In a real home, the first win usually isn’t aesthetic. It’s the moment the floor by the front door becomes visible again. That alone feels like an achievement worthy of dramatic music.
People often start this project thinking the pallet itself will be the hard part, but the real challenge is deciding how polished they want the final result to look. A very raw pallet can feel wonderfully rustic, but once it enters an indoor space, the little details matter more. After sanding, filling, and finishing, the same pallet suddenly looks less like leftover shipping material and more like intentional furniture. That transformation is what surprises most DIYers.
Another common experience is realizing that shoe storage is deeply personal. Some families want a drop zone for everyday sneakers only. Others need room for work boots, kids’ shoes, slippers, and the mysterious lone sandal that appears every spring. A pallet rack works best when it’s designed around actual habits, not fantasy habits. If your family never lines shoes up perfectly, wider slots and easy-access shelves will serve you better than a super-styled design that requires everyone to behave like a catalog photo shoot.
There’s also a real sense of satisfaction that comes from using reclaimed wood in a practical way. A pallet shoe rack doesn’t pretend to be precious. It’s useful, tough, and forgiving. If it gets a new scuff, it usually just looks more interesting. That makes it a great confidence-building project for beginners. You don’t need flawless cuts or furniture-maker credentials to create something handsome and useful.
Many people also discover that this project sparks a chain reaction. First comes the shoe rack. Then suddenly there’s talk of matching wall hooks, a bench, a mail shelf, or a small basket system for gloves and dog leashes. That’s the sneaky beauty of a well-designed entryway project: once one element starts working better, the whole area starts asking for an upgrade.
And finally, there’s the emotional payoff. A cleaner entryway changes the feeling of coming home. It sounds small, but it matters. When shoes have a place, clutter drops, mornings run smoother, and the front door area feels more welcoming. A pallet shoe rack may be made from humble materials, but the result can feel surprisingly elevated. It’s one of those rare DIY projects that delivers charm, order, and usefulness all at once. Not bad for a piece of wood that used to spend its life in a warehouse.
Final Thoughts
If you want a DIY project that is affordable, stylish, and genuinely useful, turning a pallet into a shoe rack is hard to beat. The secret is not complicated design. It’s careful prep, thoughtful finishing, and building something that fits the way your household actually lives. Start with a safe pallet, smooth it out, give it a finish you love, and install it properly. What you’ll end up with is more than a place to toss shoes. You’ll have a custom storage piece with character, purpose, and enough charm to make your entryway look pulled together on purpose.
And that, frankly, is a beautiful thing.