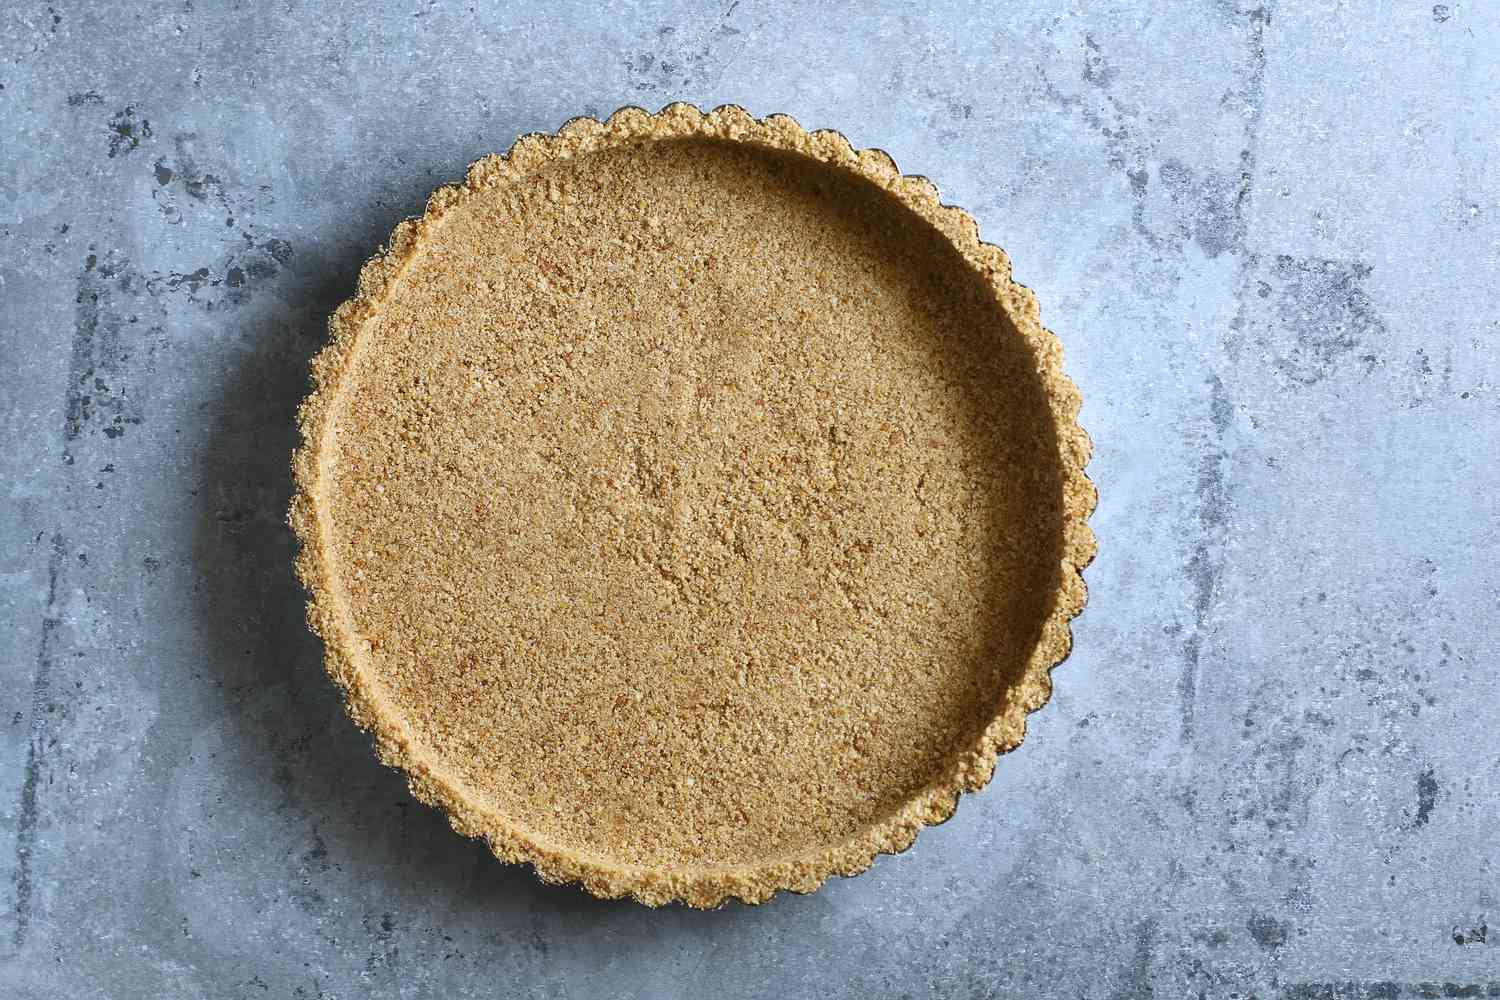
Some desserts arrive wearing a tuxedo. Others show up in stretchy pants and steal the whole party. This peanut butter graham cracker pie crust recipe is proudly in the second group. It is buttery, nutty, sweet, lightly salty, and sturdy enough to hold everything from chocolate cream filling to banana pudding without collapsing like a folding chair at a family reunion.
A classic graham cracker crust is already a dependable dessert hero. Add peanut butter, and suddenly it has personality. The peanut butter deepens the flavor, helps bind the crumbs, and gives the crust that nostalgic lunchbox-meets-bakery aroma. It is the kind of crust that makes people ask, “What is in this?” before they have even reached the filling.
This guide covers the full method, ingredient tips, bake and no-bake options, filling ideas, storage advice, troubleshooting, and a longer experience section for anyone who has ever pressed crumbs into a pie plate and wondered whether they were making dessert or edible beach sand.
Why Make a Peanut Butter Graham Cracker Pie Crust?
A homemade peanut butter graham cracker crust gives pies a richer base than the usual store-bought shell. Graham crackers bring honey-like sweetness and gentle crunch. Butter adds flavor and structure. Peanut butter adds roasted nuttiness, a little protein-rich body, and a creamy texture that helps the crumbs stick together.
This crust works especially well with no-bake pies because it has enough flavor to stand up to cold, creamy fillings. It is also excellent for baked pies that do not require a long oven time. If your dessert includes chocolate, banana, cream cheese, pudding, whipped topping, marshmallow, caramel, or vanilla custard, this crust is basically waving from the counter saying, “Pick me.”
Ingredients for Peanut Butter Graham Cracker Pie Crust
This recipe makes one 9-inch pie crust. It can be pressed into a standard pie plate, a tart pan, or a springform pan for a cheesecake-style dessert.
Main Ingredients
- 1 1/2 cups fine graham cracker crumbs about 10 to 12 full graham cracker sheets, depending on brand and size.
- 1/3 cup creamy peanut butter use conventional creamy peanut butter for the smoothest binding.
- 5 tablespoons unsalted butter, melted enough to moisten the crumbs without making the crust greasy.
- 2 tablespoons granulated sugar optional, but helpful for sweetness and texture.
- 1 tablespoon brown sugar adds a cozy caramel note.
- 1/4 teaspoon fine sea salt balances the sweetness and wakes up the peanut flavor.
- 1 to 2 teaspoons water or milk, only if needed use this if the mixture feels too dry to hold together.
Best Peanut Butter to Use
For the most reliable crust, use regular creamy peanut butter, the kind that stays smooth and spreadable without stirring. Natural peanut butter can work, but it often separates and may make the crust oily or crumbly unless it is extremely well mixed. Crunchy peanut butter is delicious, but it creates a more rustic crust with tiny peanut bits. That can be wonderful for a casual pie, though less ideal if you want picture-perfect slices.
How to Make Peanut Butter Graham Cracker Pie Crust
Step 1: Crush the Graham Crackers Finely
Place graham crackers in a food processor and pulse until they look like fine sand. No food processor? Put them in a zip-top bag and crush them with a rolling pin. Just keep going until the crumbs are small and even. Large chunks may taste nice, but they can make the crust break apart when sliced.
Step 2: Mix the Dry Ingredients
In a medium bowl, combine the graham cracker crumbs, granulated sugar, brown sugar, and salt. Stir well so the sweeteners and salt are evenly distributed. This matters because nobody wants one bite that tastes like dessert and another that tastes like a salt lick in a cowboy movie.
Step 3: Add Peanut Butter and Melted Butter
Warm the peanut butter for 10 to 15 seconds in the microwave if it is thick. It should be soft, not hot. Add the peanut butter and melted butter to the crumb mixture. Stir with a fork until all crumbs are evenly moistened. The mixture should resemble damp sand and clump together when squeezed.
Step 4: Adjust the Texture
If the crumbs feel dry and refuse to hold together, add 1 teaspoon of water or milk and mix again. Add a second teaspoon only if necessary. Be careful: too much liquid can make the crust pasty instead of pleasantly crumbly.
Step 5: Press Into the Pie Plate
Transfer the crumb mixture to a 9-inch pie plate. Start by pressing crumbs up the sides, then press the remaining crumbs evenly across the bottom. Use the flat bottom of a measuring cup to compact the crust. Apply firm, even pressure, but do not smash it into concrete. Dessert should not require a chisel.
Pay special attention to the corner where the bottom meets the sides. Rounding that inner edge slightly helps prevent cracking when you slice the pie.
Bake or No-Bake: Which Method Is Better?
This peanut butter graham cracker crust can be used two ways. The right choice depends on your filling.
No-Bake Method
For chilled fillings like peanut butter cream pie, chocolate pudding pie, banana cream pie, or no-bake cheesecake, chill the crust in the refrigerator for at least 45 minutes or freeze it for 15 to 20 minutes before filling. Chilling firms the butter and peanut butter, helping the crust keep its shape.
Baked Method
For a toastier, sturdier crust, bake it at 350°F for 8 to 10 minutes. Let it cool completely before adding any filling. Baking intensifies the graham cracker flavor and gives the crust a slightly crisp edge. It is especially useful for pies with softer fillings or pies that need cleaner slices.
Recipe Card: Peanut Butter Graham Cracker Pie Crust
Prep Time
10 minutes
Chill or Bake Time
15 to 45 minutes chilling, or 8 to 10 minutes baking
Yield
One 9-inch pie crust
Ingredients
- 1 1/2 cups fine graham cracker crumbs
- 1/3 cup creamy peanut butter
- 5 tablespoons unsalted butter, melted
- 2 tablespoons granulated sugar
- 1 tablespoon brown sugar
- 1/4 teaspoon fine sea salt
- 1 to 2 teaspoons water or milk, only if needed
Instructions
- Crush graham crackers into fine crumbs using a food processor or rolling pin.
- In a bowl, stir together graham cracker crumbs, granulated sugar, brown sugar, and salt.
- Add creamy peanut butter and melted butter. Mix until the crumbs are evenly moistened.
- Squeeze a small amount in your hand. If it holds together, it is ready. If it crumbles apart, add 1 teaspoon water or milk and mix again.
- Press the mixture into a 9-inch pie plate, building the sides first and then smoothing the bottom.
- For a no-bake pie, refrigerate for at least 45 minutes before filling. For a baked crust, bake at 350°F for 8 to 10 minutes, then cool completely.
Best Fillings for Peanut Butter Graham Cracker Crust
This crust is flexible, but it truly shines with creamy, chocolatey, and banana-forward fillings. Try it with:
- Chocolate cream pie for a candy-bar-style dessert.
- No-bake peanut butter pie when you want maximum peanut butter drama.
- Banana pudding pie for a peanut butter and banana combination that tastes like childhood with better lighting.
- Cheesecake filling for a salty-sweet base that balances tangy cream cheese.
- Chocolate ganache tart for a rich dessert that looks fancy but is secretly simple.
- Vanilla custard pie when you want the crust to bring the bold flavor.
Helpful Tips for a Crust That Does Not Fall Apart
Use Fine Crumbs
Fine crumbs pack together better than uneven chunks. Think beach sand, not gravel driveway. If the crumbs are too coarse, the crust may crumble when sliced.
Do Not Skip the Salt
Peanut butter loves salt. Graham crackers love salt. Sweet pies love salt. A small amount makes the crust taste more complete and keeps it from becoming flat or overly sugary.
Press the Sides Well
The sides are the first part of a crumb crust to break. Build them thick enough, then press them firmly against the pie plate. A thin side wall may look delicate, but it will not be your friend when serving time arrives.
Cool Before Filling
If you bake the crust, cool it completely before adding cold or creamy fillings. Warm crust plus chilled filling can create condensation and soften the texture.
Flavor Variations
Chocolate Peanut Butter Crust
Replace 1/4 cup of the graham cracker crumbs with chocolate cookie crumbs. This gives the crust a deeper cocoa flavor without losing the graham cracker structure.
Cinnamon Peanut Butter Crust
Add 1/2 teaspoon ground cinnamon to the dry ingredients. This version is excellent with banana, pumpkin, apple butter, or cheesecake fillings.
Honey-Roasted Peanut Crust
Add 2 tablespoons finely chopped honey-roasted peanuts. Keep the pieces small so the crust still slices cleanly.
Salted Pretzel-Graham Crust
Replace 1/3 cup of the graham cracker crumbs with finely crushed pretzels. Reduce the added salt slightly if your pretzels are very salty.
Storage and Make-Ahead Tips
You can prepare this crust in advance. For an unfilled crust, cover it tightly and refrigerate for up to 3 days. If baked, let it cool completely before covering. For longer storage, freeze the crust for up to 2 months. Wrap it well to protect it from freezer odors, because peanut butter is talented at making friends with every smell nearby.
Once filled, storage depends on the filling. Cream cheese, pudding, whipped topping, custard, and dairy-based pies should be refrigerated. For best flavor and texture, enjoy most refrigerated pies within 3 to 4 days.
Common Mistakes to Avoid
Using Too Much Peanut Butter
More peanut butter sounds like more happiness, but too much can make the crust dense, greasy, or soft. Stick with 1/3 cup for a reliable balance.
Not Chilling Long Enough
If you choose the no-bake method, chilling is not optional. The crust needs time for the butter and peanut butter to firm up. Filling it too soon can cause the bottom to crumble.
Overbaking
A short bake is enough. The crust should smell toasty and look slightly darker, not scorched. Peanut butter can brown faster than plain crumbs, so keep an eye on it during the final minutes.
Adding Hot Filling
Very hot fillings can melt the fat in the crust and weaken its structure. Let cooked fillings cool slightly before pouring them into the crust unless your specific pie recipe says otherwise.
Serving Ideas
For a bakery-style finish, garnish the filled pie with whipped cream, chopped peanuts, mini chocolate chips, shaved chocolate, banana slices, caramel drizzle, or crushed peanut butter cups. A tiny sprinkle of flaky salt can also make a chocolate or caramel filling taste richer.
To slice cleanly, chill the pie thoroughly and use a sharp knife. Wipe the blade between slices if the filling is sticky. This small step makes the difference between “beautiful dessert photo” and “delicious landslide.” Both taste good, but only one gets applause on the dessert table.
Experience Notes: What Making This Crust Teaches You
The first time you make a peanut butter graham cracker pie crust, you may wonder whether the mixture is too dry, too wet, or secretly judging you. That is normal. Crumb crusts are simple, but they are also wonderfully tactile. You learn by feeling the mixture. When it is right, it clumps together in your palm but still looks crumbly in the bowl. It should not smear like dough, and it should not scatter like dust.
One of the best lessons is that texture matters more than perfection. A homemade crust does not need to look machine-made. In fact, a slightly rustic edge can be charming. What matters is even thickness. If the bottom is thick and the sides are thin, the pie may break near the rim. If the sides are thick and the bottom is thin, the slices may lift unevenly. Pressing the sides first helps solve both problems.
This recipe is also a reminder that peanut butter is powerful. A small amount changes the whole personality of the crust. Plain graham cracker crust is sweet and buttery. Peanut butter graham cracker crust is warmer, fuller, and more memorable. It has that roasted aroma that makes the kitchen smell like cookies, candy, and after-school snacks all at once. Even before the filling goes in, it feels like dessert has officially clocked in for work.
Another experience worth mentioning is how well this crust handles casual entertaining. It does not require rolling dough, chilling pastry, cutting butter into flour, or whispering encouraging words to a pie crust that might shrink in the oven. You crush, stir, press, chill, and move on with your life. That makes it ideal for holidays, potlucks, summer parties, birthdays, or weeknights when the oven and your patience are both unavailable.
For family gatherings, this crust is a conversation starter. People recognize graham cracker crust, but the peanut butter twist surprises them. It pairs beautifully with familiar flavors, so it feels new without being strange. Kids usually love it. Adults pretend they are taking “just a small slice” and then return with a fork five minutes later, acting innocent. The crust is not responsible for this behavior, but it definitely encourages it.
If you are experimenting, start with a chocolate cream filling. The chocolate-peanut butter-graham combination is almost impossible to dislike. Next, try banana cream or no-bake cheesecake. Once you understand the base recipe, you can adjust it confidently. Add cinnamon for warmth, pretzels for salty crunch, or a thin chocolate layer on the bottom before adding filling. That chocolate barrier can also help keep the crust crisp under softer fillings.
The biggest practical tip from experience is to let the pie chill longer than you think. A fully chilled pie slices better, tastes cleaner, and gives the crust time to bond with the filling. If you cut it too early, it may slump. If you wait, you get neat slices with a firm, flavorful base. In other words, the refrigerator is not just storage; it is part of the recipe.
In the end, this peanut butter graham cracker pie crust recipe proves that a crust does not have to be complicated to be special. It only needs good crumbs, the right amount of fat, a little patience, and enough peanut butter to make the dessert table smell like happiness.
Conclusion
A peanut butter graham cracker pie crust is one of the easiest ways to upgrade homemade pies without adding complicated steps. It is rich, sturdy, flavorful, and flexible enough for no-bake pies, cream pies, cheesecakes, chocolate desserts, and banana-filled favorites. With fine crumbs, creamy peanut butter, melted butter, a touch of sugar, and proper chilling or baking, you can create a crust that tastes far better than anything from a foil pan.
Use this recipe as your base, then customize it with cinnamon, chocolate crumbs, pretzels, chopped peanuts, or a hint of extra salt. Whether you are making a holiday dessert or a Tuesday-night treat, this crust brings big flavor with very little fuss.
Note: This copy is written as original, publication-ready web content based on widely used American baking methods and food-safety best practices. Review ingredient labels for allergens before serving, especially because this recipe contains peanuts and wheat.