A bicycle tire puncture always seems to happen at the worst possible moment: halfway to work, five miles from the car, or just when you were finally feeling like the main character in your own cycling movie. Then comes the sad little hiss. The good news? A flat tire is one of the easiest bike problems to fix once you know the routine. It is less wizardry, more process. And once you learn it, you stop treating a puncture like a roadside tragedy and start treating it like a minor inconvenience with better scenery.
This guide breaks the job into 12 simple steps, from removing the wheel to patching or replacing the tube and getting back on the road, trail, or bike path with your dignity mostly intact. Whether you ride a commuter bike, road bike, gravel bike, or hard-working old hybrid that has seen things, these steps will help you handle a bicycle tire puncture with confidence.
Why Bicycle Tire Punctures Happen in the First Place
Most flats come from small sharp objects such as glass, wire, thorns, or nails that poke through the tire and pierce the inner tube. Others are caused by pinch flats, often nicknamed “snake bites,” where the tube gets trapped between the tire and the rim after hitting a curb, pothole, or sharp edge too hard. A worn tire, low air pressure, or debris still stuck inside the casing can also turn one puncture into an annoying sequel.
That is why fixing the tube is only half the job. The real trick is finding what caused the flat and removing it before you put everything back together. Skip that part and your bike may reward you with another flat approximately 43 seconds later, which is not a scientific number, but it does feel emotionally accurate.
What You Need Before You Start
For a typical tube-type bicycle tire repair, keep these basics nearby: tire levers, a spare tube or patch kit, a pump or CO2 inflator, and, depending on your bike, a multi-tool or wrench for axle removal. If you are repairing at home, having both a spare tube and a patch kit is ideal. On the road, many riders simply swap in a fresh tube first because it is faster, then patch the punctured tube later when they are not standing in a parking lot negotiating with mosquitoes.
How to Fix a Bicycle Tire Puncture: 12 Simple Steps
Step 1: Move to a Safe Spot and Confirm the Flat
If the puncture happens mid-ride, stop in a safe place away from traffic. Roll the bike off the road, sidewalk edge, or trail bottleneck before doing anything else. Then confirm which tire is flat. Give each tire a squeeze, look for visible damage, and check whether the issue is a slow leak, complete blowout, or tire bead problem. Knowing which wheel is affected saves time and prevents you from confidently removing the wrong one, which is a very human move.
Step 2: Shift Gears if Needed and Remove the Wheel
If the rear tire is flat, shift the chain onto the smallest rear cog before removing the wheel. This creates more room and makes reinstalling the wheel much easier. If your bike has rim brakes, release them first so the tire can clear the brake pads. Then open the quick-release, loosen the thru-axle, or undo the axle nuts. Front wheels are usually straightforward. Rear wheels take a little more finesse because of the chain and derailleur, but the principle is the same: keep calm, keep the bike steady, and don’t wrestle it like it insulted your family.
Step 3: Let the Remaining Air Out Completely
Before removing the tire, deflate the tube all the way. For a Schrader valve, press the center pin. For a Presta valve, unscrew the small top nut first, then press it to release air. A fully deflated tube makes the tire bead much easier to unseat. If the tire still feels stubborn, check again for trapped air because bike tires have a way of hanging onto the last little puff like it is rent money.
Step 4: Unseat One Side of the Tire and Remove the Tube
Start opposite the valve. Push the tire bead toward the center channel of the rim to create slack, then use your thumbs or tire levers to lift one side of the tire over the rim. Work carefully around the wheel. Once one bead is free, pull the tube out. Leave one side of the tire on the rim if possible; that makes reinstallation easier later. Remove the valve stem last.
Step 5: Find the Cause of the Puncture
Now for the detective work. Check the tube for the hole by listening for escaping air, feeling for the leak, or holding it close to your cheek. At home, you can use water and watch for bubbles. Once you find the puncture, line up the tube with the tire to identify the matching area inside the casing. Then inspect the tire carefully for glass, wire, a thorn, or any tiny villain still lodged in the tread. Do not run your bare finger carelessly inside the tire unless you enjoy surprise stabbings from mystery objects.
Step 6: Inspect the Tire, Rim, and Rim Tape
Look beyond the hole itself. Check the inside of the tire for cuts, the rim strip or rim tape for gaps, and the rim bed for anything sharp. If the tube has two close holes, you probably have a pinch flat, which often points to low tire pressure or a hard impact. If the tire has a large slash, you may need a temporary tire boot to get home. A patched or replaced tube will not last long if the tire or rim is still setting traps.
Step 7: Decide Whether to Patch the Tube or Replace It
If you are on a ride and want the quickest return to motion, install a spare tube. If the puncture is small and the tube is otherwise in good shape, patching is a smart and budget-friendly option. Small punctures from thorns or wire are usually patchable. Tubes with torn valve stems, major splits, or multiple damaged spots are often better retired with gratitude for their service.
Step 8: Patch the Tube Properly
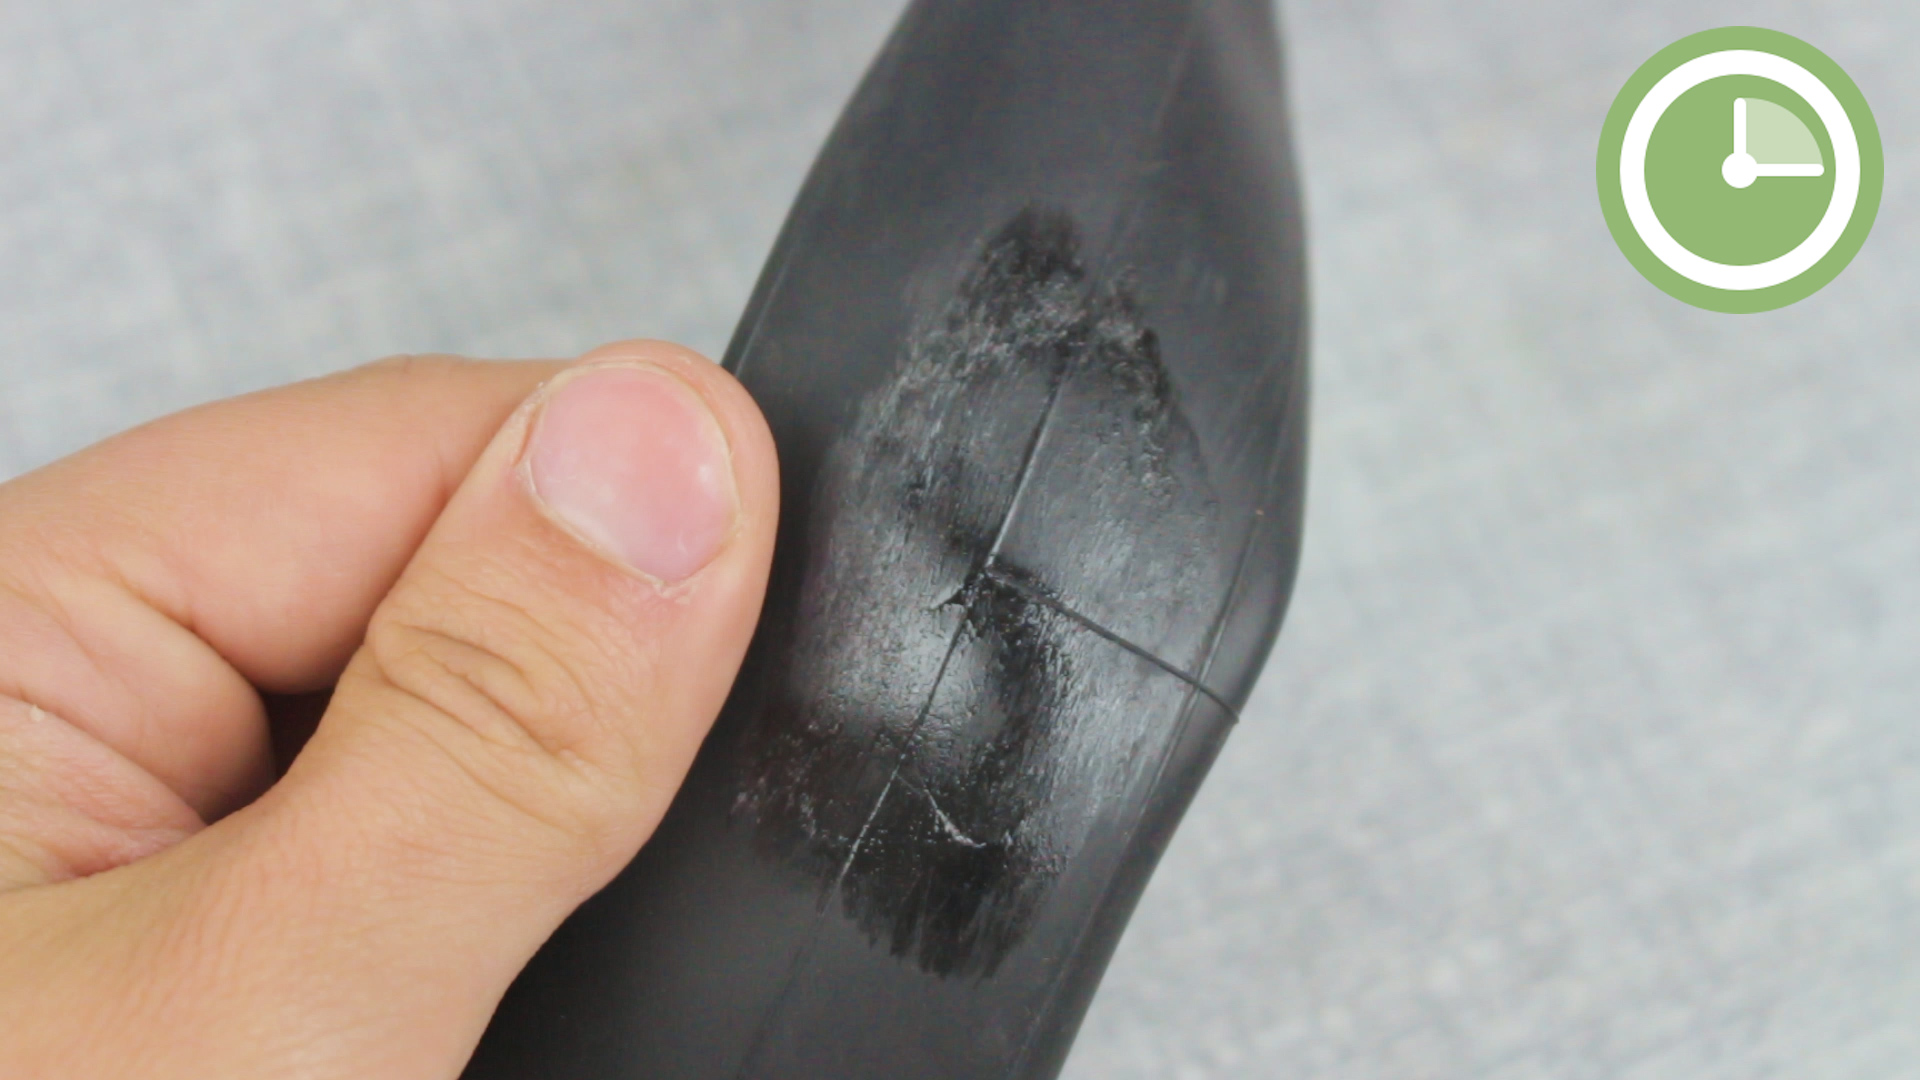
If you are using a patch kit, lightly roughen the area around the hole, clean it if needed, and follow the patch instructions. With glue-type patches, spread a thin layer of adhesive and wait until it becomes tacky before applying the patch. Press firmly and give it time to bond. With modern glueless patches, application is faster, though careful surface prep still helps. However you patch it, do not rush. A patch slapped on in panic usually behaves like it was applied in panic.
Step 9: Add a Little Air to the Tube
Whether you patched the old tube or grabbed a new one, put just a little air into it before reinstalling. You want the tube to hold its shape, not become fully inflated. This small step makes it easier to seat the tube evenly inside the tire and reduces the chance of twisting, bunching, or pinching it under the bead. It is one of those tiny details that separates a smooth repair from a second flat and a dramatic monologue.
Step 10: Reinstall the Tube and Tire Bead
Insert the valve stem through the rim first and make sure it sits straight, not at an angle. Then tuck the tube back inside the tire all the way around. Starting opposite the valve, work the tire bead back onto the rim with your hands. As the last section gets tight, push the bead into the center channel of the rim to create more slack. Use tire levers only if you absolutely need them, and do it carefully. The fastest way to puncture your “newly fixed” tube is to get aggressive here.
Step 11: Inflate Slowly and Check Tire Seating
Before fully inflating, inspect both sides of the wheel to make sure no tube is trapped between the tire bead and rim. Push the valve up slightly, then back down if needed, so the area around the valve seats cleanly. Inflate the tire slowly while watching for bulges, dips, or uneven bead seating. If anything looks crooked, stop, deflate, and reseat the tire before continuing. Once everything looks even, inflate to the recommended pressure shown on the tire sidewall or appropriate for your setup.
Step 12: Reinstall the Wheel and Test the Repair
Put the wheel back into the dropouts, secure the quick-release or axle, and reconnect the brakes if needed. Spin the wheel to make sure it turns freely and the brake pads are not rubbing. Give the tire a final squeeze, lift the bike a few inches, and let it settle so everything seats naturally. Then take a short, cautious test ride. If the bike rolls smoothly and the tire stays firm, congratulations: you have just fixed a bicycle tire puncture without needing a rescue vehicle or a motivational speech.
Common Mistakes to Avoid
Most repeat flats come from a few classic mistakes. The first is failing to remove the object that caused the puncture. The second is pinching the tube during reinstallation. The third is rushing inflation and missing an improperly seated bead. Another common error is using whatever sharp metal object is closest instead of real tire levers. A screwdriver may seem creative in the moment, but it can easily damage the tube, rim, or tire. Creative is great for songwriting. For bike repair, use the right tool.
What About Tubeless Bike Tire Punctures?
If you run tubeless tires, small punctures may seal on their own with sealant. If they do not, a tire plug can often get you rolling again without removing the wheel. The basic idea is simple: remove the debris, insert the plug, air the tire back up, and keep riding. For larger cuts or failures that will not seal, you may still need to install a tube as a backup. Tubeless systems reduce many flats, but they do not eliminate bad luck, thorns, or giant hardware-store screws that appear to have fallen from another dimension.
How to Prevent Your Next Flat Tire
Not every puncture is avoidable, but many are. Keep your tires inflated properly. Check tread for wear and embedded debris. Replace old tires before they become paper-thin. Avoid smashing potholes and curbs at speed whenever possible. Carry a repair kit every ride, even on short ones, because the universe is weirdly attentive to overconfidence. A spare tube, patch kit, tire levers, and pump do not weigh much, but they feel priceless when your alternative is walking home in cycling shoes.
Conclusion
Learning how to fix a bicycle tire puncture is one of the most useful bike maintenance skills you can have. It saves time, saves money, and removes a lot of anxiety from riding. More importantly, it turns a flat tire from a ride-ending disaster into a manageable pause. Once you have done it a few times, the process becomes routine: remove the wheel, inspect carefully, patch or replace the tube, seat the tire correctly, and ride on.
The first repair may feel slow, awkward, and full of tiny doubts. That is normal. Practice at home once or twice before you need the skill for real, and future-you will be deeply grateful when a puncture happens on an inconvenient road shoulder with one dying phone battery and absolutely no shade. Few things in cycling feel better than fixing your own flat and rolling away like it was never a big deal at all.
Rider Experiences: What Flat Tires Teach You After the First Few Times
The first time many riders fix a flat, the repair is less “smooth operation” and more “public character development.” You flip the bike over, drop a tire lever into a storm drain, forget which pocket holds the patch kit, and suddenly realize you never actually practiced using your mini-pump. Then, somehow, you still get the job done. That first success matters because it changes the way you ride afterward. You stop feeling helpless. A puncture becomes annoying, sure, but not mysterious.
One of the most common experiences riders talk about is how different a flat repair feels at home versus on the road. In the garage, everything is easy. There is light, there is space, and there are no passing cars or surprise gusts of wind blowing your patch wrapper into next week. On the roadside, every tiny detail gets louder. Your hands are dirty. The tire bead feels tighter than it did in the living room. The valve refuses to line up on the first try. That is exactly why practicing at home pays off. Familiar motions become automatic when conditions are bad.
Another lesson riders learn quickly is that the puncture itself is often not the real problem. The real problem is the tiny shard of glass still hiding in the tire. Lots of people patch or replace the tube perfectly, inflate the tire, reinstall the wheel, and celebrate two minutes too early. Then the new tube goes flat because the original culprit never left the scene. After that happens once, you become the kind of person who inspects the inside of the tire like a detective in a crime drama.
There is also the humbling experience of the pinch flat. Many riders discover this after hitting a pothole hard or reinstalling the tire with a little too much enthusiasm and a little too little patience. Two small holes in the tube later, the message is clear: more air pressure, gentler technique, less heroic force. Flat repair teaches touch. You learn that bike maintenance is not about muscling everything into place. It is about getting the parts to cooperate.
Then there is weather. Fixing a bicycle tire puncture in the rain deserves its own category of emotional growth. Everything is slippery, your hands are cold, and the road grit seems magnetically attracted to your patch glue. Yet riders remember these moments because they build confidence fast. If you can fix a flat in drizzle, fading light, and a suspiciously mosquito-rich ditch, you can definitely fix one on a sunny Saturday morning.
Over time, flat tires also teach riders what to carry. The minimalist who once brought only a pump starts adding a spare tube. The rider who trusted one CO2 cartridge starts carrying a backup mini-pump. The person who assumed flats are rare starts checking tire pressure before every ride. Experience does not make cyclists paranoid; it makes them prepared. That is a much more flattering word.
In the end, punctures are part of cycling, but they are also part of becoming a more capable rider. Every repaired flat builds a little more calm, a little more speed, and a lot more self-reliance. You may never enjoy hearing that telltale hiss, but eventually you stop hearing doom in it. You hear a short delay, a practical task, and a chance to prove to yourself that you know exactly what to do next.