Your GE dryer is tumbling like a champion, the timer is marching along, and the laundry is doing its little spin-show behind the door. There is only one problem: the clothes are coming out cold, damp, and deeply unimpressed. When a GE dryer is not heating, it can feel like the appliance has quietly changed careers from “dryer” to “rotating laundry basket.”
The good news is that many no-heat problems are caused by simple, fixable issues: a tripped breaker, a clogged vent, the wrong cycle setting, a blown thermal fuse, a failed heating element, or a gas supply problem. The less-good news is that dryers combine heat, electricity, airflow, and, in gas models, fuel. That means DIY troubleshooting should be careful, calm, and absolutely not powered by “I saw a five-second video and now I’m an engineer” confidence.
This guide explains why your GE dryer is not heating, how to troubleshoot the problem step by step, what you may be able to fix yourself, and when to call a professional before your laundry room becomes a tiny appliance courtroom.
Safety note: Always unplug an electric dryer before opening panels or testing parts. For a gas GE dryer, unplug the dryer and turn off the gas supply before inspection. If you smell gas, see burned wiring, find melted terminals, or feel unsure at any point, stop and call a qualified technician.
Common Reasons a GE Dryer Is Not Heating
A dryer needs four things to dry properly: power, heat, airflow, and tumbling. If the drum spins but the dryer produces no heat, the issue is often in the heat circuit or gas ignition system. If the dryer heats weakly but clothes stay damp, airflow is usually the prime suspect. Lint is fluffy, innocent-looking, and shockingly good at causing trouble.
1. The Dryer Is on the Wrong Setting
Before grabbing a screwdriver, check the control panel. GE dryers often include settings such as Air Fluff, No Heat, Delicates, or cool-down portions of a cycle. These settings may tumble without producing much heat, or any heat at all.
Try running a timed dry cycle on a medium or high heat setting for five minutes. Open the door and carefully feel inside the drum. If it is warming, your dryer may not be broken; it may just have been set to the laundry equivalent of “spa breeze.”
2. One Breaker Has Tripped on an Electric GE Dryer
Electric dryers typically require 240 volts. Many use two breaker legs: one can power the motor and controls while the other powers the heating element. That means the dryer can run and tumble, yet not heat, if one breaker is tripped.
Go to your electrical panel and find the dryer breaker. Flip it fully off, then back on. Do not simply glance at it; breakers can look “almost on” while still being tripped. If the breaker trips again, do not keep resetting it. Repeated tripping may indicate a wiring, outlet, terminal block, or heating element problem.
3. The Power Cord or Terminal Block Is Damaged
GE Appliances advises checking the dryer power cord and the terminal block connection when an electric dryer runs but does not heat. A loose, burned, broken, or frayed connection can interrupt proper power delivery and may create a fire hazard.
Unplug the dryer before inspecting the rear terminal block cover. If you see blackened wiring, melted insulation, burned screws, or a scorched smell, stop. This is not a “wrap it in tape and hope” situation. The power cord and terminal block may need replacement, and the outlet should be checked as well.
4. The Lint Screen or Dryer Vent Is Clogged
A clogged lint screen or vent may not always cause a total no-heat condition, but it can absolutely make a dryer act like it has lost its ambition. Poor airflow traps heat inside the dryer, extends drying time, and can trigger safety devices such as the thermal fuse.
Clean the lint screen before every load. Then check the vent hose behind the dryer. It should not be crushed, kinked, packed with lint, or made from flimsy plastic ducting. Go outside while the dryer is running and check whether warm air is blowing from the exterior vent. If the flap barely moves, the vent is likely restricted.
5. The Thermal Fuse Has Blown
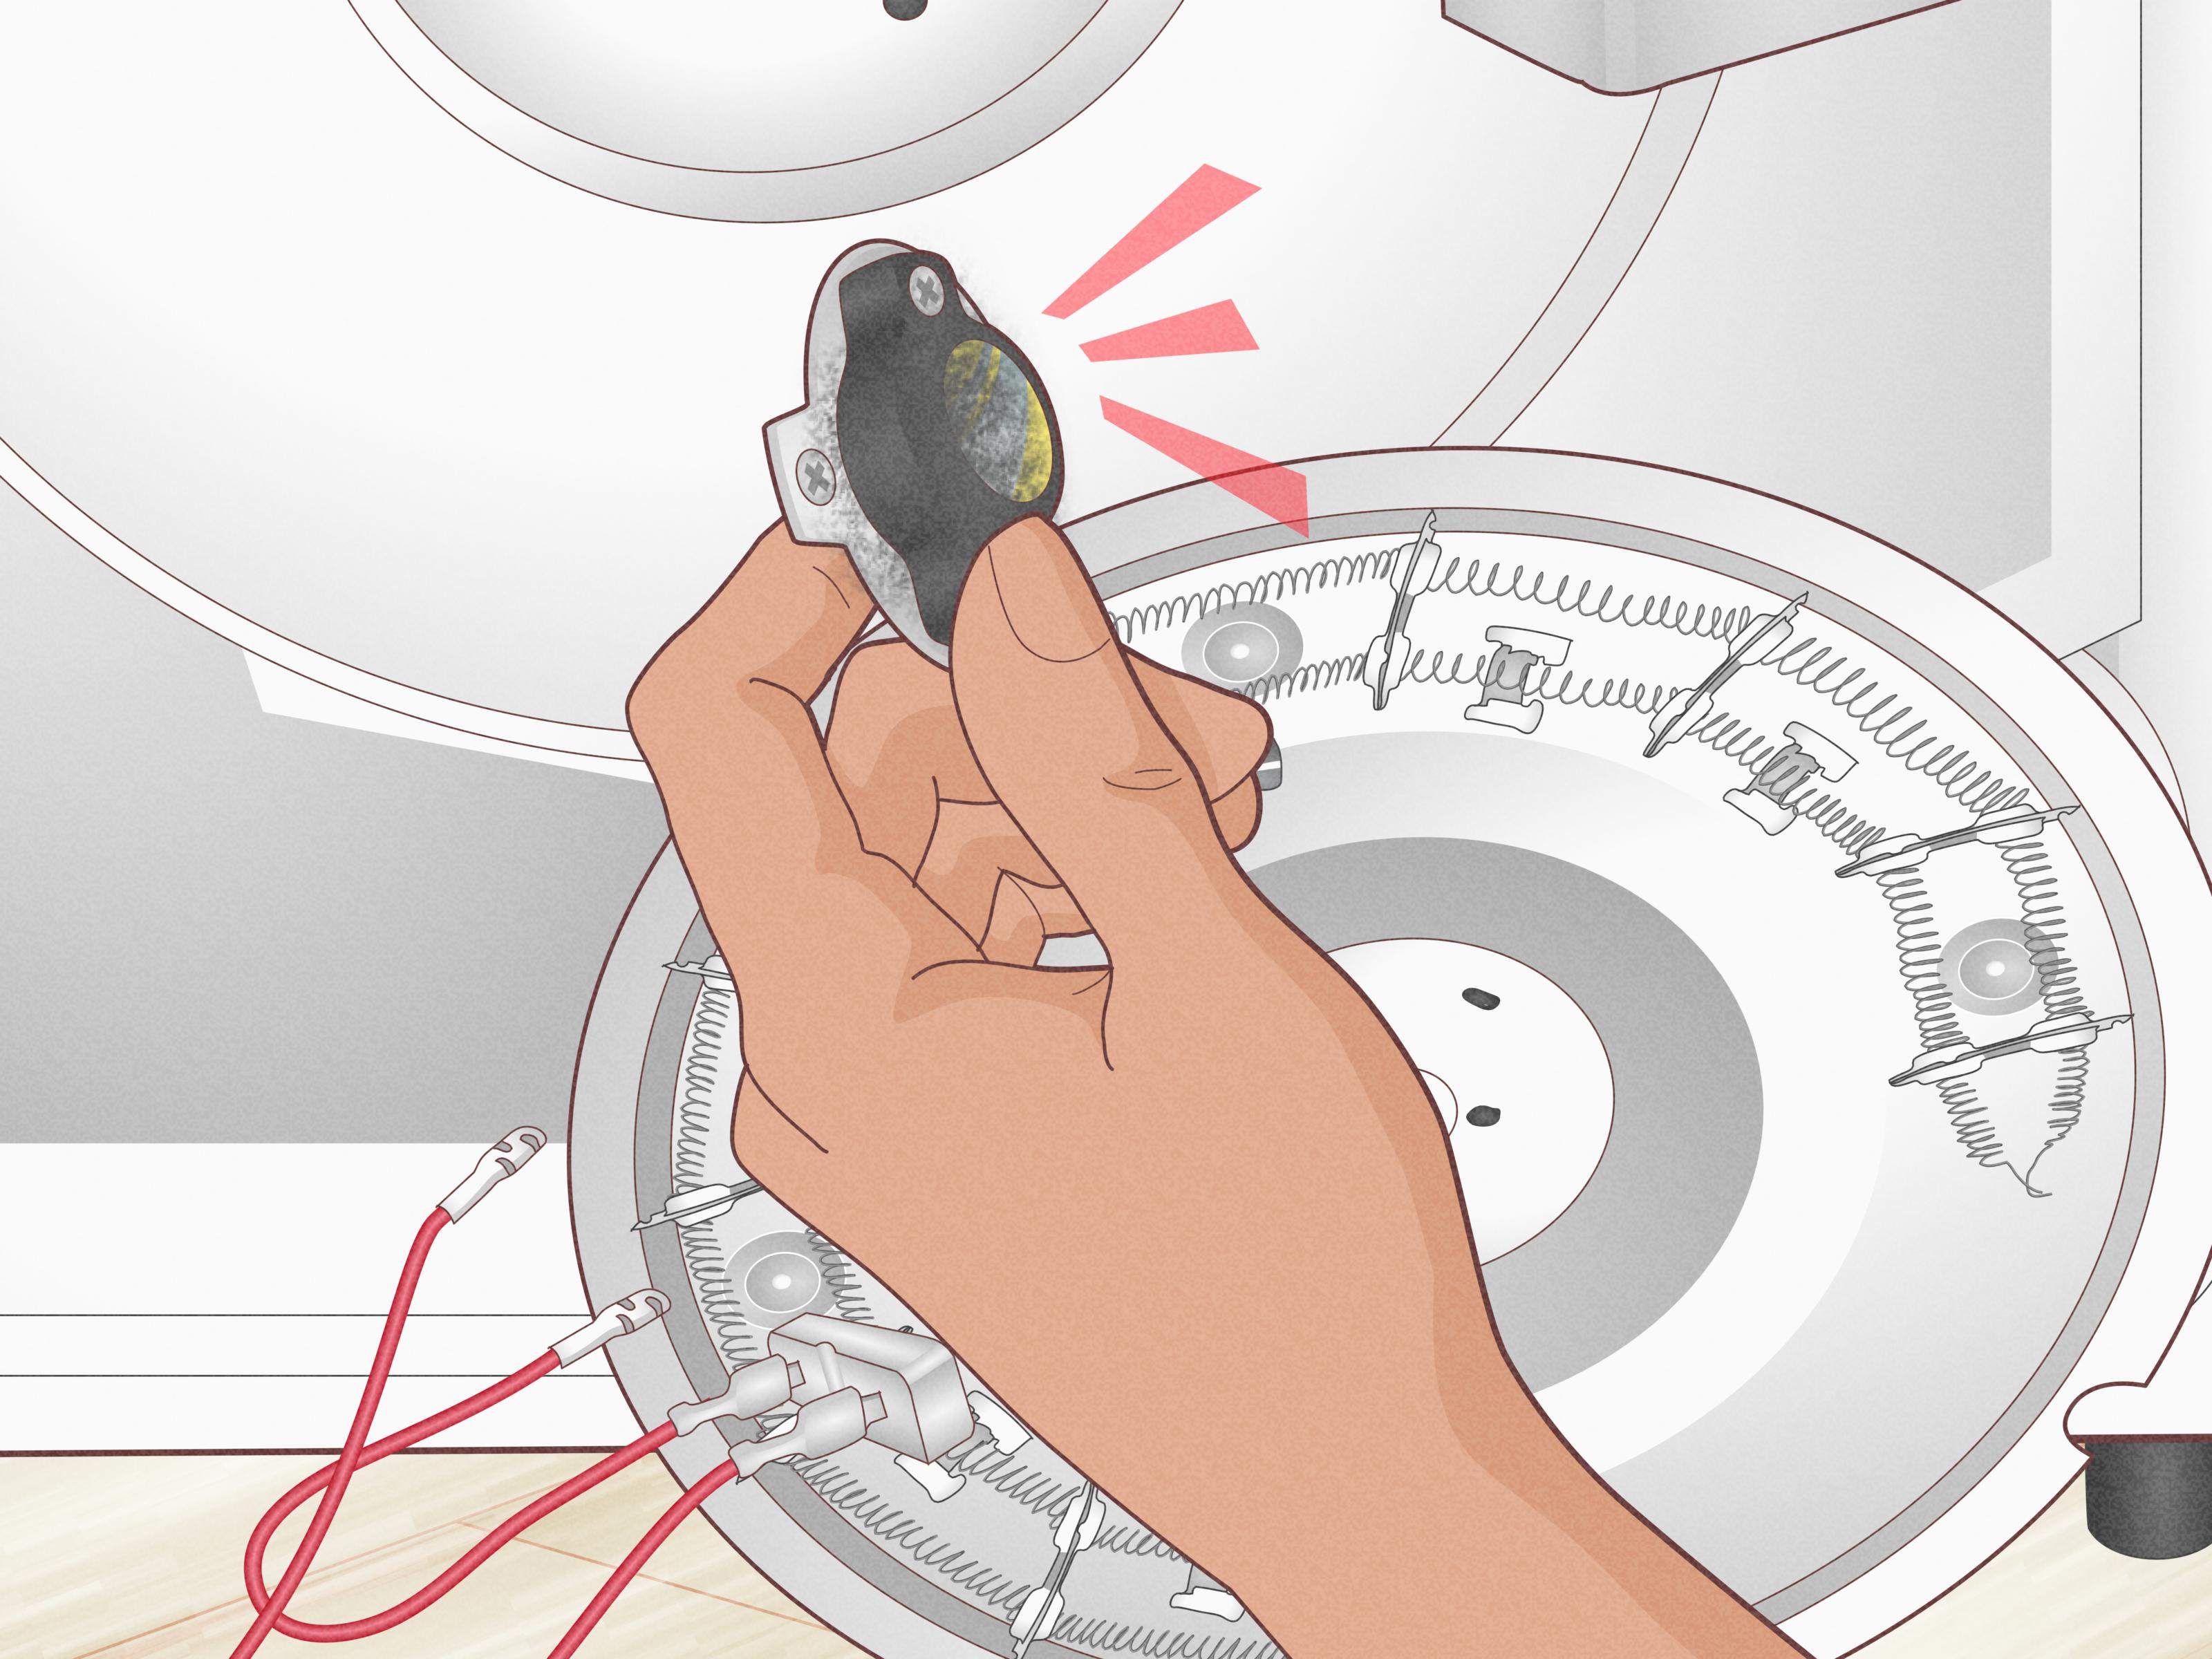
The thermal fuse is a safety device designed to protect the dryer from overheating. When it blows, the dryer may stop heating or, in some models, stop running entirely. A blown thermal fuse must be replaced; it cannot be reset.
Most importantly, never bypass a thermal fuse. Bypassing it is like removing the smoke alarm because it keeps complaining about smoke. The fuse usually blows for a reason, often restricted airflow. Replace the fuse and fix the airflow problem, or the new fuse may fail too.
6. The Heating Element Has Failed on an Electric Dryer
In an electric GE dryer, the heating element is the part that turns electrical energy into hot air. Over time, the coil can break, short against the housing, or burn out. A failed element often causes a dryer to tumble normally with no heat.
With the dryer unplugged, the element can be tested with a multimeter for continuity. No continuity usually means the element is broken. Some elements show visible damage, such as a snapped coil or burned area, but not always. A multimeter is more reliable than staring at the part and saying, “You look guilty.”
7. The High-Limit Thermostat or Cycling Thermostat Is Bad
Thermostats regulate dryer temperature. The cycling thermostat helps maintain normal heat levels, while the high-limit thermostat acts as a protective backup if temperatures climb too high. If one fails, the heat circuit may not work correctly.
These parts can be tested for continuity after the dryer is unplugged. However, thermostat diagnosis can vary by model, and replacing parts randomly can get expensive. If the thermal fuse, venting, and heating element check out, thermostat testing is a logical next step.
8. The Gas Supply Is Off on a Gas GE Dryer
For a gas GE dryer, the drum can tumble even if no gas is reaching the burner. Check that the gas shutoff valve is open. The handle should usually be parallel with the gas pipe when open and perpendicular when closed.
If the valve is open but the dryer still will not heat, do not loosen gas fittings unless you are trained to do so. Gas repairs require caution. If you smell gas, leave the area and contact your gas utility or emergency services.
9. The Igniter, Flame Sensor, or Gas Valve Coils Have Failed
Gas dryers use an igniter to light the burner. If the igniter does not glow, it may be broken or not receiving power. If it glows but the burner does not ignite, the problem may involve the flame sensor or gas valve coils.
A classic symptom of weak gas valve coils is a dryer that heats briefly, then stops heating after the first cycle. The coils work when cold, then fail as they warm up. It is annoying, sneaky, and very committed to ruining towel day.
10. The Timer or Control Board Is Not Sending Power
If all major heating components test correctly, the issue may be in the timer, motor switch, wiring harness, or electronic control board. These are less common than airflow problems, thermal fuses, and heating elements, but they do happen.
At this point, a wiring diagram and model-specific service information become important. For most homeowners, this is the line where DIY troubleshooting ends and professional diagnosis starts.
Step-by-Step DIY Troubleshooting for a GE Dryer That Won’t Heat
Step 1: Confirm the Symptoms
Start with a simple test. Put a few damp towels in the dryer, choose a timed dry cycle with heat, and let it run for five minutes. Open the door and check whether the drum feels warm. If it is completely cold, you likely have a no-heat issue. If it is warm but clothes take forever to dry, airflow is probably your main problem.
Step 2: Check the Cycle and Temperature Settings
Make sure the dryer is not set to air fluff, no heat, or an extended cool-down cycle. Select a normal heat setting. Also avoid overloading the drum. Clothes need room to tumble so warm air can circulate. A dryer packed like a vacation suitcase will not dry efficiently.
Step 3: Reset the Breaker
For electric GE dryers, go to the breaker box and reset the dryer breaker completely. Flip it off, then back on. If your home uses fuses, check both dryer fuses. Because the motor and heater can be powered separately, the dryer may run without heat if only part of the supply is interrupted.
Step 4: Clean the Lint Screen and Vent System
Remove lint from the screen. Then wash the screen with warm water, dish soap, and a soft brush if you see waxy residue from dryer sheets. Let it dry fully before reinstalling.
Next, unplug the dryer and pull it away from the wall. Disconnect the vent hose and vacuum lint from the dryer outlet, hose, and wall duct. If the vent run is long, use a dryer vent brush kit. Outside, clear lint, leaves, bird nesting material, or stuck flaps from the exterior hood.
Step 5: Inspect the Vent Hose
Replace crushed, torn, plastic, or flimsy accordion-style venting with rigid or semi-rigid metal duct. Smooth metal venting improves airflow and traps less lint. Keep the duct as short and straight as possible. Every bend is another place for lint to build a tiny vacation home.
Step 6: Check the Gas Valve on Gas Models
If you have a gas GE dryer, confirm that the gas valve is open. Do not proceed with burner disassembly if you smell gas, hear hissing, or suspect a leak. Gas work is not the place to be heroic.
Step 7: Test the Thermal Fuse
Unplug the dryer. Access location varies by GE model, but the thermal fuse is often near the blower housing or heating assembly. Remove at least one wire from the fuse before testing. Set a multimeter to continuity or the lowest resistance setting. A good fuse should show continuity. If it reads open, replace it with the correct model-specific part.
After replacing the fuse, do not skip vent cleaning. A blown fuse is often a symptom, not the original cause.
Step 8: Test the Heating Element on Electric Models
With the dryer unplugged, access the heating element housing. Remove the wires from the element terminals and test for continuity. If the circuit is open, the element is likely failed. Also inspect for coils touching the metal housing, which can cause shorting and overheating.
Use your GE model number to order the correct heating element. Dryer parts can look similar while being just different enough to ruin your afternoon.
Step 9: Test Thermostats and Thermal Cutoffs
If the element and thermal fuse test good, test the high-limit thermostat, cycling thermostat, and thermal cutoff where applicable. These parts usually should show continuity at room temperature, but specifications can vary. Replace only parts that test bad or match a clear model-specific diagnosis.
Step 10: Evaluate Gas Ignition Parts
For gas dryers, observe the ignition sequence only if you can do so safely through an access opening and without touching live components. If the igniter glows but there is no flame, suspect gas valve coils or the flame sensor. If the igniter never glows, suspect the igniter, thermal fuse, thermostat, or control circuit.
Because gas ignition involves fuel and live voltage, many homeowners choose professional service at this stage. That is not defeat. That is wisdom wearing work gloves.
How to Tell Whether It Is a Heat Problem or an Airflow Problem
A true heat problem means the dryer never warms up. Clothes come out cold, and the drum does not feel warm after several minutes on a heated cycle. Common causes include a tripped breaker, failed heating element, blown thermal fuse, bad thermostat, closed gas valve, or failed igniter.
An airflow problem means the dryer gets hot but does not dry well. Clothes may be very hot, damp, or musty. Drying may take two or three cycles. The laundry room may feel humid. The top of the dryer may become unusually hot. These signs point toward a lint screen, vent hose, wall duct, or exterior vent restriction.
Do not ignore airflow problems. Overheating can damage parts, blow safety fuses, waste energy, and increase fire risk. In many dryer repairs, cleaning the vent is not optional maintenance; it is the actual fix.
Tools You May Need
- Phillips and flathead screwdrivers
- Nut driver set
- Work gloves
- Flashlight
- Vacuum with hose attachment
- Dryer vent cleaning brush kit
- Multimeter with continuity setting
- Model-specific replacement parts
When You Should Call a Professional
Call a technician if the dryer has burned wiring, a melted terminal block, repeated breaker trips, a suspected gas leak, a damaged gas line, or a control board issue. You should also call for service if you do not feel comfortable testing electrical parts or opening the dryer cabinet.
Some DIY repairs are straightforward. Others are like trying to solve a mystery novel written by an electrician with a grudge. Knowing the difference saves time, money, and possibly eyebrows.
Prevention: How to Keep Your GE Dryer Heating Properly
Clean the Lint Screen Every Load
This is the easiest dryer maintenance task and one of the most important. A clogged lint screen reduces airflow and makes the dryer work harder. Clean it before every cycle, not when it looks like a small sweater.
Clean the Vent at Least Once a Year
Inspect and clean the exhaust duct at least annually. Clean it more often if you dry large loads, have pets, use the dryer daily, or notice longer drying times. Pet hair and lint combine into a stubborn little felt factory inside vent lines.
Do Not Overload the Dryer
Large, heavy loads trap moisture. Towels, blankets, jeans, and bedding need space to tumble. Splitting oversized loads can reduce drying time and strain on the heating system.
Keep the Dryer Area Clear
Do not store boxes, cleaning products, clothing piles, or lint-covered items around the dryer. Heat plus lint plus clutter is not a home organization strategy; it is a fire-risk starter pack.
Use the Correct Replacement Parts
Always use your GE model number when ordering parts. The model tag is commonly located around the door opening, inside the door frame, or on the rear panel. Correct parts matter for fit, safety, and performance.
Specific Examples: What the Symptoms Usually Mean
The Dryer Runs but Is Completely Cold
Check the breaker first on an electric model. Then inspect the power cord and terminal block. If power is correct, test the thermal fuse and heating element. On a gas model, check that the gas valve is open, then consider the igniter and gas valve coils.
The Dryer Heats for a Few Minutes, Then Goes Cold
This often points to failing gas valve coils on gas dryers or overheating caused by poor airflow. Clean the vent system and observe whether the burner cycles normally.
The Dryer Gets Hot but Clothes Stay Damp
This is usually airflow, load size, or washer spin performance. Clean the lint screen, vent hose, wall duct, and exterior vent. Also make sure clothes are not entering the dryer soaking wet because of a weak washer spin cycle.
The Dryer Blows the Thermal Fuse Again
If a new thermal fuse fails quickly, look for a blocked vent, crushed duct, stuck exterior flap, failed cycling thermostat, or overheating element. Replacing the fuse again without fixing the cause is like buying a new umbrella while standing under a broken sprinkler.
Experience Notes: Lessons From Real-World GE Dryer No-Heat Problems
After dealing with dryer troubleshooting scenarios, one pattern becomes obvious: homeowners often assume the most expensive part has failed first. The heating element gets blamed immediately, like the butler in an old mystery movie. But many GE dryer not heating complaints start with something simpler: half-tripped power, poor airflow, or a vent packed with enough lint to knit a hamster blanket.
One common experience is the electric dryer that runs perfectly but produces no heat after a storm or power flicker. The drum turns, the light works, and the owner thinks, “Well, it has power.” Technically, yesbut not always the full power needed for heat. Resetting both breaker legs can solve the problem in minutes. It is the appliance repair equivalent of finding your glasses on your head.
Another frequent discovery is the crushed vent hose. The dryer gets pushed too close to the wall, the duct folds behind it, and airflow drops dramatically. The dryer may still heat, but the clothes remain damp because moisture cannot escape. The owner runs a second cycle, then a third, and the dryer quietly suffers in the corner like an overworked intern. Pulling the dryer out and replacing the crushed duct with a smooth metal connection can make a dramatic difference.
Thermal fuse replacement is another area where experience matters. A blown thermal fuse is not just a bad part; it is a message. Something got too hot. Many people replace the fuse, celebrate, and then groan when the dryer stops heating again a week later. The missing step was cleaning the vent all the way to the exterior hood. If airflow is still restricted, the dryer may overheat again and sacrifice another fuse.
Gas dryers bring their own personality. A classic complaint is: “It heats at first, then stops.” In many cases, the igniter glows and the burner lights once, but after the coils warm up, they fail to reopen the gas valve. The dryer tumbles, the timer advances, and the clothes remain damp. This is where patient observation helps. Does the igniter glow? Does the flame appear? Does the flame disappear and never return? Those details narrow the diagnosis.
There is also the “dryer sheet film” problem. Dryer sheets can leave residue on the lint screen. The screen may look clean, but water beads on it instead of passing through. That residue restricts airflow just enough to slow drying. Washing the screen with warm water and mild soap can restore airflow. It is a small fix, but small fixes are the unsung heroes of appliance repair.
Perhaps the biggest lesson is not to rush. A GE dryer that is not heating should be diagnosed in order: settings, power, airflow, safety fuse, heat source, thermostats, and controls. Skipping steps leads to unnecessary parts and unnecessary muttering. A multimeter, a clean vent, and a little patience can prevent a lot of guesswork.
Finally, experience teaches respect for safety. Dryers look simple from the outside, but inside they deal with high voltage, high heat, and sometimes gas. A confident DIYer can clean vents, reset breakers, inspect obvious damage, and test replaceable parts. But burned terminals, gas leaks, repeated breaker trips, and uncertain wiring deserve a professional. The goal is not just to make the dryer heat again. The goal is to make it heat safely, consistently, and without turning laundry day into a dramatic miniseries.
Conclusion
When your GE dryer is not heating, do not panic and do not immediately order the most expensive part. Start with the basics: confirm the heat setting, reset the breaker, check the gas valve if applicable, clean the lint screen, and inspect the entire vent path. Many “broken” dryers are really airflow problems wearing a fake mustache.
If the basics do not restore heat, move to careful electrical testing. The thermal fuse, heating element, thermostats, gas igniter, flame sensor, and gas valve coils are common no-heat suspects. Use your model number, test parts before replacing them, and never bypass safety devices.
A properly repaired GE dryer should heat steadily, move air freely, and dry clothes in a reasonable time. With smart troubleshooting and safe habits, you can often fix the problem yourselfand get back to warm towels, dry jeans, and the quiet satisfaction of beating laundry day at its own game.